To setup remote console setting, Chapter 4.2.1, 1 to setup remote console setting – AVer EH11116H-4 series user manual User Manual
Page 141
131
CHAPTER 4
Name
Function
(15) Event Log
Display the Event logs, Operation logs, System logs, and Network logs.
(16) Auto Scan
Enable/disable channel switch cycle.
(17) Full screen
Use the entire area of the screen to only display the video. To return, Right-click the mouse
or press ESC on the keyboard.
(18) Alarm
Alert and display warning info.
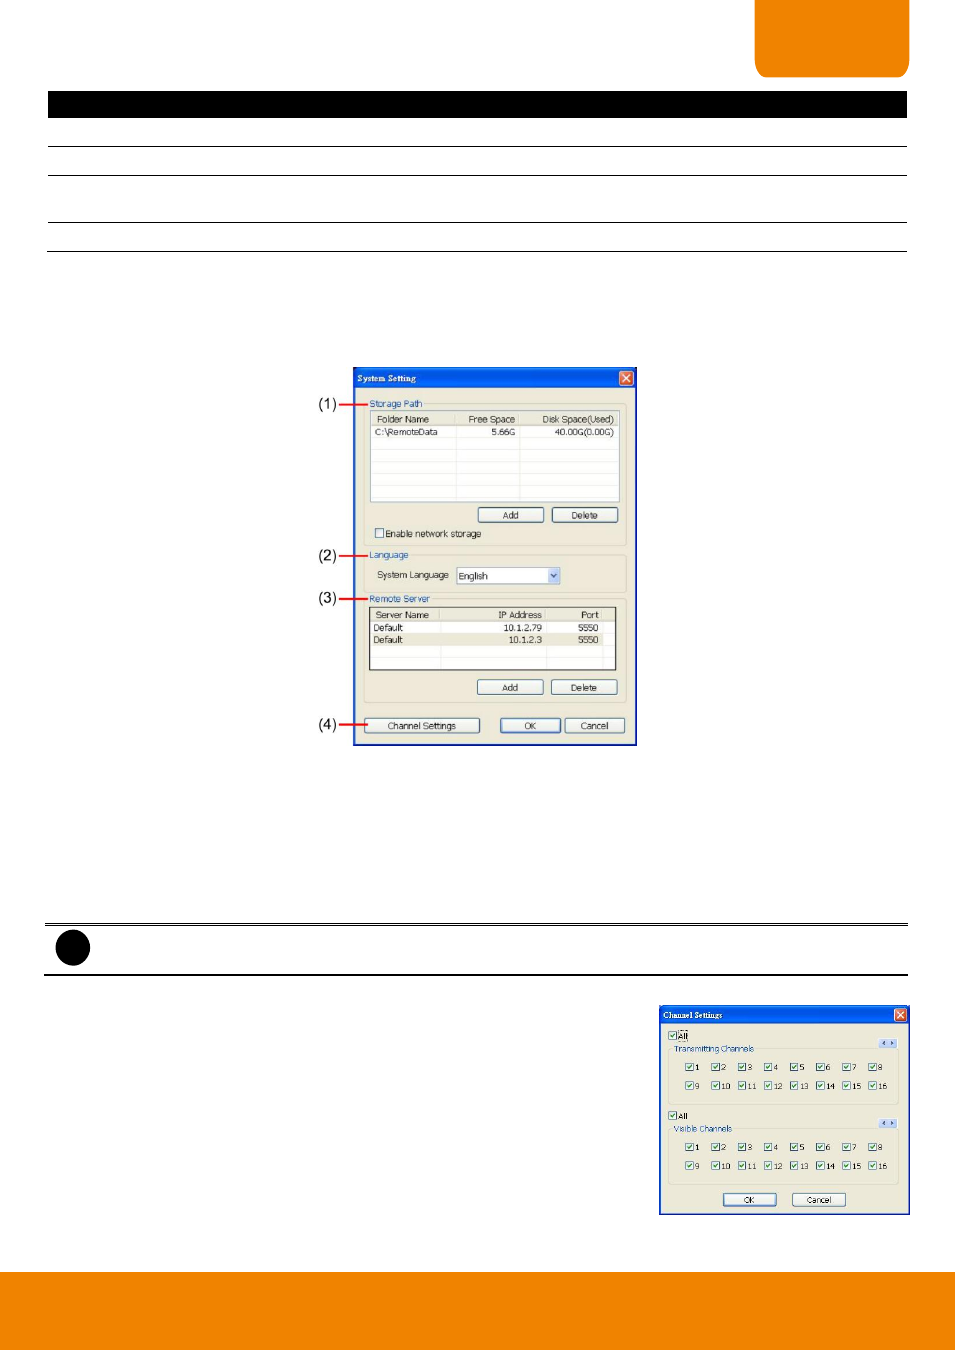
4.2.1
To Setup Remote Console Setting
Click Setup button to call out the System Setting windows. Click OK to exit and save the setting and Cancel to
exit without saving the setting.
(1) Storage Path
Set the directory on where to save the data. When there is not enough free space to record one hour data, the
system automatically replaces the oldest data. In case you have more than one storage path, the system
automatically saves the data to the next storage path. By default the data is stored in C:\RemoteData, to insert
another storage path, click Add. To remove the selected path, click Delete.
- Enable network storage: Select the Enable network storage check box to send the recorded video in
network-attached storage.
i
To add network storage, the Internet storage drive/folder must be mapped as Network Driver in DVR
server.
(2) Language
Customize the system to display the tool tips and dialogs based on the
selected language. By default the language is in English.
(3) Remote Server
Enter the DVR Server IP and Server Port number.
(4) Channel Settings
The numbers from 1 to 16 represent the camera ID. In Transmitting
Channels section, enable the camera number to receive the camera
signal from the server. In Visible Channels section, enable the camera
number to view the camera signal on Remote Console screen. To select all the cameras, enable the ALL
check box.