AVer EH11116H-4 series user manual User Manual
Page 35
25
CHAPTER 1
2. After download the firmware file, un-zip the file and save on USB pen drive.
i
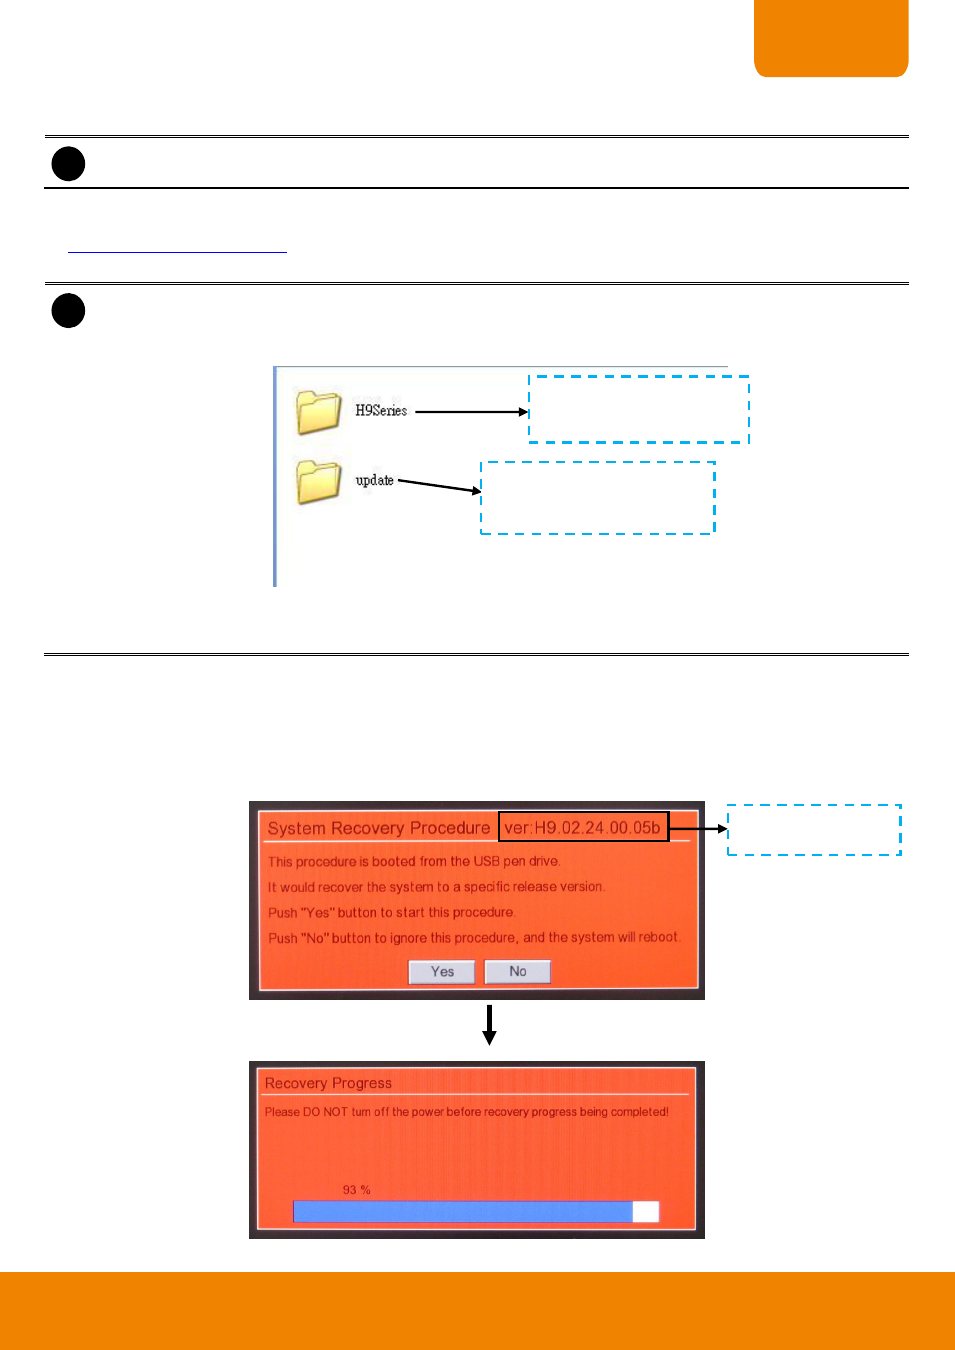
Copy the un-zip firmware file folder into USB pen drive.
3. Then, create a folder named Update and copy the IP camera patch file that user can download from web site
same as downloading the firmware file and import configuration file that user
has export from DVR system. The name of import file must to be
“import.cfg”.
i
- The update folder is saved in the same directory as firmware file folder.
- If user don’t need to import configuration file or upgrade IP camera patch in different version, the
update folder is not necessary to create at this point.
- Once the Update folder has created and there is no any import file or IP camera path file, it won’t
affect upgrading process but the DVR system still will do the checking during the upgrading.
4. Un-plug the USB mouse from DVR unit.
5. Next, plug the USB pen drive to left side of USB port on DVR unit. Then, power on DVR unit. While the DVR
is reading file, the screen is black. Please wait for a System Recovery Procedure window to show up.
6. When System Recovery Procedure window show up, click Yes to continue it. If user wants to cancel the
firmware upgrade procedure, click No.
The firmware
’s version
is going to update.
The folder contains the
firmware.
The folder contains the IP cam
patch and import configuration
file.