Nikon LS-10 Installation Guide for Windows User Manual
Page 52
Attention! The text in this document has been recognized automatically. To view the original document, you can use the "Original mode".
Chapter 4
Mounting the LS-10
Never attempt to connect power to the scanner while the computer’s power is on.
Note that both ends of the power connector are keyed so that two corners are
beveled. Be careful to ensure that the beveled edges of the connectors are properly
aligned before completing connection to Coolscan’s power connector.
Under certain circumstances, it may be possible to force the power connector in at
a reverse angle, thereby creating a backwards connection. Extreme damage can
occur to the scanner should this happen. Make sure that the connection is correct.
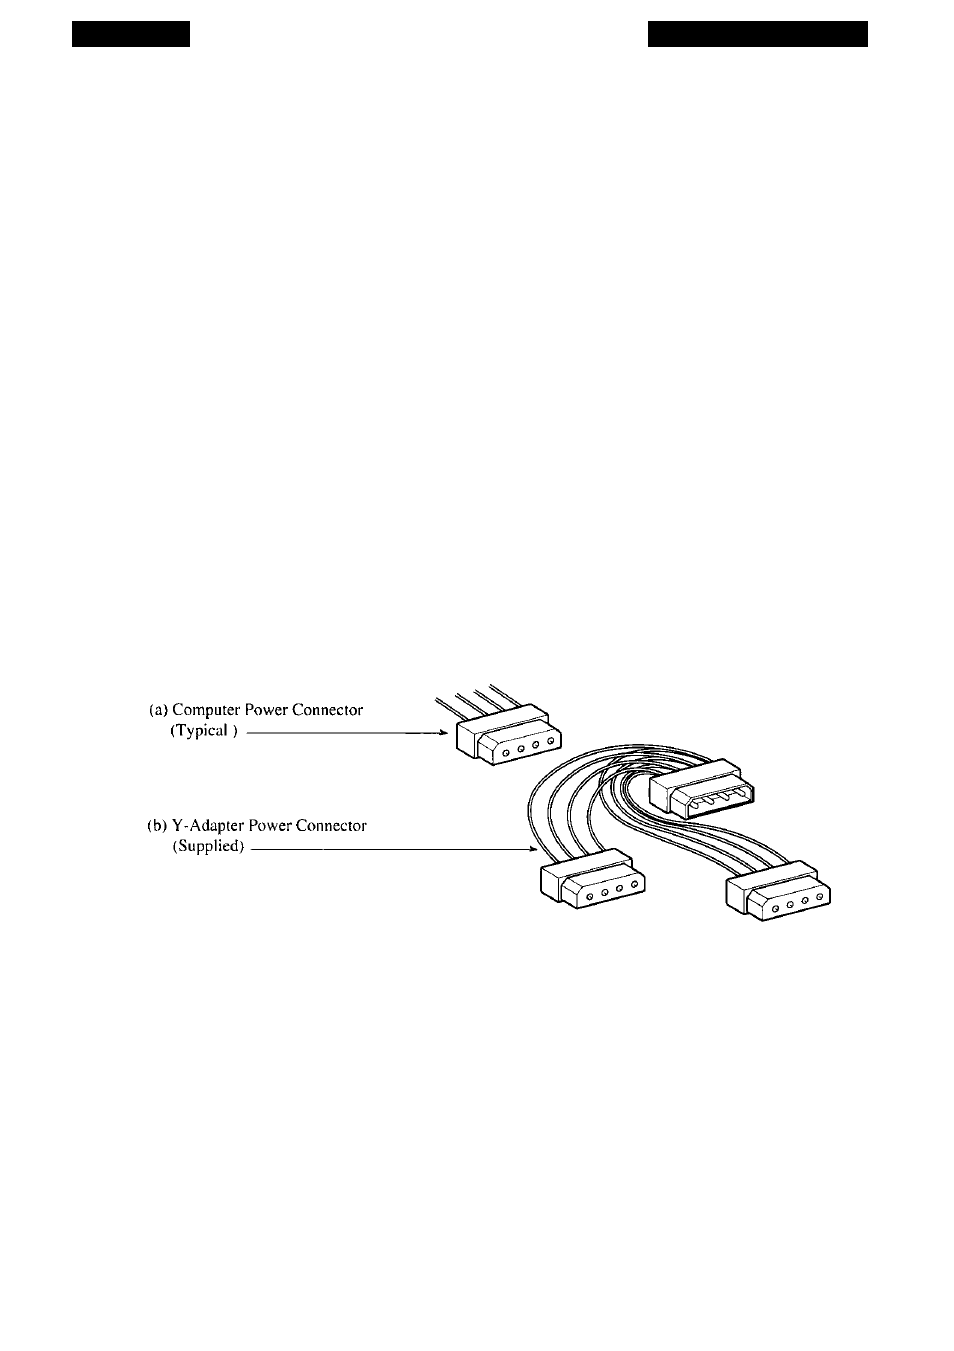
If there is no power connector available in your PC, use the provided Y-Adapter,
per the instructions below:
1) Unplug the 4-pin power connector from the closest internal SCSI device.
2) Plug it into the female connector of the Y-Adapter.
3) Plug one of the male connectors of the Y-Adapter into the same device.
4) Plug the other male connector of the Y-Adapter into the Coolscan power connec
tor.
Figure 4.3
Internal power connectors, (a) Typical connector on four wire cable, (b) Optional Y-
Adapter power connector provided with Coolscan.
Step 5. Slide Coolscan completely into the drive bay.
Once the power and SCSI connections are complete, carefully slide the scanner
the rest of the way into the drive bay. One hand should gently pull the SCSI cable to
provide a slight tension on the cable while the scanner is being pushed in. Never tug on
the cable nor allow the cable to be pinched, folded or crimped.
Step 6. Secure the scanner.
Nikon
Coolscan Installation Guide for Windows
Page 45