Figure 3.9 – Nikon LS-10 Installation Guide for Windows User Manual
Page 32
Attention! The text in this document has been recognized automatically. To view the original document, you can use the "Original mode".
Chapter 3
The SCSI Interface
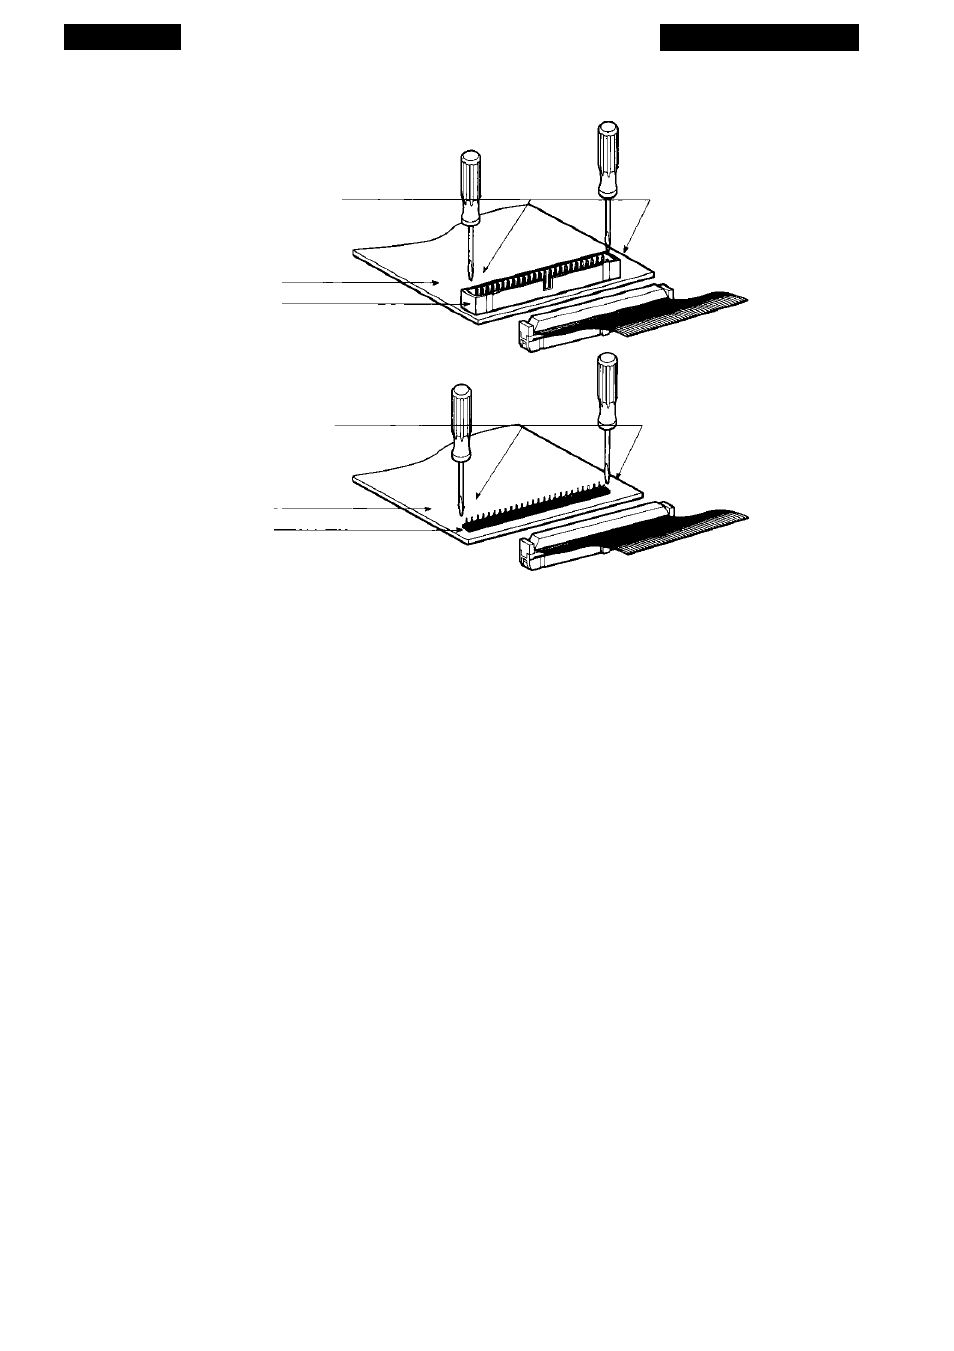
(a) Closed SCSI Connector
To Remove Connector:
Pry flat cable connector
out gently with small
flat screw driver
Circuit Card
Closed SCSI
Connector
(b) Open SCSI Connector
To Remove Connector:
Pry flat cable connector
out gently with small
flat screw driver
Circuit Card
Open SCSI
Connector
Figure 3.9
Removing the SCSI cable from the SCSI connector on the SCSI card.
(a) Closed-type SCSI connector, (b) Open-type SCSI connector.
1. Never force the connector in or out. If you bend or break any pins, replacement
of the controller card will be required.
2. Make sure that the mating connectors are aligned properly before inserting.Take
extra care in this very critical step.
3. Push the cable connector gently into the mating connector. Once in place, push
down firmly.
Never remove a cable from the connector by pulling on the cable. If you cannot
remove the cable by hand, use a small screwdriver to pry each of the sides out, a lit-
de at a dme. Use caudon at all dmes.
4. To remove the cable, gently pull the cable out by the connector the rest of the
way.
5. Make sure that Pin 1 of the cable connector mates with Pin 1 of the computer
connector. Never guess.
6. Never plug or unplug a SCSI connector while the computer is powered on. This
can result in damage to the SCSI interface hardware.
Nikon
Coohcan Installation Guide for Windows
Page 25