Nikon LS-10 Installation Guide for Windows User Manual
Page 42
Attention! The text in this document has been recognized automatically. To view the original document, you can use the "Original mode".
Chapter 3
The SCSI Interface
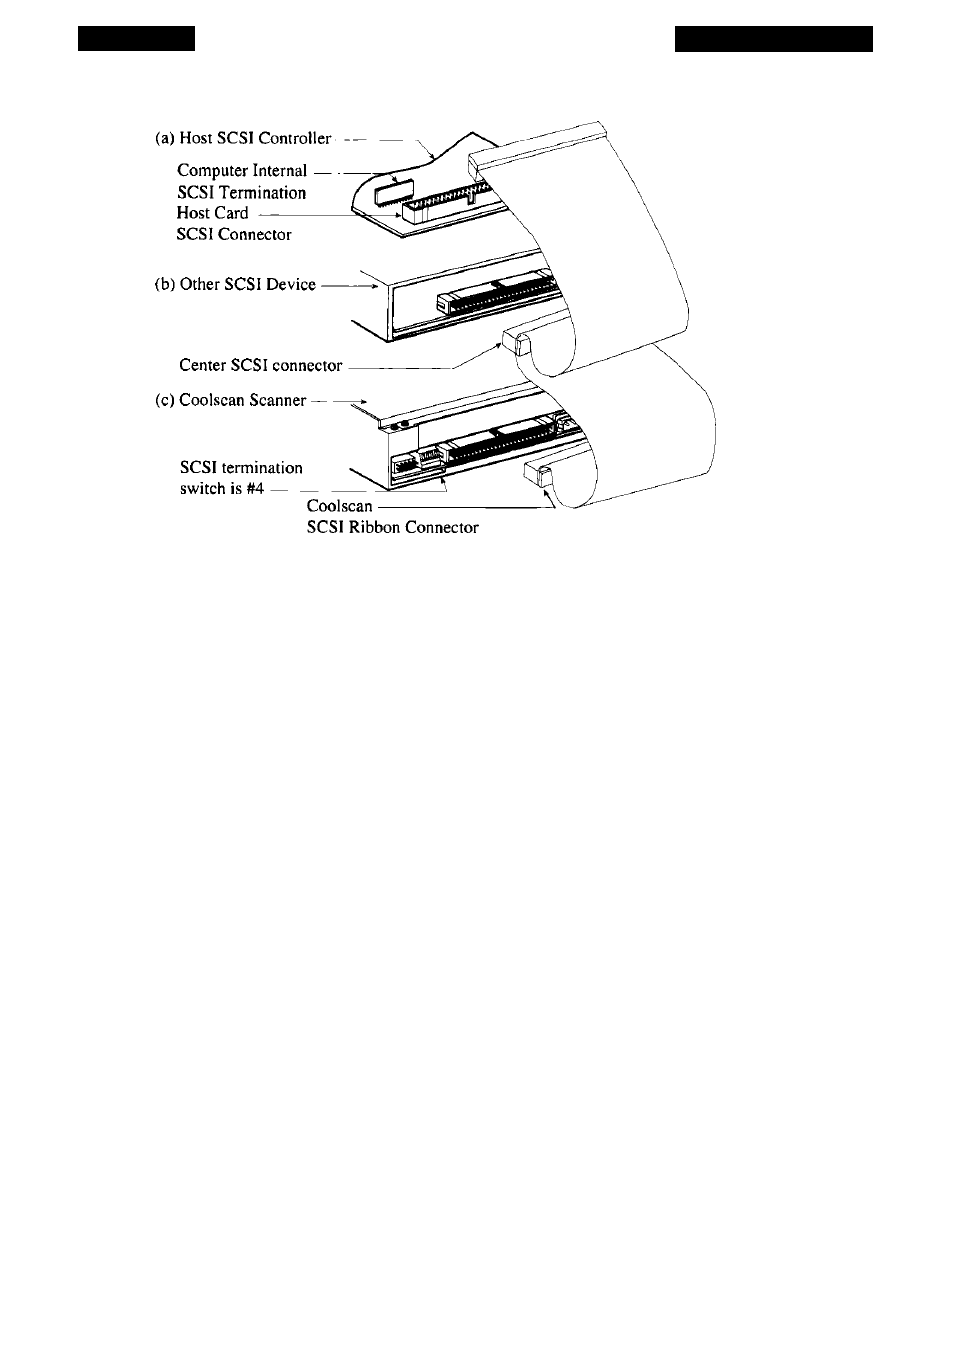
Figure 3.16 Multiple SCSI devices on the PC’s SCSI bus.
Coolscan is at the end of the SCSI chain.
Procedure (use the supplied 3-connector 50-pin flat SCSI cable):
1. Make sure that the PC and all other SCSI devices are powered off.
2. Remove SCSI termination from the last device in the SCSI chain.
3. Remove the SCSI cable currently in use from the PC’s SCSI connector on the
motherboard, and the other end from the SCSI device.
4. Connect one end of the supplied 3-connector flat SCSI cable to the SCSI connec
tor on the PC’s SCSI controller card (see “Installing Coolscan Into the Drive Bay”
in Chapter Four for detailed description).
5. Connect the middle connector of the supplied SCSI cable to the SCSI connector
of the neighboring, now middle SCSI device (see “Installing Coolscan Into the
Drive Bay” in Chapter Four for detailed description).
6. Insert the unused end of the SCSI cable into the SCSI connector on the back of
Coolscan (see “Installing Coolscan Into the Drive Bay” in Chapter Four for detailed
description).
7. Since Coolscan is now at the end of the SCSI chain it must be terminated. Refer
to the section “Terminating the SCSI Chain - Coolscan Internal Mode” in this
Nikon
Coolscan Installation Guide for Windows
Page 35