Terminating the ls-10e, Terminating the ls-10, Terminating the ls-loe – Nikon LS-10 Installation Guide for Windows User Manual
Page 26: Nikon
Attention! The text in this document has been recognized automatically. To view the original document, you can use the "Original mode".
Chapter 3
The SCSI Interface
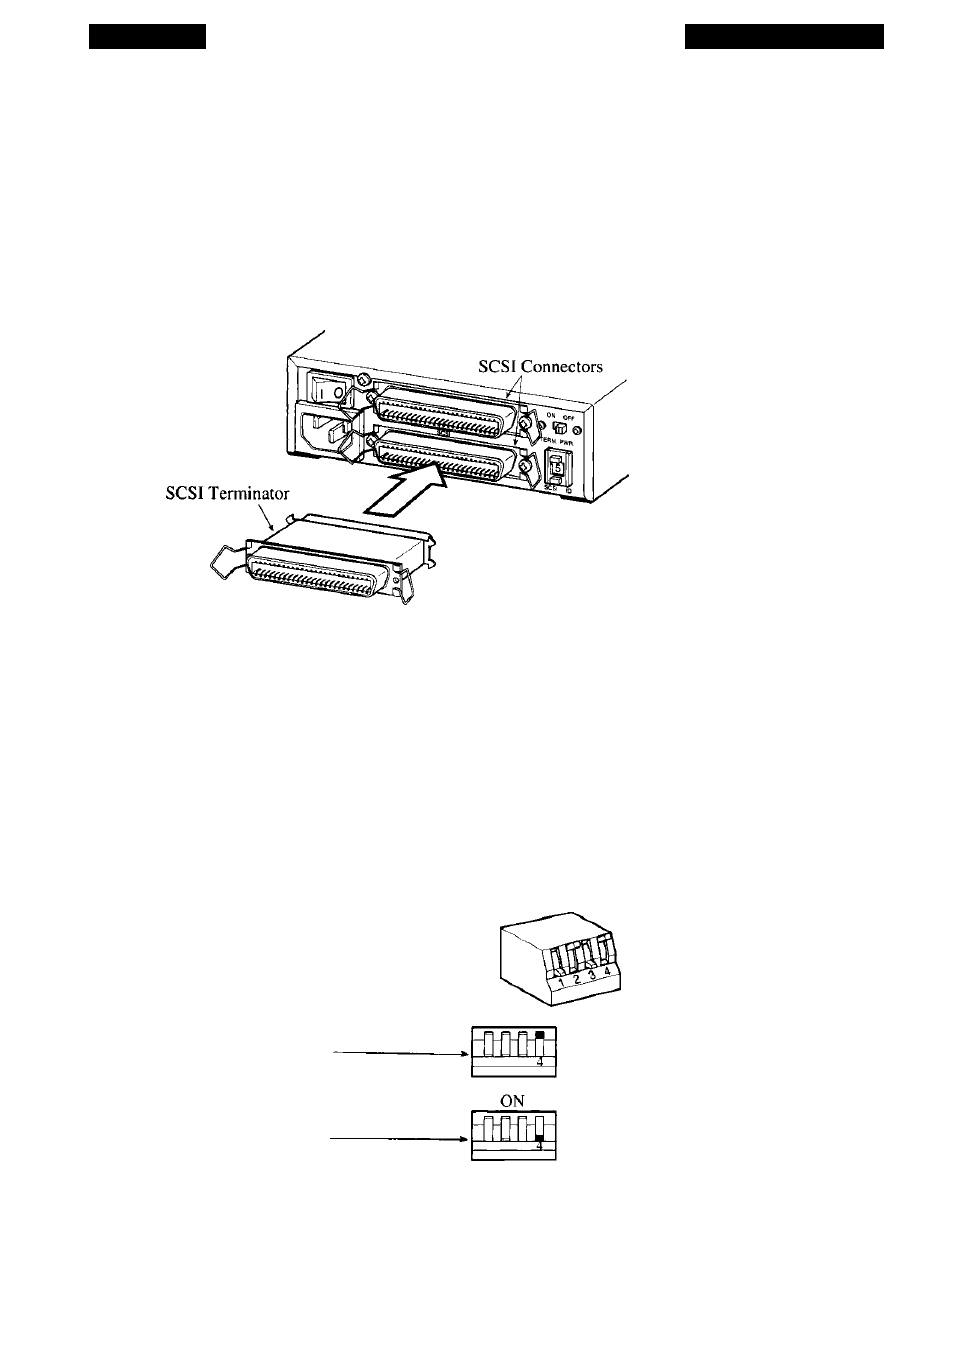
Terminating the LS-10E
The LS-lOE is configured with two 50-pin SCSI connectors on the rear of the
unit, as shown in Figure 3.3. Install the standard 50-pin SCSI terminator included with
Coolscan, onto the bottom connector if termination is desired. If you would like
Coolscan to reside in the center of the SCSI chain, then by necessity, the bottom con
nector will be used for a SCSI to SCSI jumper cable.
Figure 3.3
Attaching the SCSI terminator on the rear of Coolscan - LS-IOE.
Please proceed to the section “SCSI Cables.”
Terminating the LS-10
Setting termination on the LS-10 is simple. Termination is controlled by the
position of the #4 switch of the configuration DIP switch block. If you recall, setting
the SCSI ID number required use of only the #1, #2, and #3 switches.
Configuration
DIP Switch —
OFF
SCSI Termination OFF
SCSI Termination ON
Figure 3.4
SCSI termination using the configuration DIP switch #4 on the rear of the LS-10.
Nikon
Coolscan Installation Guide for Windows
Page 19