Karcher KM 170-600 D User Manual
Page 26
-
10
Adjust the sweeping track position by
adjusting the adjustment screw.
Check sweeping mirror.
Check tyre pressure.
The side-brushes lift up.
Drive sweeper on to a smooth, even
surface covered with a visible layer of
dust or chalk.
Set the programme switch to sweep
with roller brush and side brush.
The side-brushes lift up.
Set programme selection to "Drive".
Drive machine backwards.
Check sweeping mirror.
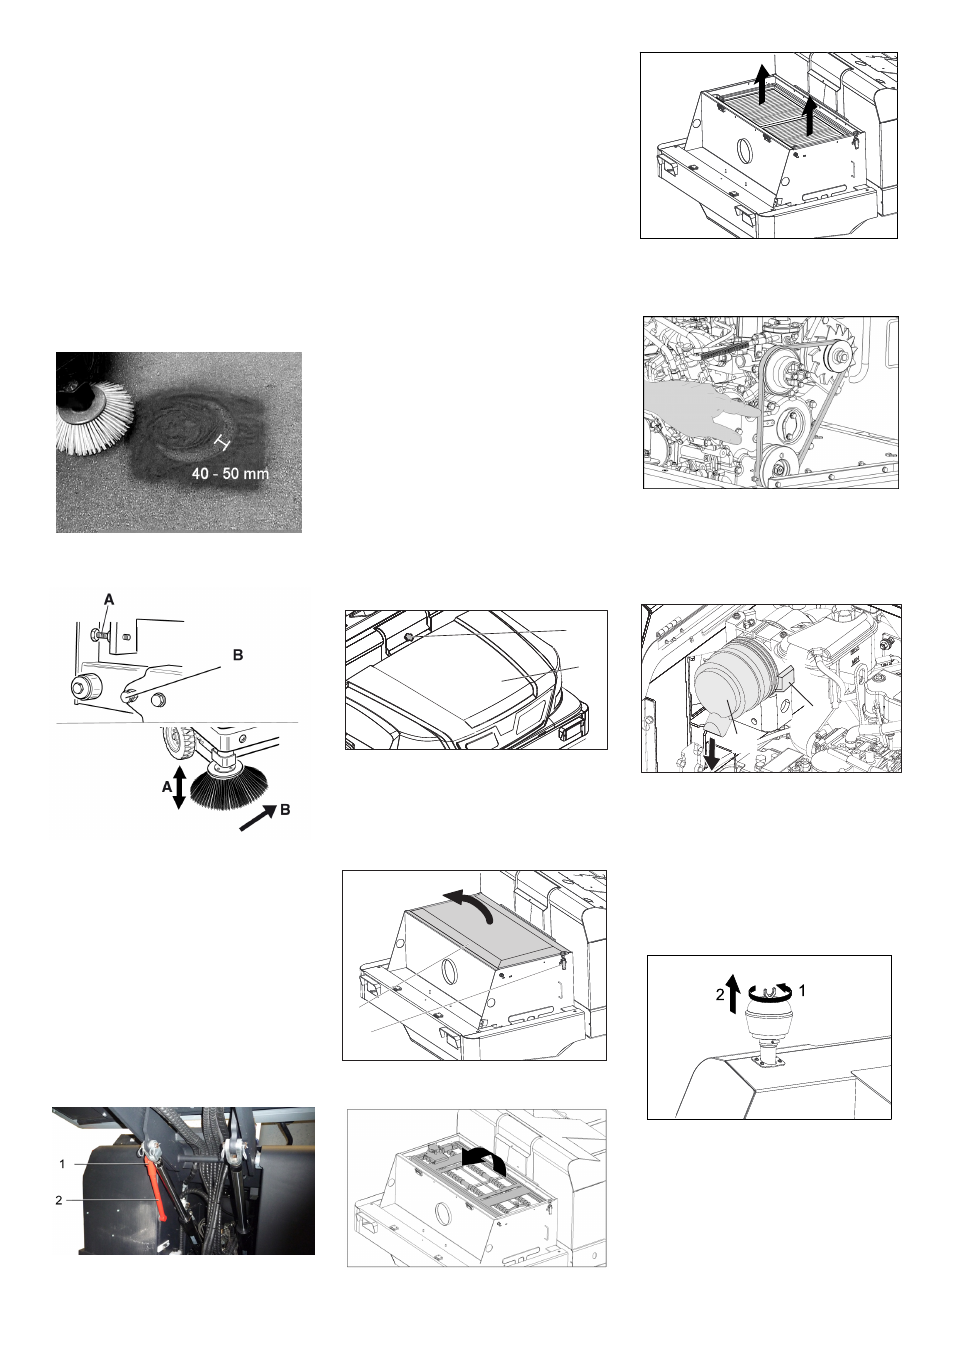
The width of the sweeping track should lie
between 40-50 mm.
Set the sweeping track using the two
adjusting screws.
Check sweeping mirror.
Check tyre pressure.
Drive the waste container up and se-
cure it with the safety rod.
ƽ
Danger
Risk of injury! Always apply the safety bar
when the waste container is raised.
Fold the safety rod for the high empty-
ing up and insert it into the holder (se-
cured).
1 Holder of safety rod
2 Safety rod
Open the side cover as described in
Chapter "Replace brush roller".
Release the 6 wing nuts on the side
holding plate.
Loosen 3 nuts (SW 13) on the front
holding plate.
Press the side seal down (elongated
hole) until it is about 1 to 3 mm to the
floor.
Screw in the holding plates.
Repeat the procedure on the other side
of the appliance.
Park the sweeper on an even surface.
Connect air pressure testing device to
tyre valve.
Check air pressure and adjust if re-
quired.
For permissible tyre air pressures see
"Technical data".
Clean the dust filter with the filter clean-
ing button.
ṇ
Warning
Empty waste container before replacing
dust filter. Wear a dust mask when working
around the dust filter. Observe safety regu-
lations on the handling of fine particulate
material.
1 Lock of appliance hood
2 Cover
Open the lock, remove the star grip
screw to do this.
Fold cover forwards.
Open filter cap.
Fold the filter vibrator forward.
Replace the dust filter.
Close the filter cover.
The V-Belt must deflect approx. 7-9 mm at
a pressure of 10 kg.
Get the V-belt tension adjusted by an
authorized customer service.
1 Lock
2 Air filter housing
Open the lock.
Remove the air filter housing.
Replace the air filter insert.
Note: Installation position with blowout
opening pointing down (see illustra-
tion).
Unscrew the wing nut from the centrifu-
gal separator.
Clean the centrifugal separator.
Unscrew the head lamps.
Take out the head lamps and pull out
the plug.
Check and adjust sweeping track of the
side-brush
Adjust the side seals
Check the tyre pressure
Manually clean the dust filter
Replacing dust filter
1
2
2
1
Check and adjust the V-Belt
Check air filter and replace, if necessary
Changing the headlight bulb (option)
1
2
26
EN