Removing the front panel – ZOLL M Series Defibrillator Rev R User Manual
Page 92
M Series Service Manual
82
2. Removing
the Front
Panel
Tools Required
• No. 2 Phillips screwdriver
• Orange stick
To reinstall the Front Panel:
1. Reinstall the laminate cable first with the
black band facing up and towards the system
circuit board.
2. Reconnect the multi-wire cable from the
display.
3. Reverse steps 1, 2, and 3 above to reinstall
the front panel.
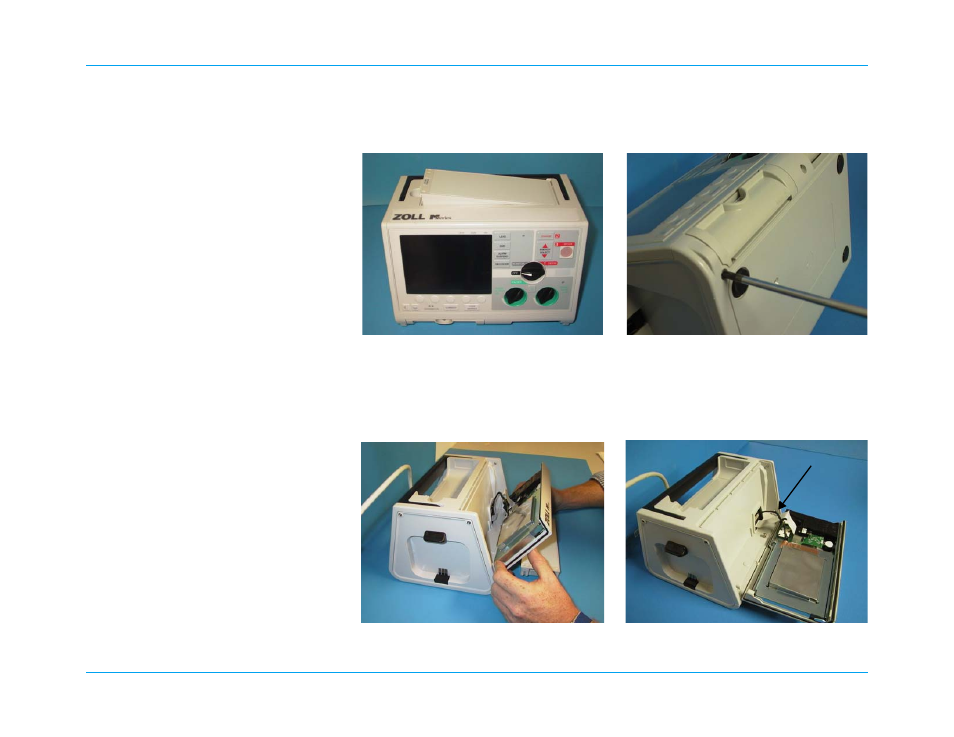
Step 1: Remove the battery from the battery well
and place it in front of the unit.
Step 2: Rotate unit on to its back side. Remove
the two Phillips head screws located on the left
and right sides on the bottom of the unit.
Step 3: Place your thumbs in the main selector
switch cup and push up on the front panel to
release the panel from the unit. After the front
panel is removed, use the battery as a support for
the panel. Do not use the main selector switch as
point of leverage.
Step 4: Disconnect the multi-wire cable from the
system board by gently pulling the beige
connector by its sides towards the front of the
unit. Remove the ZIF keeper from the laminated
ribbon cable and then disconnect it. Lift the right
side first with the unit facing you.
Multi-wire cable