Extron Electronics IN1608 MA User Guide User Manual
Page 79
IN1606 and IN1608 Series Scaling Presentation Switcher • Internal Web Pages
73
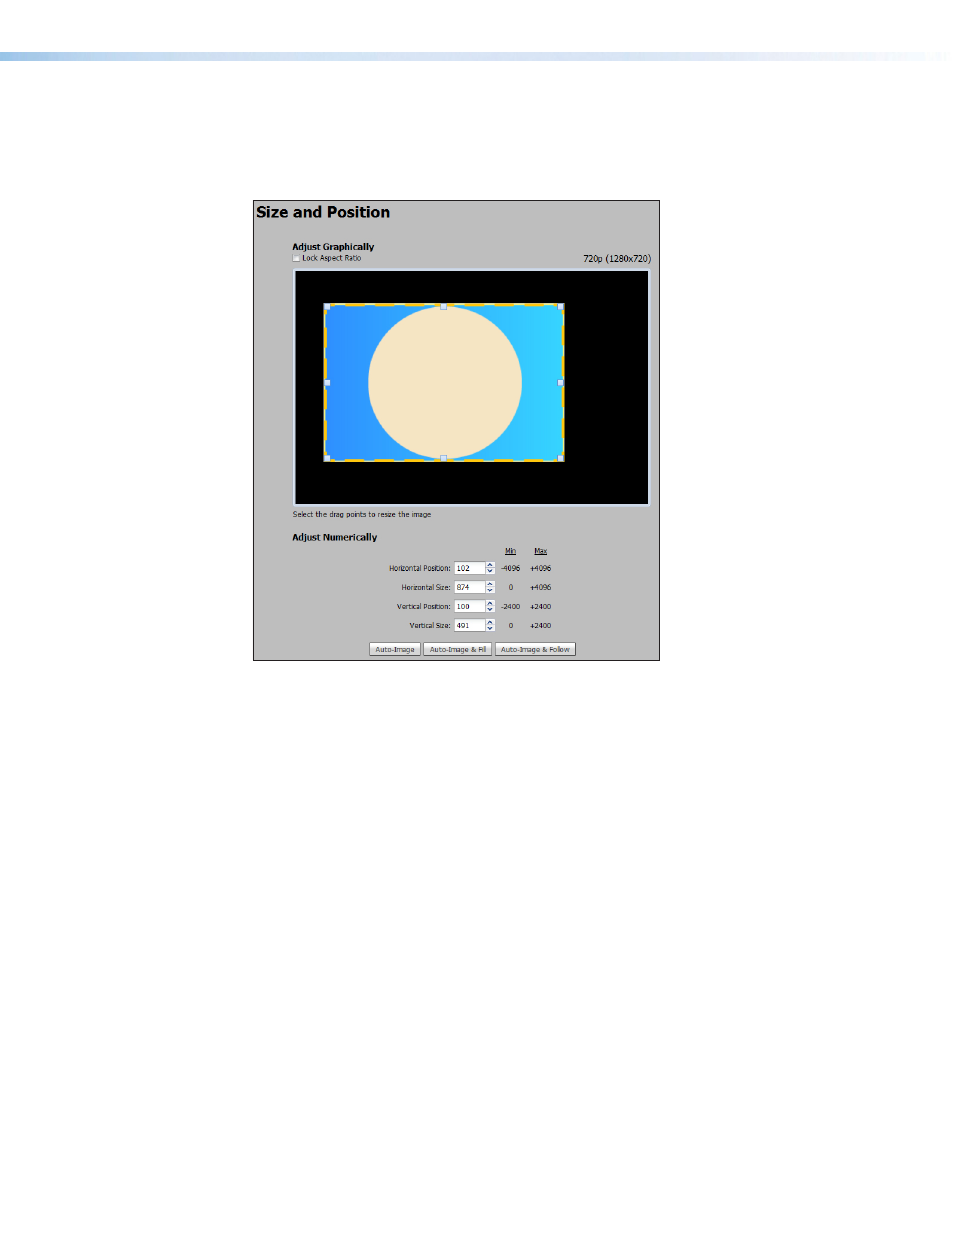
Size and Position Page
The Size and Position page provides three methods of adjusting image output size and
position: graphically, numerically, or automatically with Auto-Image. Click the
Size and
Position
icon on the Global Navigation Bar to open the Size and Position page.
Figure 43.
Size and Position Page
To adjust the size and position graphically:
If desired, click the
Lock Aspect Ratio
check box to constrain proportions.
1.
Click and drag the drag points of the sample image to resize the image within the
designated space (defined by the black area in figure 43 above).
2.
Click anywhere inside the sample image (see the blue rectangle with a circle inside in
figure 43 above) and drag it anywhere within the designated space to reposition the
image.
To adjust the size and position numerically:
1.
Enter a value or click the
Up
or
Down
arrow in the
Horizontal Size
and
Vertical Size
fields.
2.
Enter a value or click the
Up
or
Down
arrow in the
Horizontal Position
and
Vertical Position
fields.
To adjust the size and position automatically:
To automatically adjust these settings, perform one of the following (see
page 20 for more details on Auto-Image settings):
•
Click the
Auto-Image
button to perform a one-time Auto-Image.
•
Click the
Auto-Image & Fill
button to perform a one-time Auto-Image and fill the
entire video output (ignores aspect ratio settings).
•
Click the
Auto-Image & Follow
button to perform a one-time Auto-Image and to
maintain the aspect ratio of the input signal. (ignores aspect ratio settings)