Reducer door – Grain Systems PNEG-707GSI User Manual
Page 201
18. Windows and Doors
PNEG-707 12', 18', 24' and 30' GSI Commercial Tower Dryer
201
Reducer Door
Install reducer door to pre-cut opening in reducer.
Use 5/16" x 3/4" whiz lock bolts and nuts.
NOTE: Caulking and bulb seal are not required.
1. Snug bolt reducer door frame top, reducer door frame bottom, and two (2) reducer door frame sides
to inside of pre-cut opening on reducer. Fit reducer door frame together as tightly as possible.
Check that reducer door frame is level and square. Tighten bolts.
NOTE: Do not tighten bolts on hinge-side of reducer door frame, where reducer door assembly will
be installed.
2. Bolt door latch in pre-drilled bolt holes inside reducer.
3. Install reducer door assembly as follows.
Install hinge-side of reducer door assembly to hinge-side of reducer door frame.
Open and shut reducer door assembly to check fit in door frame. If necessary, adjust reducer
door assembly.
4. Adjust bolt on door latch so reducer door latches securely.
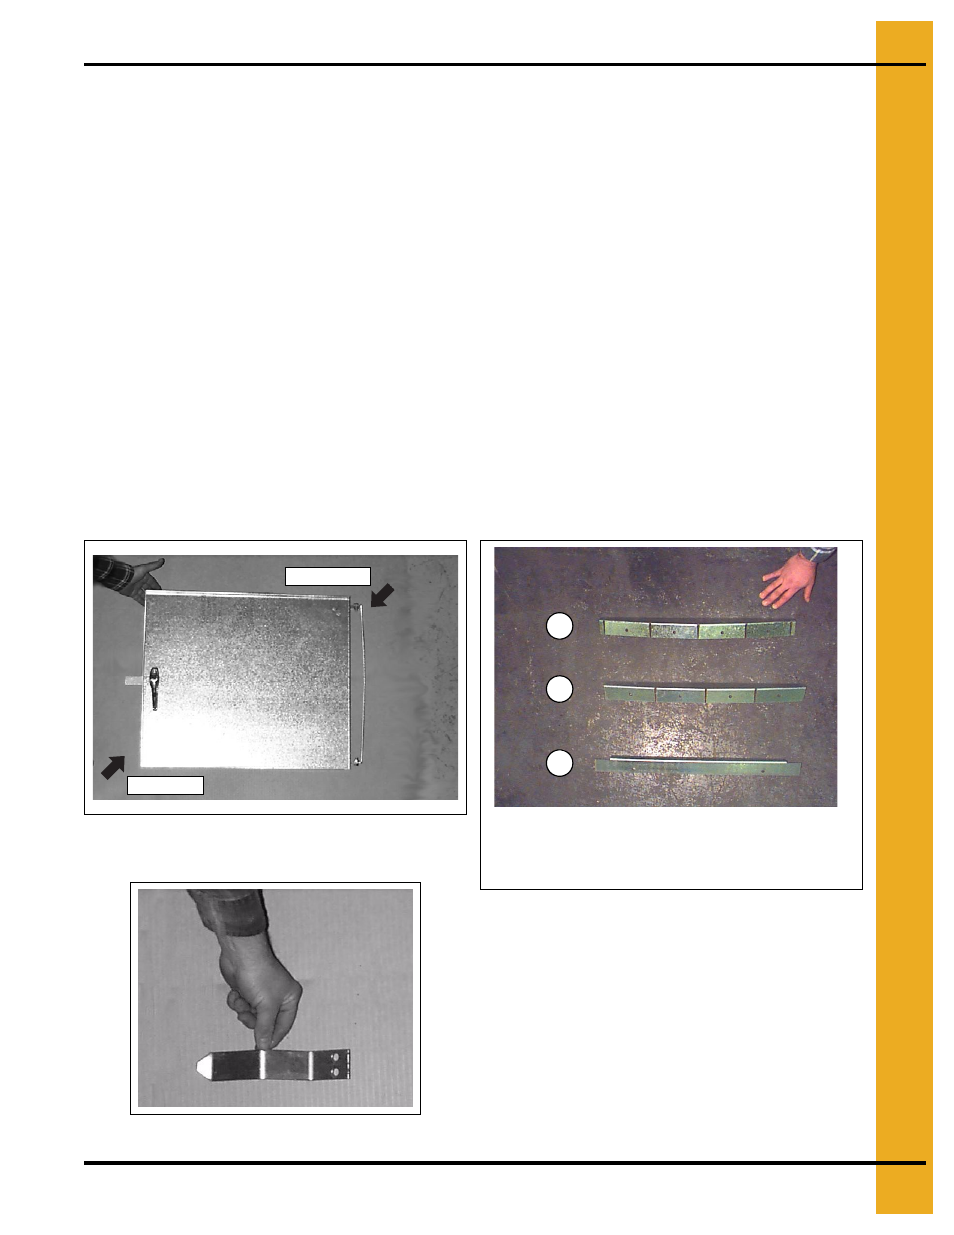
Figure 18AT Reducer door assembly, with latch bar.
Note hinge-side.
Figure 18AU Door Latch
Figure 18AV
Latch bar
Hinge-side
A
B
C
A. Reducer door frame - Top (note tabs at ends)
B. Reducer door frame - Bottom
C. Reducer door frame - Side