Windows and doors, Chapter 18 windows and doors, Overview – Grain Systems PNEG-707GSI User Manual
Page 187
PNEG-707 12', 18', 24' and 30' GSI Commercial Tower Dryer
187
18. Windows and Doors
Orientation Section on Page 19
for dryer dimensions, components, wall sheet guidelines, etc.
See Orientation Section on Page 32
for flat layout for window and door placement in the
dryer model.
NOTE: Windows are installed in cool section wall sheets.
See Orientation Section on Page 32
for
flat layout for type of wall sheet to use.
NOTE: Window installation requires cutting wall sheets on-site.
Check that wall sheets are lapped correctly, with rough side away from grain column.
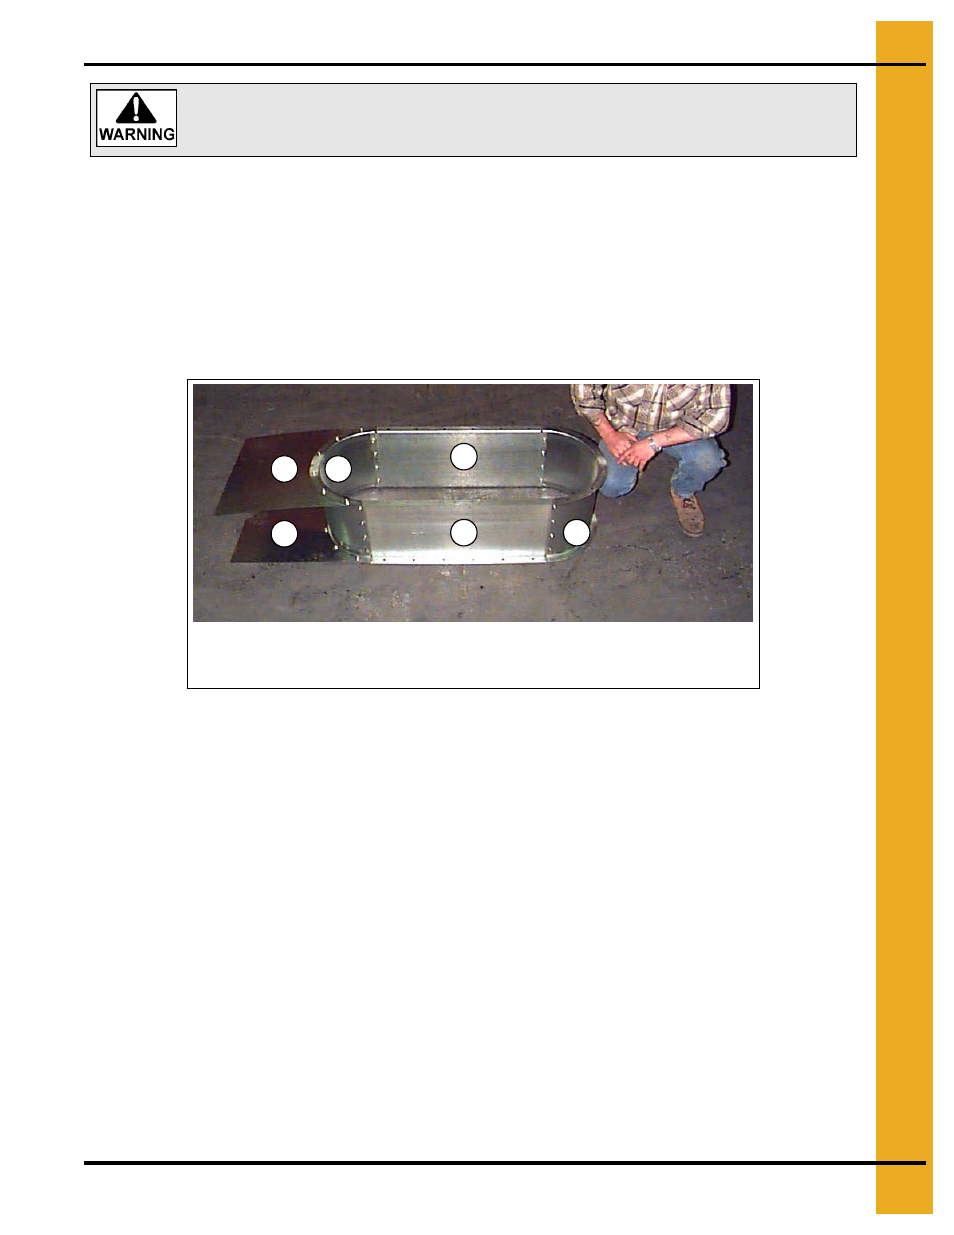
Figure 18A 18" Window Kit (Assembled for demonstration.) (May come from factory partially assembled.)
NOTE: 24" Window kit is not shown. It has same parts (on larger scale) as 18" window kit.
Overview
1. Pre-assembly of window kits.
Pre-assemble 18" window kit and 24" window kit in the same way.
2. Installation of window kits.
Install 18" window kit and 24" window kit to dryer in the same way.
3. Screened windows.
Position at same level as fan motors. Use 18" window kit and screening.
4. Louvered windows.
Position at same level as cool section door. Use 24" window kit and louvered assembly.
5. Cool section door.
Use 24" window kit, louvered assembly, and door parts.
6. Heat section door.
Use 18" window kit, and door parts.
7. Reducer door.
8. Hopper service door.
Important Safety Precautions:
Dryer has sharp edges. These sharp edges may cause serious injury. Use
appropriate personal protective equipment. Use proper lifting techniques.
A
B
B
A
C
C
A. Frame top/bottom
B. Frame side
C. Air deflectors (install at bottom of frame)