Figure 87 ospf virtual link, Table 66 ospf virtual-link – ZyXEL Communications GS-4012F/4024 User Manual
Page 180
GS-4012F/4024 User’s Guide
Chapter 25 OSPF
179
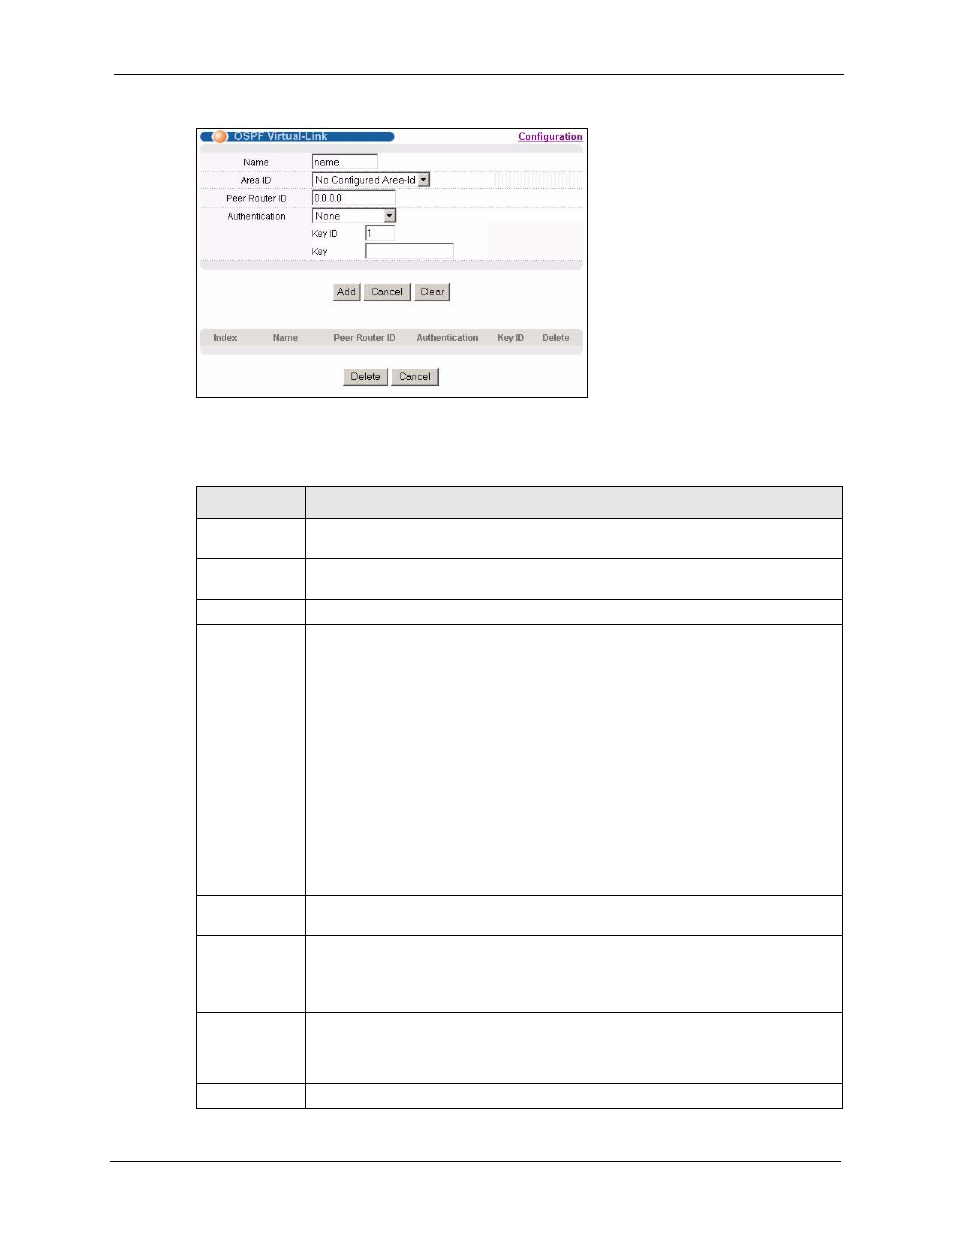
Figure 87 OSPF Virtual Link
The following table describes the related labels in this screen.
Table 66 OSPF Virtual-Link
LABEL
DESCRIPTION
Name
Enter a descriptive name (up to 32 printable ASCII characters) for identification
purposes.
Area ID
Select the area ID (that uses the format of an IP address in dotted decimal notation)
of an area to associate the interface to that area.
Peer Router ID
Enter the ID of a peer border router.
Authentication
Note: Virtual interface(s) must use the same authentication method
within the same area.
Select an authentication method. Choices are Same-as-Area, None (default),
Simple and MD5.
To exchange OSPF packets with peer border router, you must set the authentication
method and/or password the same as the peer border router.
Select Same-as-Area to use the same authentication method within the area and set
the related fields when necessary.
Select None to disable authentication. This is the default setting.
Select Simple to authenticate OSPF packets transmitted through this interface using
a simple password.
Select MD5 to authenticate OSPF packets transmitted through this interface using
MD5 authentication.
Key ID
When you select MD5 in the Authentication field, specify the identification number of
the authentication you want to use.
Key
When you select Simple in the Authentication field, enter a password eight-
character long.
When you select MD5 in the Authentication field, enter a password 16-character
long.
Add
Click Add to save your changes to the switch’s run-time memory. The switch loses
these changes if it is turned off or loses power, so use the Save link on the top
navigation panel to save your changes to the non-volatile memory when you are done
configuring.
Cancel Click
Cancel to start configuring the above fields again.