4 configuring trusted computers, Figure 111 content filter: trusted – ZyXEL Communications 802.11g HomePlug AV ADSL2+ Gateway P-660HWP-Dx User Manual
Page 193
Chapter 12 Content Filtering
P-660HWP-Dx User’s Guide
71
The following table describes the labels in this screen.
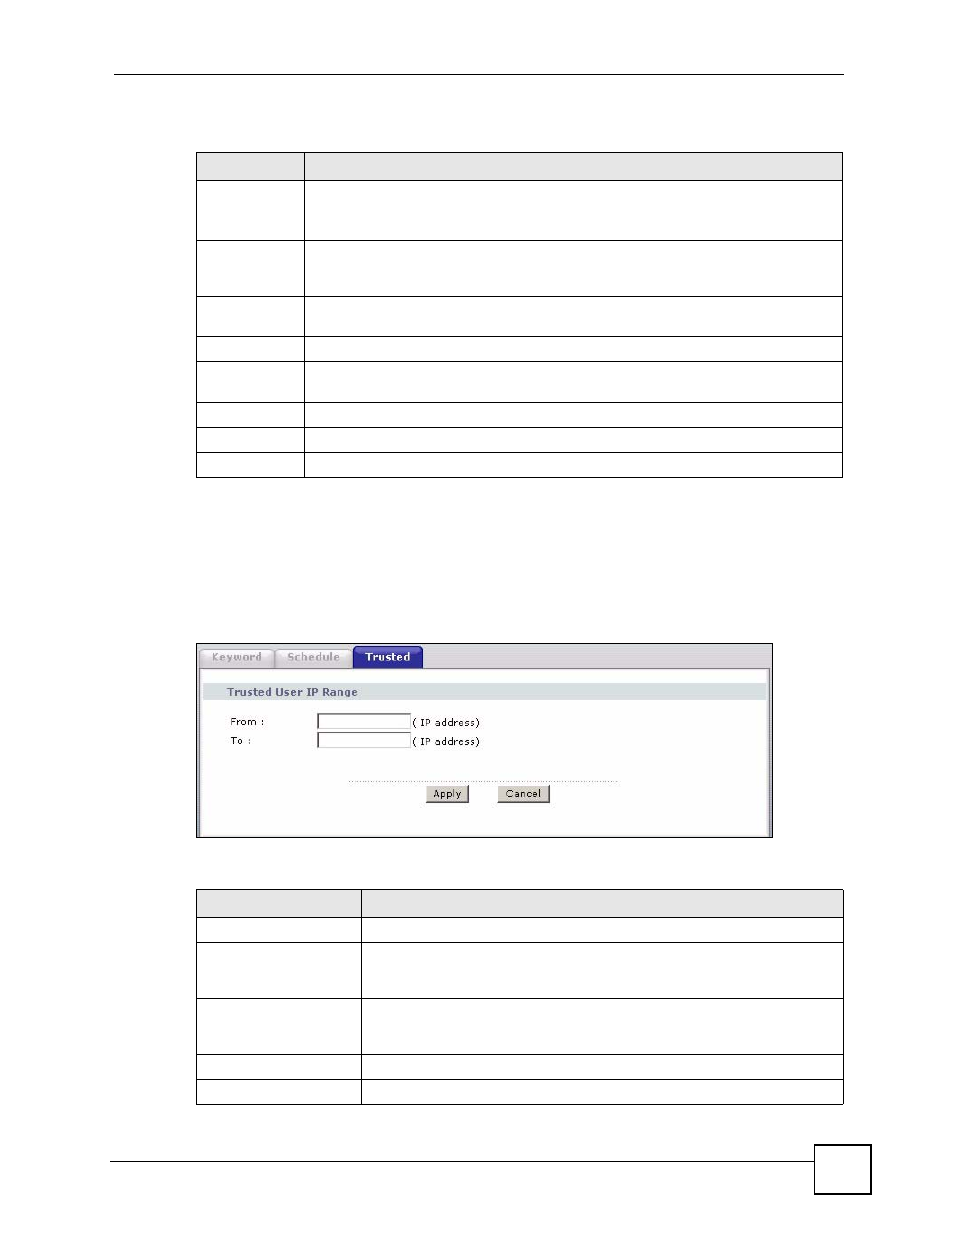
12.4 Configuring Trusted Computers
To exclude a range of users on the LAN from content filtering on your P-660HWP-Dx, click
Security > Content Filter > Trusted. The screen appears as shown.
Figure 111 Content Filter: Trusted
The following table describes the labels in this screen.
Table 68 Content Filter: Schedule
LABEL
DESCRIPTION
Schedule
Select Active Everyday to Block to make the content filtering active everyday.
Otherwise, select Edit Daily to Block and configure which days of the week (or
everyday) and which time of the day you want the content filtering to be active.
Active
Everyday to
Block
Select this option to allow continuous filtering of websites based on the keywords you
have chosen.
Edit Daily to
Block
Select this option to filter websites according to the day(s) and time(s) configured.
Active
Select the check box to have the content filtering active on the selected day.
Start TIme
Enter the start time when you want the content filtering to take effect in hour-minute
format.
End Time
Enter the end time when you want the content filtering to stop in hour-minute format.
Apply
Click Apply to save your changes.
Cancel
Click Cancel to return to the previously saved settings.
Table 69 Content Filter: Trusted
LABEL
DESCRIPTION
Trusted User IP Range
From
Type the IP address of a computer (or the beginning IP address of a specific
range of computers) on the LAN that you want to exclude from content
filtering.
To
Type the ending IP address of a specific range of users on your LAN that
you want to exclude from content filtering. Leave this field blank if you want
to exclude an individual computer.
Apply
Click Apply to save your changes to the P-660HWP-Dx.
Cancel
Click Cancel to return to the previously saved settings.