6 lan ip alias, Figure 58 lan client list, Table 29 lan client list – ZyXEL Communications 802.11g HomePlug AV ADSL2+ Gateway P-660HWP-Dx User Manual
Page 108
Chapter 6 LAN Setup
P-660HWP-Dx User’s Guide
44
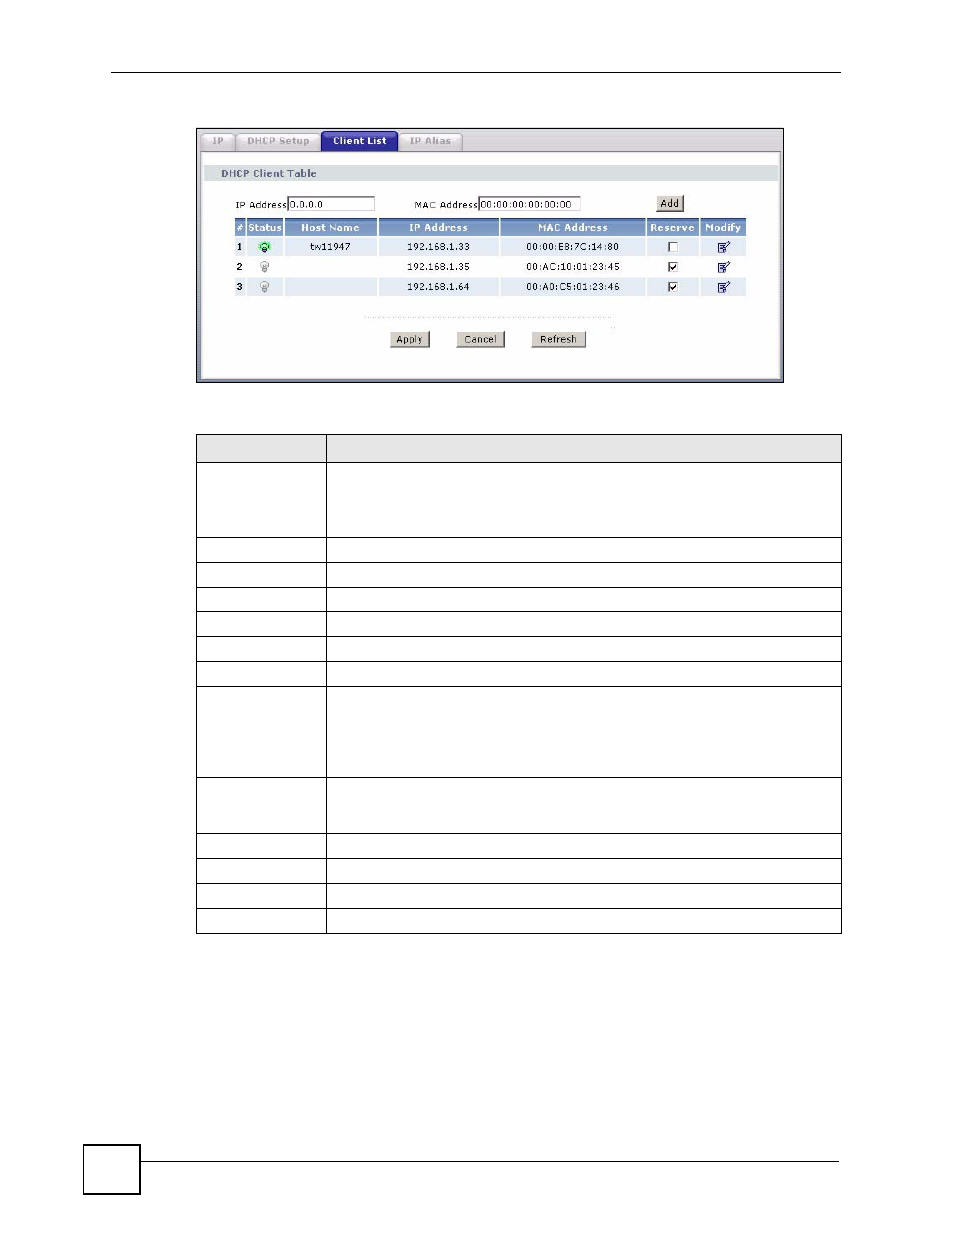
Figure 58 LAN Client List
The following table describes the labels in this screen.
6.6 LAN IP Alias
IP alias allows you to partition a physical network into different logical networks over the
same Ethernet interface. The P-660HWP-Dx supports three logical LAN interfaces via its
single physical Ethernet interface with the P-660HWP-Dx itself as the gateway for each LAN
network.
Table 29 LAN Client List
LABEL
DESCRIPTION
IP Address
Enter the IP address that you want to assign to the computer on your LAN with
the MAC address specified below.
The IP address should be within the range of IP addresses you specified in the
DHCP Setup for the DHCP client.
MAC Address
Enter the MAC address of a computer on your LAN.
Add
Click Add to add a static DHCP entry.
#
This is the index number of the static IP table entry (row).
Status
This field displays whether the client is connected to the P-660HWP-Dx.
Host Name
This field displays the computer host name.
IP Address
This field displays the IP address relative to the # field listed above.
MAC Address
The MAC (Media Access Control) or Ethernet address on a LAN (Local Area
Network) is unique to your computer (six pairs of hexadecimal notation).
A network interface card such as an Ethernet adapter has a hardwired address
that is assigned at the factory. This address follows an industry standard that
ensures no other adapter has a similar address.
Reserve
Select the check box(es) in each entry to have the P-660HWP-Dx always assign
the selected entry(ies)’s IP address(es) to the corresponding MAC address(es)
(and host name(s)). You can select up to 32 entries in this table.
Modify
Click the modify icon to have the IP address field editable and change it.
Apply
Click Apply to save your changes to the P-660HWP-Dx.
Cancel
Click Cancel to begin configuring this screen afresh.
Refresh
Click Refresh to reload the DHCP table.