Configuring ip routing with a frame relay link, Adding a route – Patton electronic 3120 User Manual
Page 326
C • Technical Reference
Model 3120 RAS Administrators’ Reference Guide
326
Configuring Frame Relay
Configuring IP routing with a Frame Relay Link
As each properly configured DLCI will have an IP address representing the next hop on that link, the access
server can use a Frame Relay link to access many remote networks. The IP address of the Frame Relay link is
unnumbered and specifies the next hop to another router. As such, it is a single-host route with a mask of
255.255.255.255. By using the access server’s routing table, you can apply any number of network routes to
use the Frame Relay link. You can even use a PVC as the default gateway (0.0.0.0).
Do the following to access the IP routing table in the access server:
1. Click on
IP
under the
Configuration Menu
to display the
IP
window (see figure 77 on page 194).
2. Click on
Routing Info
.
When the Frame Relay link (DLMI) and a DLCI is in the UP state, its IP address and interface, will appear in
the IP Routing table. The IP address of the PVC will not appear in the IP routing table if the Frame Relay link
is down, or the DLCI is not configured or inactive.
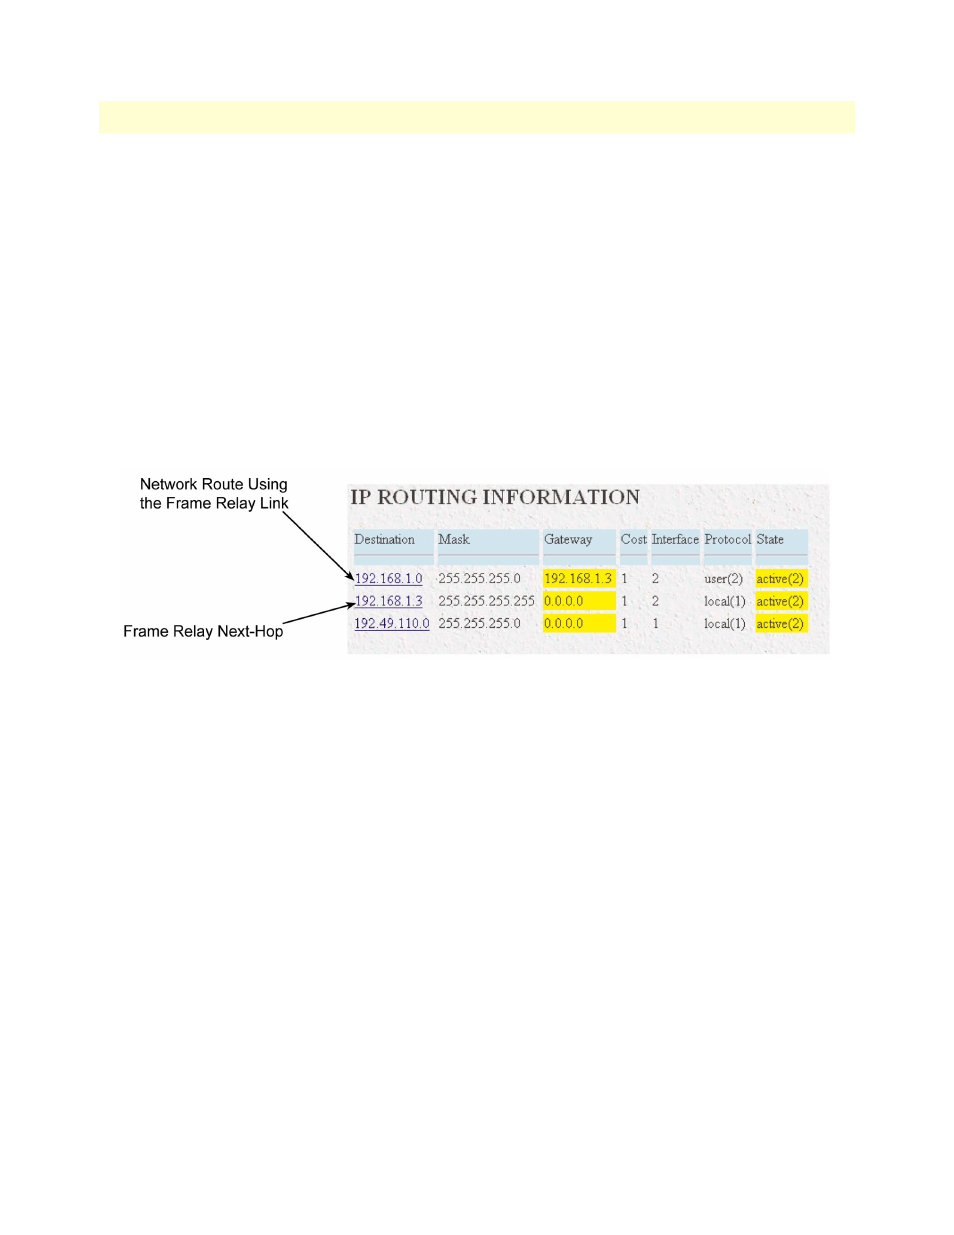
Figure 132. IP routing with Frame Relay example
In figure 132, the Frame Relay link shows the address of 192.168.1.3. As IP routing dictates the best fit for any
forwarding decisions, any destination with this address will automatically be sent across the Frame Relay link.
A network route using the Frame Relay link as its next hop is also shown in figure 132. The destination of
192.168.1.0 255.255.255.255 specifies the gateway, or next-hop, of 192.168.1.3. With this entry, any IP
packet with the destination address in the range of 192.168.1.1- 192.168.1.254 will automatically be sent
down the Frame Relay link to the device with the IP address of 192.168.1.3.
Adding a route. To add a route, do the following:
1. To access the IP routing table in the access server, click on
IP
under the
Configuration Menu
to display the
IP
window (see figure 77 on page 194).
2. Click on
Routing Info
.
Note
To add a network route, use the second set of entry items which allow
for a destination, mask and gateway: