Carriage tilt cylinder removal/reinstallation, Gradall – Gradall 544D (9136-4003) Service Manual User Manual
Page 329
9.2
C
ARRIAGE
T
ILT
C
YLINDER
R
EMOVAL/
R
EINSTALLATION
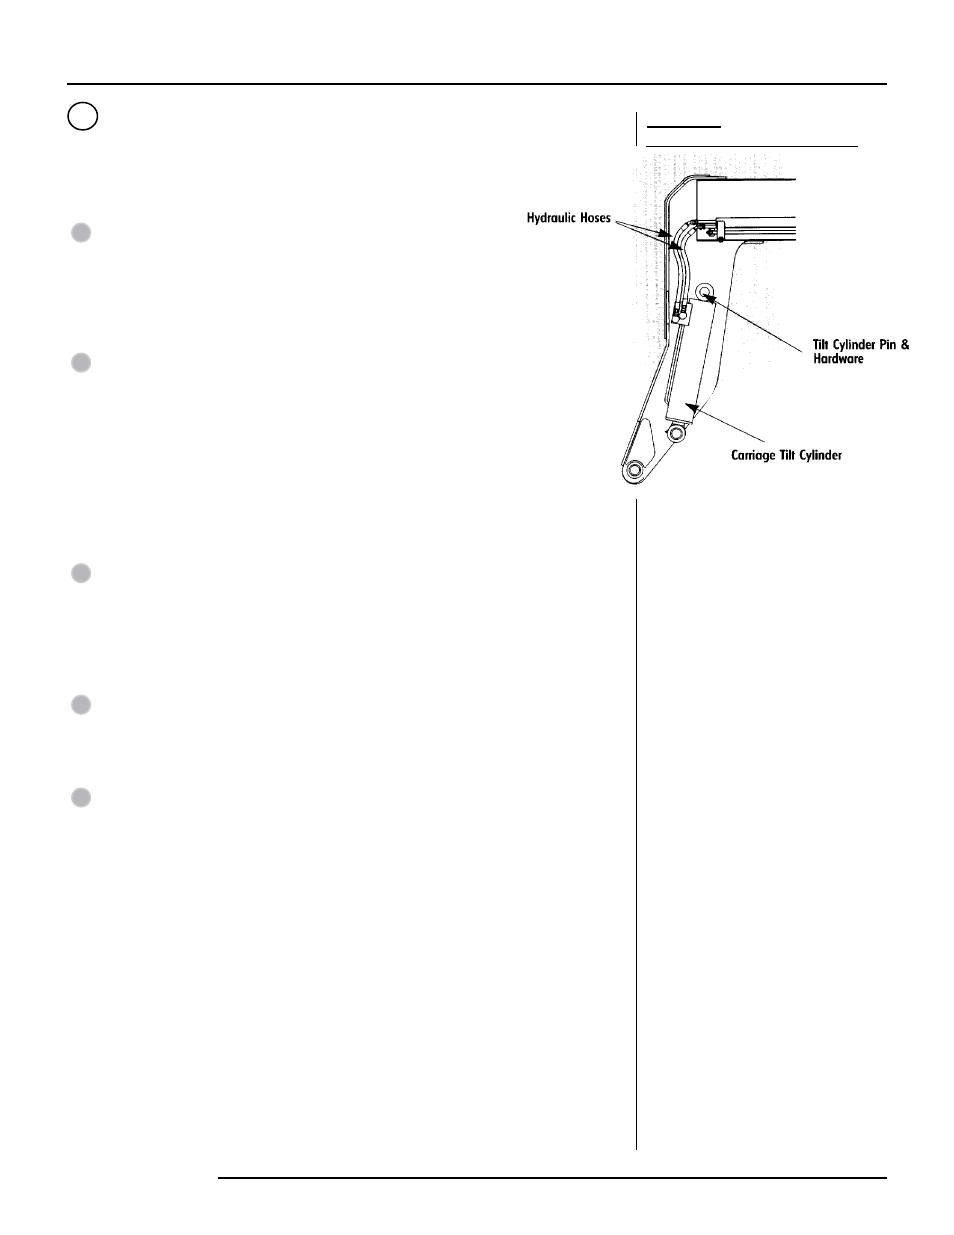
The carriage tilt cylinder is connected to the nose of boom-section 4 and to the fork
carriage during normal operation. It tilts the fork ends up or down, (carriage top forward or
back) as the cylinder rod extends or retracts.
R
EMOVING
T
HE
C
ARRIAGE
T
ILT
C
YLINDER:
B
OOM
S
TILL
I
NSTALLED
Preparation
Position the handier in a safe, level, open area well away from personnel and
equipment. Apply the park broke, shift the forward/reverse lever to Neutral and
turn the rear wheels straight forward.
Tag hydraulic hoses as an aid for reassembly
Separate, plug and cap hydraulic hoses and fittings.
Removal
Attach lifting tackle to the carriage tilt cylinder and take the weight from the
cylinder pin.
Remove the tilt cylinder pin and related hardware.
Lift the tilt cylinder free and place in a designated work area.
R
EINSTALLING THE
C
ARRIAGE
T
ILT
C
YLINDER
Preparation
Check that the machine is still safely secured.
Clean and lubricate all bores and cylinder pins.
Attach lifting tackle to cylinder, checking that the tackle holds the cylinder correctly
when hoisted into position.
Lift the tilt cylinder into position for pin insertion.
Reinstallation
Install fill cylinder pins and hardware.
Reconnect hydraulic hoses.
Re-torque fasteners and hydraulic fillings per Appendix A and Appendix B.
Test
Start the machine and carefully pressurize the fill circuit, checking for leaks.
Cycle the till cylinder fill range, 10 times, to purge air from the system.
Return the machine to service.
9B
1.
2.
3.
1.
2.
3.
1.
2.
3.
4.
1.
2.
3.
1.
2.
3.
B
OOM
H
EAD:
S
HOWING
C
ARRIAGE
T
ILT
C
YLINDER
→
→
→
→
→
→
→
→
→
→
→
→
→
→
→
→
→
→
→
→
→
→
→
→
→
GRADALL
GRADALL