Gradall – Gradall 544D (9136-4003) Service Manual User Manual
Page 317
5.1
R
ETRACT
C
HAIN
R
EINSTALLATION
Lubricate and inspect chains thoroughly before installation. See Section 6 Articulate the
chains to make sure all working surfaces ore thoroughly lubricated.
Note! Install the 3/4" chain first.
3
/
4
" Chain Reinstallation
Fasten a rope to the end of the 3/4" chain in order pull it back into the boom.
Attach the choin to the chain clevis at the rear of boom-section 4.
Carefully pull the chain into the boom until it can be fastened to the chain clevis.
Remove the rope.
Fasten the chain into the clevis by installing a pin and colter pin.
Install and torque the jam nut to 100 ft-lb. Do not use LOCTITE
®
on the nuts.
1" Chain Reinstallation
For the 1" chain, perform Steps 1 through 5 per above.
Install the chain adjustment block and mounting bolts removed under
Removal, Step 1, Page 5.0
Torque the mounting bolts to 340-365 ft-lb.
Readjust the chains.
Install and torque the jam nut to 100 ft-lb. Do not use LOCTITE on the nuts.
R
EMOVING THE
E
XTEND
C
HAINS
W
ITHOUT
R
EMOVING THE
B
OOM
A
SSEMBLIES
Preparation
Extend the boom far enough to access the chain anchor and the clevis through
the rear top access hole.
Mechanically secure the boom sections together to prevent
uncontrolled boom runout when the extend chains are removed.
Removal
On the chain being extracted, remove the jam nut from the rear chain clevis and
back off the adjusting nut on the chain clevis fully without removing it.
Remove the chain clevis pin and the cotter pin to free the chain.
Install a plastic tie-wrap through the chain holes, forming a loop and tie rope to
the loop.
Pull slack to the chain clevis at the front of the boom.
Remove the devis pin and the colter pin from the chain and the chain clevis.
Install a plastic tie-wrap through the chain holes, forming a loop and tie a rope
to the loop.
Carefully pull the chain out of the boom.
→
→
→
→
→
1.
2.
3.
4.
5.
6.
1.
2.
3.
4.
5.
1.
2.
1.
2.
3.
4.
5.
6.
7.
Note!
Use front or rear, whichever best
suits the particular situation.
(Typically, the chain is pulled out
through the rear access hole)
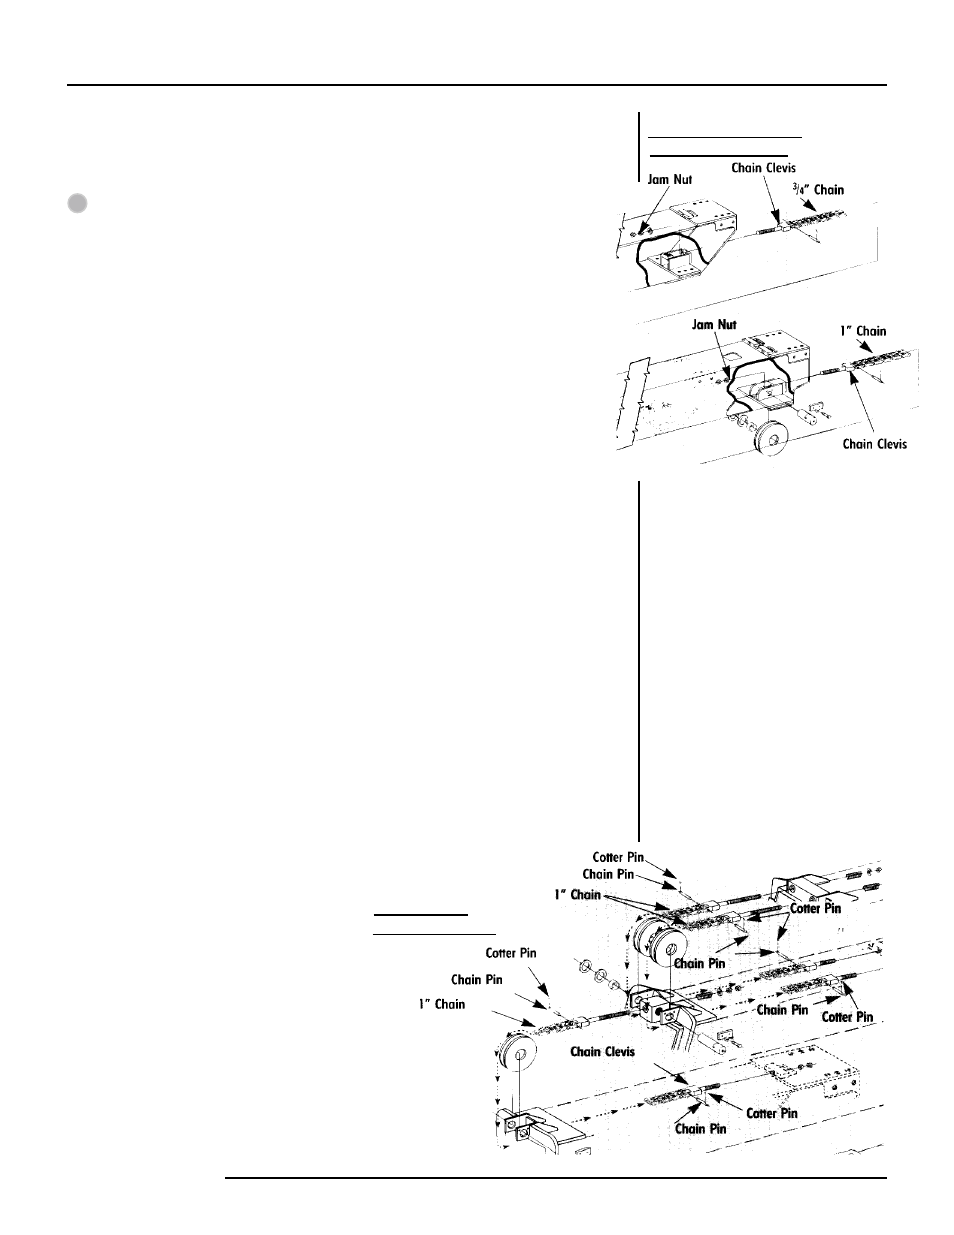
R
EAR
, B
OOM
-S
ECTION
4 &
R
EAR
, B
OOM
-S
ECTION
3
E
XTEND
C
HAINS:
R
EMOVAL
E
XPLOSION
GRADALL
GRADALL