HP 30 HP30 User Manual
Page 45
Chapter 3 - Quick-Start Procedures
3-5
3.3.2
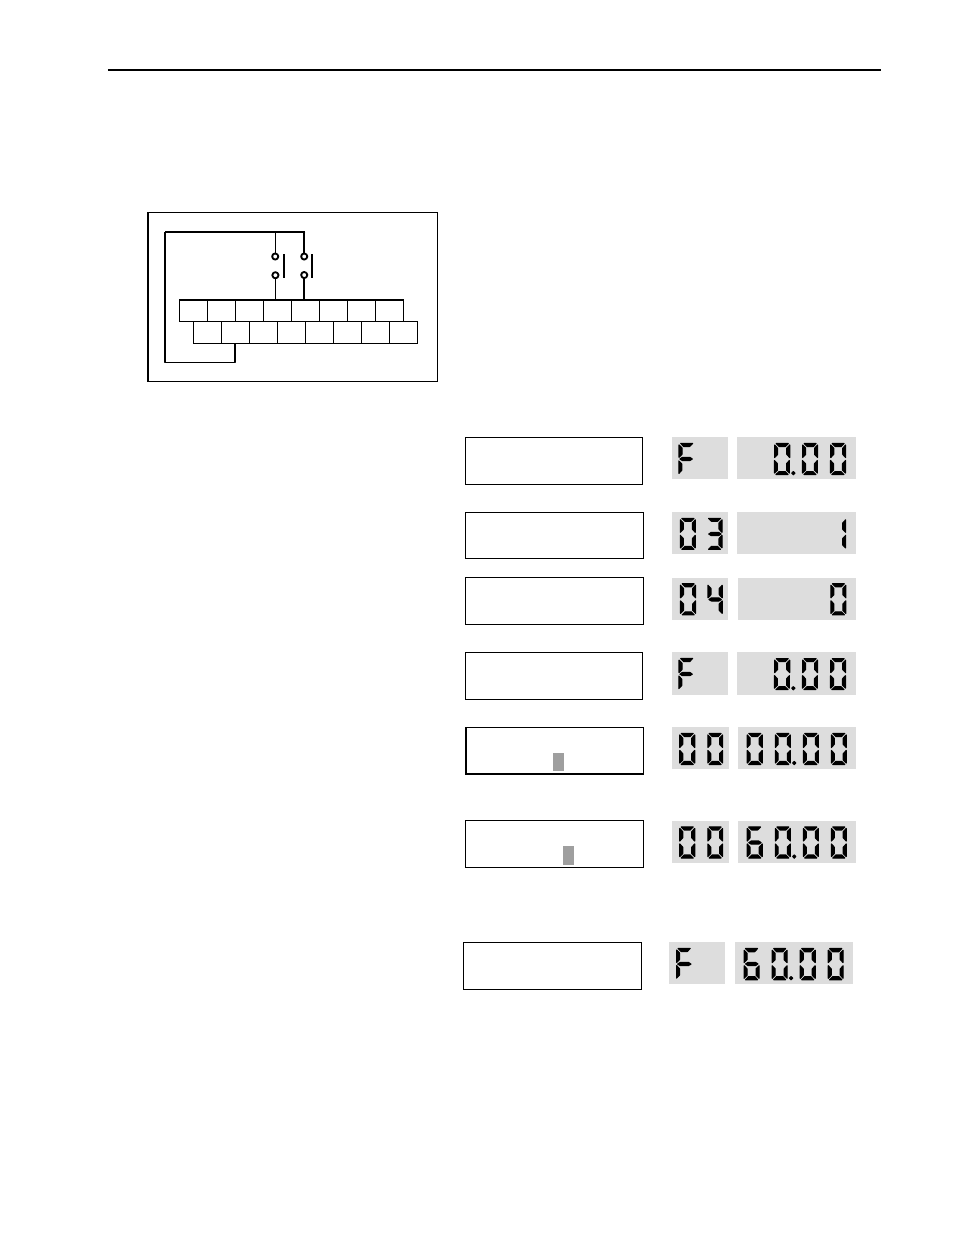
Frequency set by Keypad and Run/Stop by External Source.
1. Connect wiring as shown below.
2. Apply AC power.
3. Confirm that the DRV 03 is set at ‘Fx/Rx-1’.
4. Confirm that the DRV 04 is set at
‘Keypad-1’.
5. Press [SHIFT/ESC] key.
6. LCD: Press [PROG] key.
7-Seg: Press [PROG/ENT] key.
7. LCD: Set the frequency using [SHIFT/ESC] and
[▲] key.
7-Seg: Set the frequency by rotating the encoder
knob.
8. LCD: Press [ENT] key to save the data.
7-Seg: Press [PROG/ENT] key to save the data.
9. Close the FX or RX contact to run the motor.
10. Open the FX or RX contact to stop the motor.
LCD Display
7-Segment Display
P1 P2
JOG
CM
P3 FX RX NC
CM BX
RST
I
VR VI
FM 5G
DRV
►T/K 0.0 A
00 STP 0.00Hz
The DRV LED is ON.
DRV
► Drive mode
03 Fx/Rx-1
DRV
► Freq mode
04 Keypad-1
DRV
►T/K 0.0 A
00 STP 0.00Hz
DRV
► Cmd. freq
00 0.00Hz
The PROG/ENT LED is turned ON.
DRV
► Cmd. freq
00 60.00Hz
The PROG/ENT LED is turned ON.
DRV
►T/V 0.0 A
00 STP 60.00Hz
The FWD or REV LED starts blinking. The RUN LED starts blinking.
The STOP/RESET LED starts blinking. The STOP/RESET LED starts blinking.