Setting up a web control point (optional), Connecting an ethernet cable, To set the ip address – Ensemble Designs BrightEye NXT 410 Clean HDMI Router User Manual
Page 62

www.ensembledesigns.com
Page 62
BrightEye NXT 410/415/430 Compact Router Installation, Configuration and Operations Guide
Setting Up a Web Control Point (Optional)
Because the BrightEye NXT includes the built-in front control panel, it is not required to set up a web
control point. However, creating one or more web control points adds flexibility to both configuring
and operating your BrightEye NXT router.
Connecting an Ethernet Cable
Your BrightEye NXT unit is equipped with an Ethernet interface. To establish network connectivity
between a web control point and the BrightEye NXT, connect an Ethernet cable to the Ethernet port
on the rear panel while the power is off. The Ethernet port should be connected with CAT5 or CAT6
cabling to a network Ethernet router or switch to make the BrightEye NXT accessible to computers on
the network. The Ethernet port will auto-sense cable direction, so a cross-over cable is not needed.
Assigning the BrightEye NXT a New IP Address and Subnet Mask
When you initially power up the BrightEye NXT as received from the factory, it will take the self-
assigned static IP address of 192.168.1.100. You must modify its IP address and subnet mask to be
compatible with your network’s environment. These are general instructions. We recommend that you
consult your IT staff if you are uncertain about any of these network configuration settings.
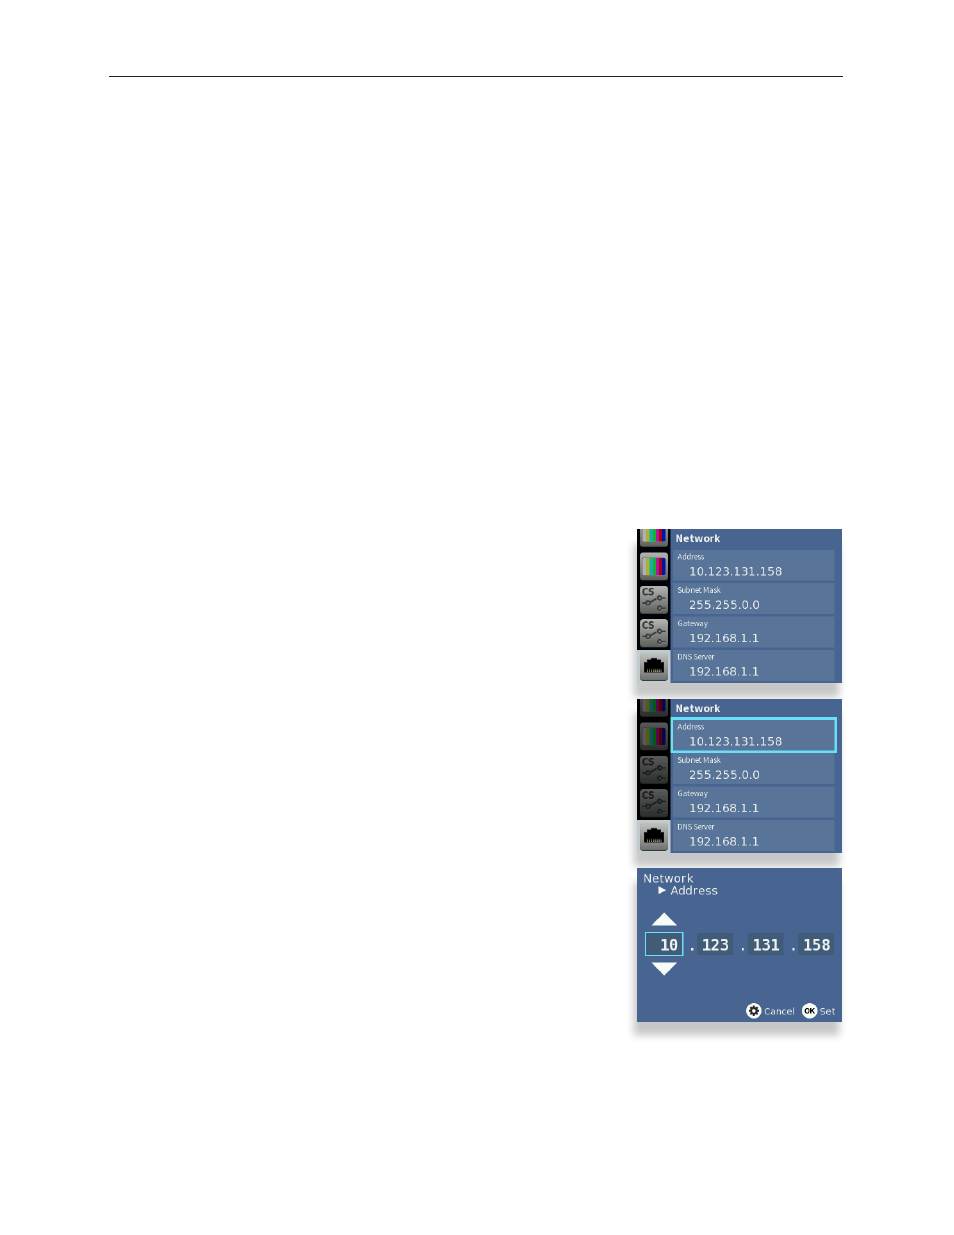
To Set the IP Address
1. Press the Configuration button. The top level menus display.
2. Press the down arrow button until the Network top level menu is
selected.
3. Press the right arrow button (or OK) to highlight the Address
submenu.
4. Press the right arrow button (or OK) to go to the Address selection
submenu.
5. Using the arrow buttons, modify the fields in the Address submenu
with an IP address that is compatible with your network. For
example, you may want to change the IP address to something like
the following: 10.123.131.158.
6. Press OK to save the new IP address, or press the Configuration
button to cancel.
