To set the output timing for clean switches, To set the audio enables for clean switches – Ensemble Designs BrightEye NXT 410 Clean HDMI Router User Manual
Page 43
www.ensembledesigns.com
Page 43
BrightEye NXT 410/415/430 Compact Router Installation, Configuration and Operations Guide
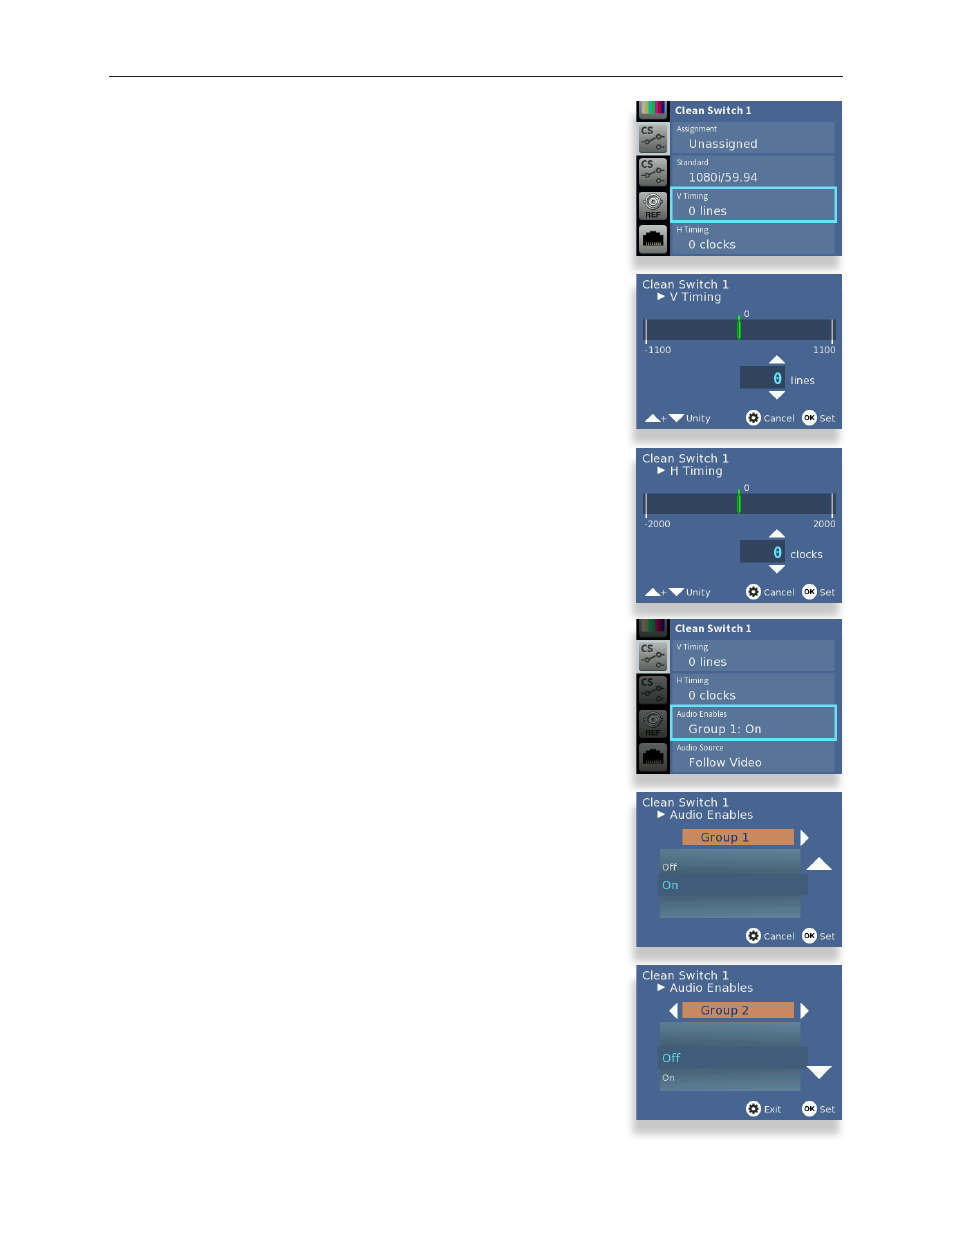
To Set the Output Timing for Clean Switches
Using the Output Timing control, you can adjust the timing of the
Clean Switch relative to the genlock reference. Setting the H and V
parameters to 0 will “zero” time the Clean Switch, matching it to the
reference. Negative values will cause the Clean Switch to be early with
respect to the reference; positive values will make the Clean Switch
output later in time.
1. From the Clean Switch top level menu, use the up or down arrow
buttons to navigate to the V Timing or H Timing menu.
2. Press the right arrow button (or OK) to go to the Clean Switch V
Timing or H Timing submenu.
3. Use the up or down arrow buttons to indicate the timing setting
you want the Clean Switch to use.
4. Press OK to set the timing to your new selection, or press the
Configuration button to cancel your selection.
5. Press the Configuration button to back out of the menu one
level at a time. Or wait approximately 30 seconds until the screen
automatically returns to Operational mode.
To Set the Audio Enables for Clean Switches
The Clean Switch supports 16 channels (four groups) of embedded
audio. In order for the Clean Switch output to have a consistent
configuration of audio, regardless of what is present on the input,
individual enables are provided for each group.
The Clean Switch output will always contain the enabled groups, but
channels that are not present in the input will simply be silent. In this
way, switching between sources with differing audio configurations
will produce smooth, silent transitions.
If you are using embedded audio, enable the appropriate audio
groups.
1. From the Clean Switch top level menu, use the up or down arrow
buttons to navigate to the Audio Enables menu.
2. Press the right arrow button (or OK) to go to the Audio Enables
submenu.
3. Use the right or left arrow buttons to navigate to the submenu you
want to work with: Group 1, Group 2, Group 3 or Group 4.
4. Use the up or down arrow buttons to select On or Off.
5. Press OK to set your new selection, or press the Configuration
button to cancel your selection.
6. Press the Configuration button to back out of the menu one
level at a time. Or wait approximately 30 seconds until the screen
automatically returns to Operational mode.