Mapping audio channels, To remap audio channels – Ensemble Designs BrightEye NXT 410 Clean HDMI Router User Manual
Page 36
www.ensembledesigns.com
Page 36
BrightEye NXT 410/415/430 Compact Router Installation, Configuration and Operations Guide
Mapping Audio Channels
For any given video Input source, which can carry up to 16 audio
channels, any audio Input channel can be assigned to any audio
Output channel.
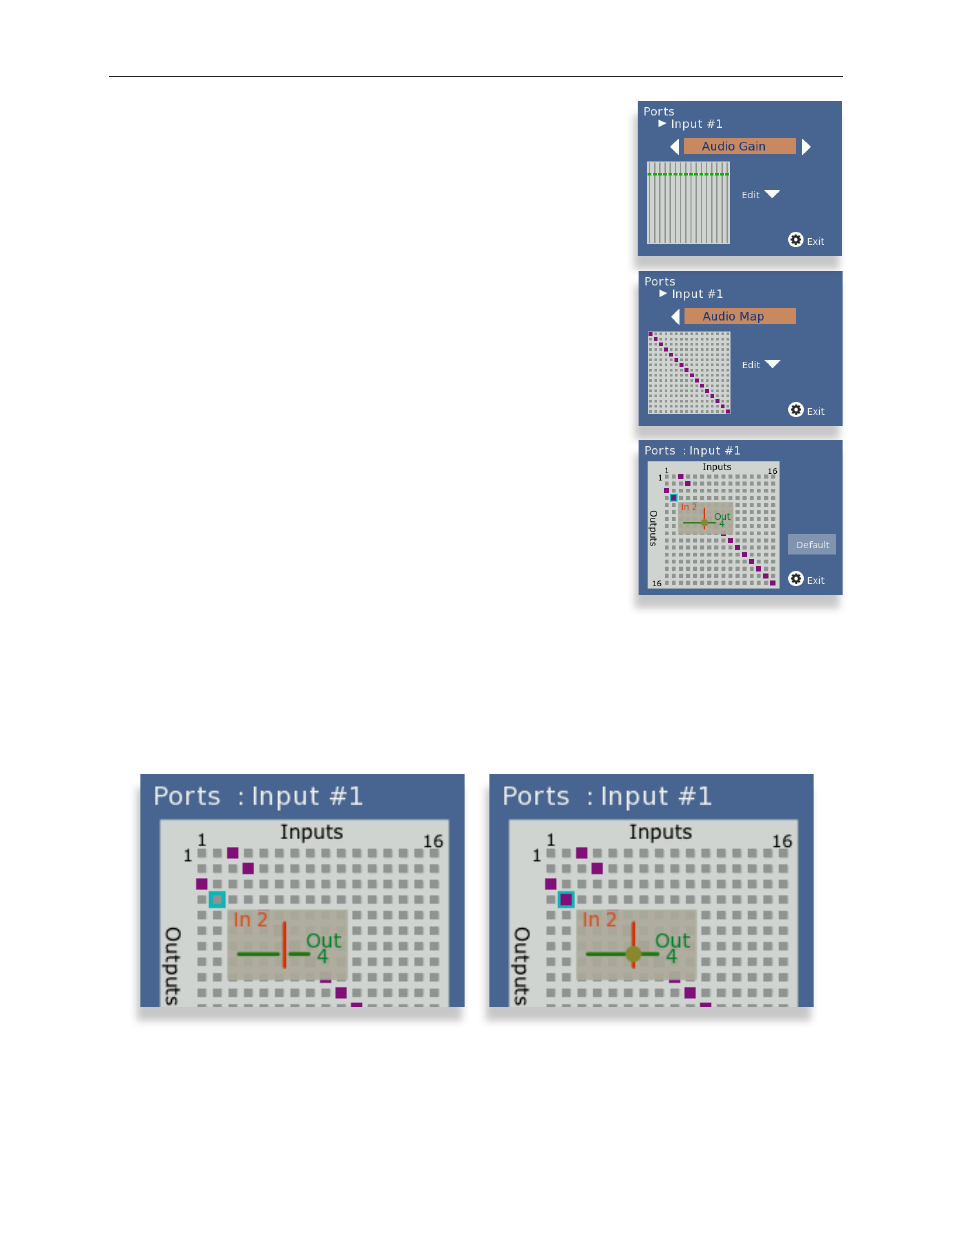
Each point on the audio map represents a potential cross-point for a
specific audio channel Input and Output. By default, Input 1 is mapped
to Output 1, Input 2 is mapped to Output 2, and so forth. This default
configuration is shown in the middle screen capture to the right.
As a remapping example using Port Input #1, suppose you needed to
switch channels 1 and 2 with channels 3 and 4 on the outputs. Using
the Audio Map menu, you can assign inputs 1 and 2 to outputs 3 and
4, and assign inputs 3 and 4 to outputs 1 and 2. This configuration is
shown in the lower screen capture to the right.
To Remap Audio Channels
1. From the Audio Gain menu, press the right arrow button to access
the Audio Map menu.
2. Press the down arrow button to go to the Audio Map editing
screen.
3. To edit the audio map, use the arrows to select a point on the grid.
4. Press the OK button to activate the selected cross-point. Pressing
the OK button toggles between purple (active cross-point) and
gray (not active cross-point).
5. When finished, press the configuration button to exit.
Inactive cross-point.
Active cross-point.