To rename a port, Adjusting audio levels, To adjust audio levels – Ensemble Designs BrightEye NXT 410 Clean HDMI Router User Manual
Page 35
www.ensembledesigns.com
Page 35
BrightEye NXT 410/415/430 Compact Router Installation, Configuration and Operations Guide
header and footer, on the front panel Port menus, on the video
thumbnails used in the web interface, on Profiles, and on the Ports
configuration page of the web interface.
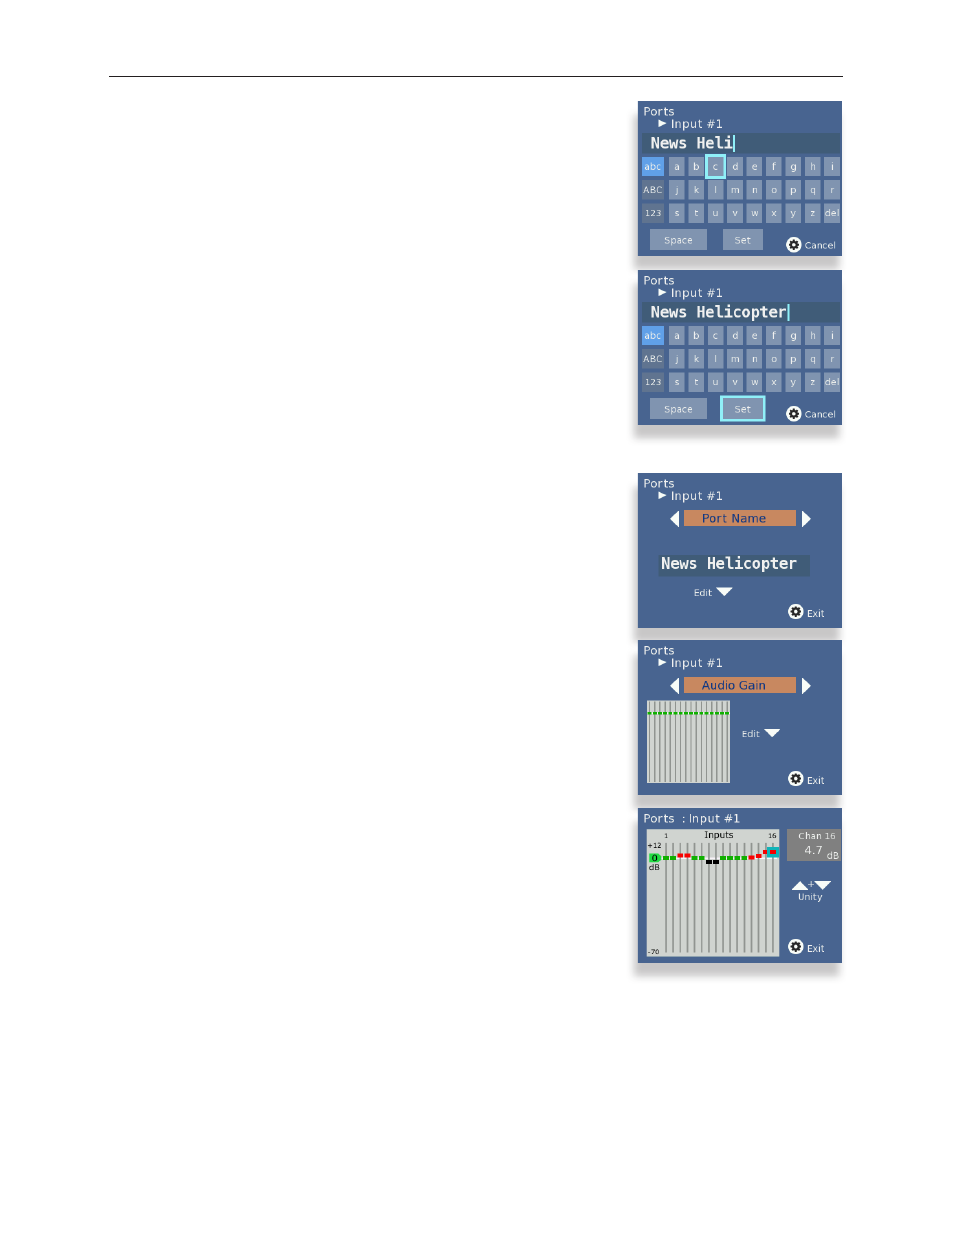
To Rename a Port
1. From the Ports Configuration submenu, press the right arrow
button to go to the Port Name submenu.
2. Press the down arrow button to go to the keyboard submenu.
3. Use the up, down, left and right arrow buttons to navigate the
keyboard. Press OK to enter a keyboard character into the label
area. Change case by highlighting and selecting either “abc” or
“ABC.” To backspace or delete letters one at a time, highlight the
“del” key, then press OK.
4. When finished editing the port name, highlight “Set” on the
keyboard and press OK.
Adjusting Audio Levels
When the signal is output through a Clean Switch, you can adjust
audio levels on a per-input and per-channel basis. The BrightEye NXT
compact routers can apply gain or attenuation from +12.0 dB to -70
dB.
When the Clean Switch is in Mix mode, the audio output will properly
mix between the adjusted settings of one input to the adjusted
settings of the new source.
To Adjust Audio Levels
1. From the Port Name menu, press the right arrow button to enter
the Audio Gain menu.
2. Press the down arrow button to go to the Audio Gain editing
screen.
3. Use the right and left arrow buttons to select the channel you
want to modify. The selected channel is indicated by a blue field
surrounding the channel’s level control. In the example to the
right, channel 16 is selected.
4. Press the up or down arrows to adjust the audio levels to be higher
or lower. Press and hold the up or down arrow button to accelerate
the rate of adjustment.
A red marker indicates that gain has been added. A black marker
indicates that gain has been reduced. A green marker indicates
that the audio level is at its default setting.
5. When finished adjusting the audio levels, press the configuration
button to exit and return to the Audio Gain menu.