10–internal settings, Ethernet page – Teac HS-2 User Manual
Page 97
TASCAM HS-2
97
Video Resolve
When slaving this unit to a VCR, video sync signals might
be used instead of word sync signals for the common
standard clock. In the same way as with word sync
signals, you can select whether the video clock is followed
(synchronizing the beginning of time code frames with
video signal frame edges) or it is independent from the
frame clock.
This must be turned
ON
to accurately control this unit from
a video editor.
ON
(default):
Time code frame edges synchronized with
video signal frame edges
OFF
:
Independent from video frame clock
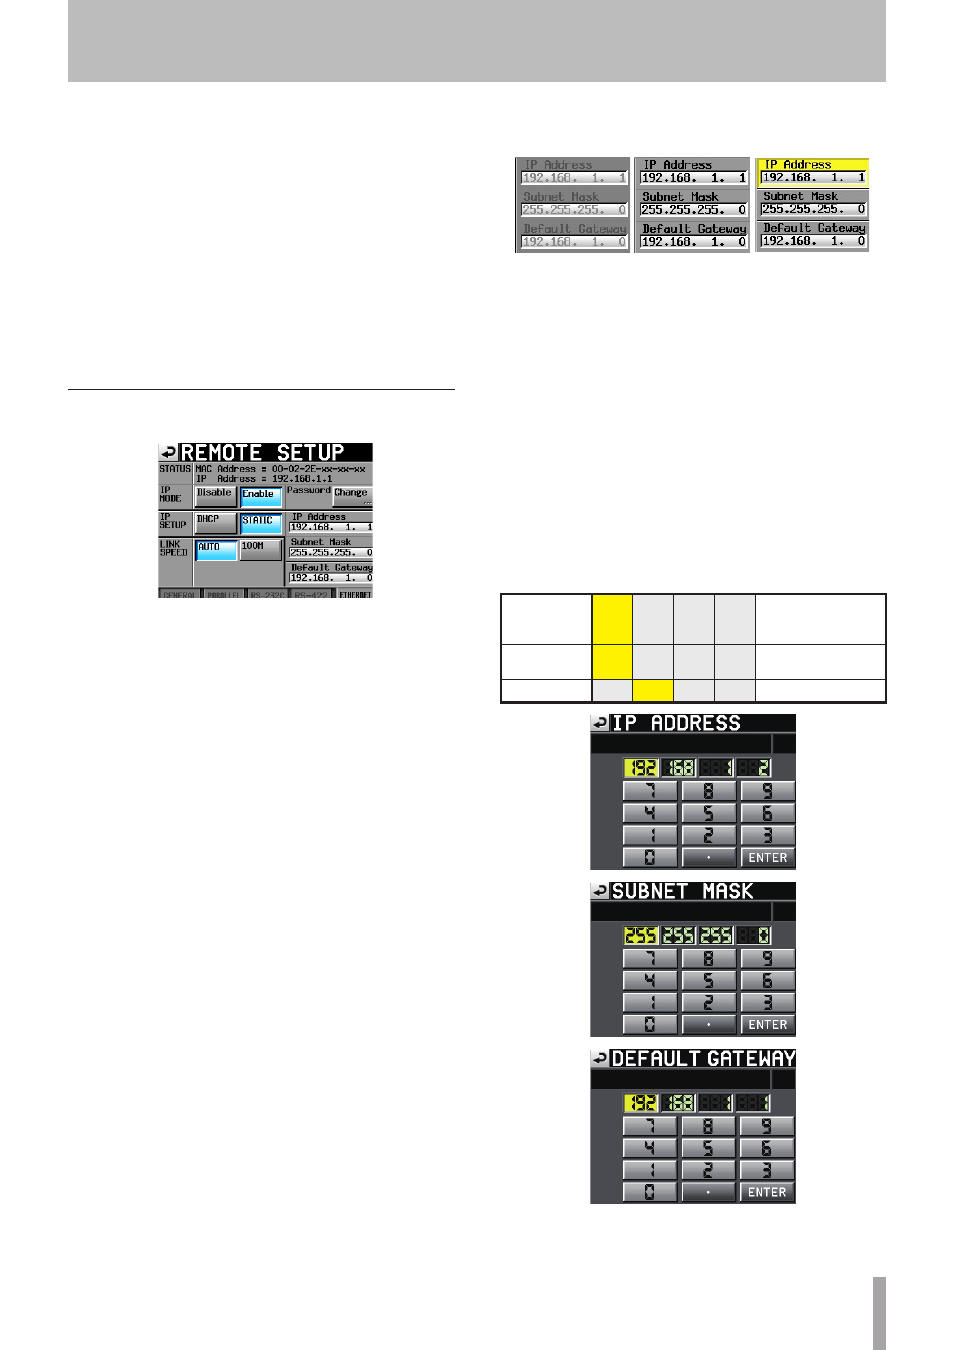
ETHERNET page
Perform settings related to the ETHERNET communication.
STATUS
Shows the MAC Address of this unit and the current IP
Address.
IP MODE
This button is to enable or disable all network activity.
Setting buttons:
Disable
(Disabled, Default),
Enable
(Enabled)
IP SETUP
Selects how the unit's IP address is specified
In DHCP mode, if a DHCP server exists on the same LAN
network as the unit, the IP address, Subnet Mask and
Default Gateway settings are automatically obtained.
In the STATIC settings, IP Address, Subnet Mask and
Default Gateway must be set manually.
Setting buttons:
DHCP
,
STATIC
(default)
LINK SPEED
This button affects how the link speed is determined.
Setting buttons:
Auto
(Default. Negotiates the best possible
link speed according to the network
environment.)
100M
(Operates with a fixed link speed of
100Mbps)
IP Address / Subnet Mask / Default Gateway
Allows setting and display of the specified values to be
used in STATIC IP address mode.
Default: 0. 0. 0. 0.
According to the above
IP SETUP
settings, the display of
this area will change as follows:
When setting DHCP When setting STATIC When touching
Changing the IP Address / Subnet Mask / Default
Gateway settings
Touch the applicable area on the
ETHERNET
page of the
REMOTE SETUP
screen to display each setting adjustment
screen.
• Numbers are three digits. (For those of two digits or
less, you do not need to input
0
first.)
• The first digits are selected after the screen is displayed.
• Touch the first number button after entering the
selection mode to set that only the numbers of the
buttons touched are input. Subsequently, the numbers
are input using the number pad.
• Touch the dot (“.”) button to move the selection to the
next number.
Example)
W h e n d i s -
played on the
screen
192. 168. 1.
1
Input 1234
234. 168. 1.
1
(The first “1” is pushed
forward.)
Input “ . ”
192. 168. 1.
1
10–Internal settings