7–timeline mode – Teac HS-2 User Manual
Page 57
TASCAM HS-2
57
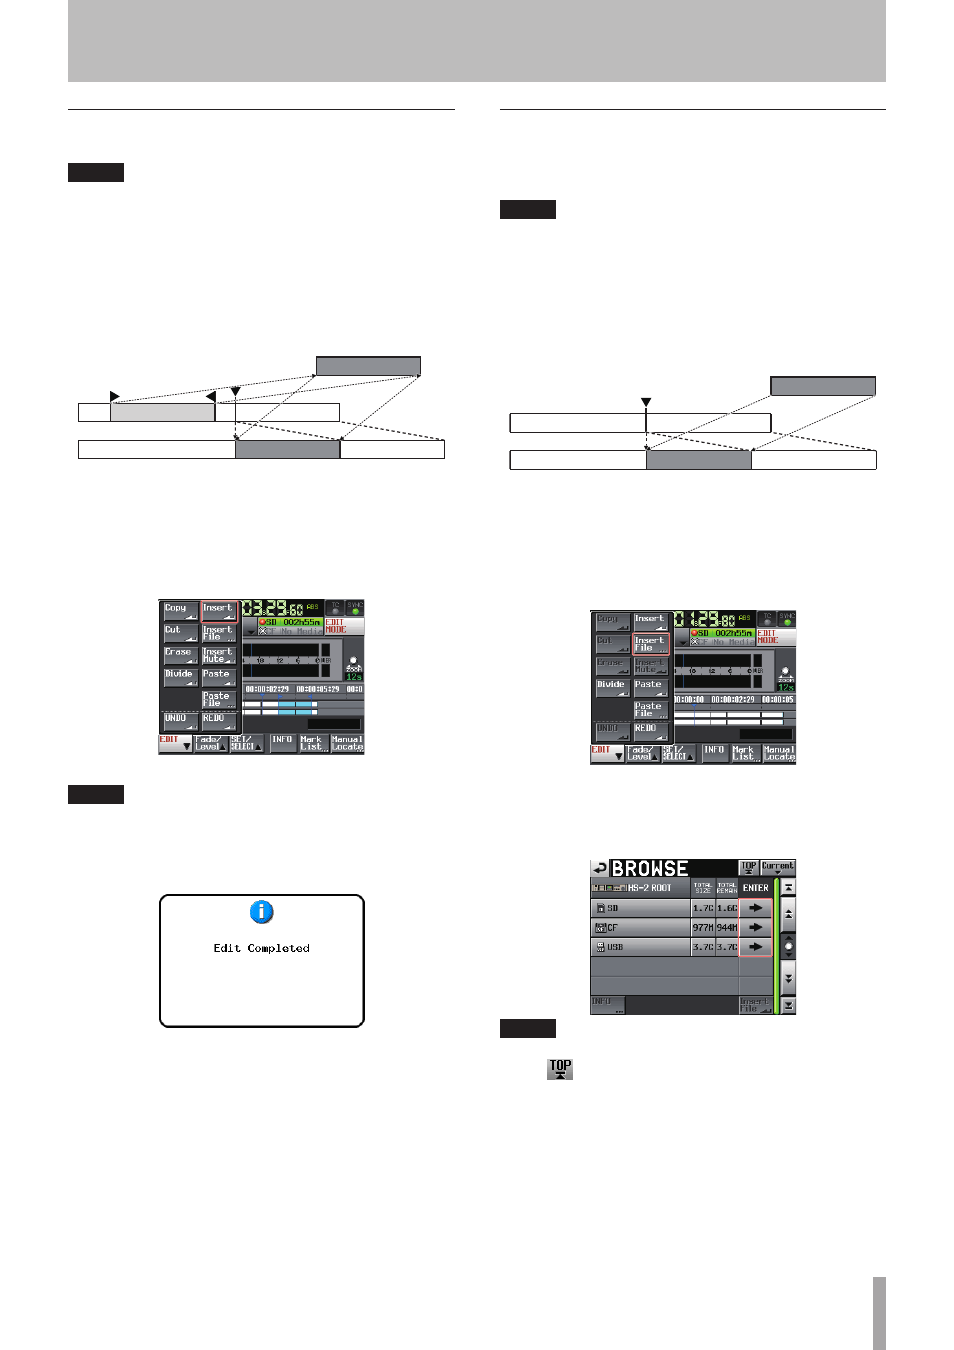
Inserting the data of the copy buffer into the
designated position (Insert)
NOTE
• All regions following the positions inserted will move
backward by the time of the data inserted.
• When inserting into a region, the following three
regions will be generated: before the timeline cursor,
the content of the copy buffer, and after the timeline
cursor.
• When the designated position is located between
fade-in and fade-out, the fade-in and fade-out
information will be deleted.
&RS\ EXIIHU
1 Press the HOME key to display the Home Screen.
2 Touch the
EDIT MODE
button to enter the edit
mode.
3 Move the timeline cursor to the position where you
want to insert data.
4 Touch the
EDIT
button to display the pull-up menu.
Touch the
Insert
button on the pull-up menu.
NOTE
The
Insert
button is available only when the copy buffer
contains data.
5 When inserting is complete, the Home Screen will
be displayed after the pop-up window is displayed.
In this case, the
EDIT
pull-up menu will remain open.
Inserting the designated file into the desig-
nated position (Insert File)
You can insert the entire contents of a 2ch BWF file/WAV
file into the designated position.
NOTE
• All regions following the positions inserted will move
backward by the time of the file inserted.
• When inserting into a region, the following three
regions will be generated: before the timeline cursor,
the inserted file, and after the timeline cursor.
• When the designated position is located between
fade-in and fade-out, the fade-in and fade-out
information will be deleted.
EZI ILOH
1 Press the HOME key to display the Home Screen.
2 Touch the
EDIT MODE
button to enter the edit
mode.
3 Move the timeline cursor to the position where you
want to insert a file.
4 Touch the
EDIT
button to display the pull-up menu.
Touch the
Insert File
button on the pull-up menu
to open the
BROWSE
screen.
5 Touch the
e
button to select the media containing
a file to insert on the
BROWSE
screen.
NOTE
If the top page of the
BROWSE
screen is not displayed,
touch
on the screen. The media selection screen
appears.
7–Timeline mode