11–mark and locate functions, Mark functions, Adding marks – Teac HS-2 User Manual
Page 109: Using keys to locate to marks, Mark list screen, 109 mark functions
TASCAM HS-2
109
Mark functions
Adding marks
Use the following methods to create marks.
One timeline mode or one take can have a maximum of
99 marks, including automatically-created marks.
8 Push the MARK key on the front panel.
Press the MARK key to add a mark at that playback/
recording time. In timeline mode, marks are added to the
timeline and file itself.
Mark names are in the format “
MARK XX
”.
8 Use the auto marker function
When the auto marker function is ON, marks can be
added upon PREREC start/ recording start / end when
audio overs occur, at regular time intervals and when
synchronization errors occur (see “OPTIONS page” on page
90.)
In timeline mode, marks are added to the timeline and file
itself.
Marks are named according to how they were made.
When auto marks are made
Mark name
When audio over occurs
OVER xx
At every time interval
TIME xx
When a synchronization error
occurs
UNLK xx
CAUTION
The following auto marks are only added to the file (take),
and will not appear in the timeline in timeline mode.
When auto marks are made
Mark name
Recording start point
REC xx
Recording end point
END xx
Pre-recording start point
PRE xx
NOTE
• “Audio Over” occurs when the level exceeds the
maximum level (full scale) minus the value set by the
user. (In the example above, this would be when the
level exceeds the maximum level minus 0.20 dB.)
• If a mark is triggered using parallel control, a mark is
added in the same manner as if the MARK key had
been pushed.
• When an Audio Over or Synchronization Error auto
marker is added, an additional event of that same
type will not cause a mark to be added until at least 10
seconds have passed.
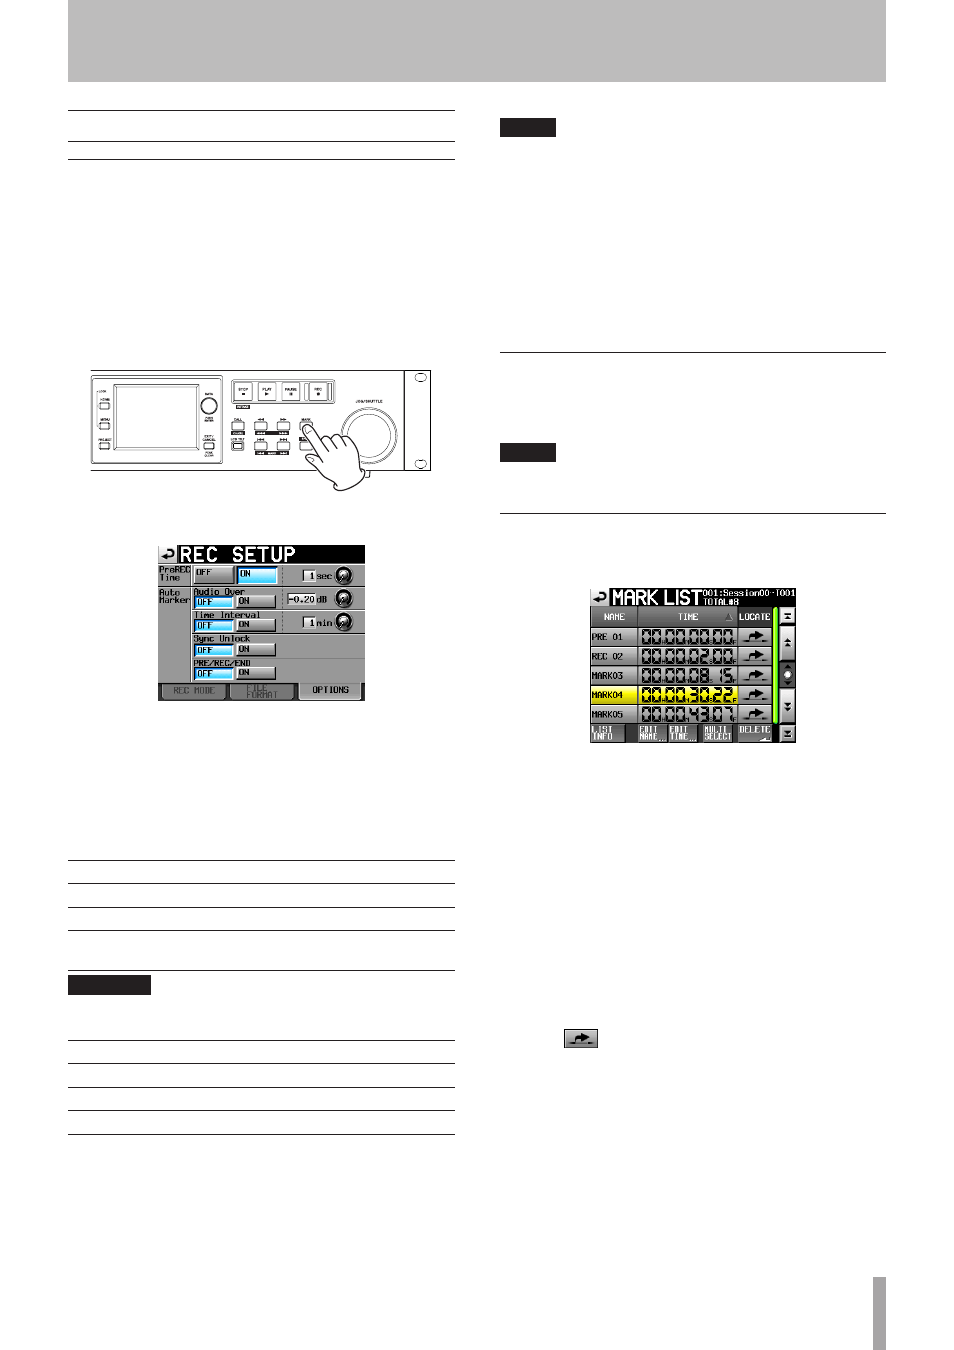
Using keys to locate to marks
Press the . [MARK .] or / [MARK /] key
while pressing and holding the SHIFT key to locate to the
previous or next mark.
NOTE
If MARK SKIP +/– is input using parallel control, the unit
will locate to the next or previous mark.
Mark list screen
Touch the
Mark List
button on the Home Screen to
open the
MARK LIST
screen.
NAME buttons
Touch to sort by mark name in descending or ascending
order.
When the mark names are sorted in ascending order, a
icon appears inside the
NAME
button. When in descending
order, a
icon appears inside this button.
TIME buttons
Touch to sort marks by time in descending or ascending
order. When they are sorted by time in ascending order,
a
icon appears inside the
TIME
button. When in
descending order, a
icon appears inside this button.
Mark name buttons
Touch to select a mark.
LOCATE (
) buttons
Touch one of these to locate to the corresponding mark.
LIST INFO button
Touch this to see a list of the number of marks by type in
the currently selected take.
11–Mark and locate functions