Echelon i.LON SmartServer 2.0 Power Line User Manual
Page 75
i.LON SmartServer 2.0 Power Line Repeating Network Management Guide
61
• If the LNS database is not empty, all the LONWORKS
CHANNELS
and devices on the SmartServer
tree are merged into the database.
The domain length and domain ID properties in the database
are not changed.
After the LNS database has been updated, you can synchronize an LNS application such as the
LonMaker tool to the LNS database and then use it to manage the network.
To switch the SmartServer from standalone to LNS mode and synchronize the network in the
SmartServer tree to an LNS network database, follow these steps:
1. Install the Echelon Enterprise Services on the i.LON SmartServer 2.0 DVD. This contains the
LNS Proxy Web service, which is required to access the LNS databases on an LNS server. See
Installing Echelon i.LON Enterprise Services in Chapter 2 of the i.LON SmartServer 2.0 User’s
Guide for more information on how to do this.
If you install Echelon Enterprise Services SR2 on your computer, you must also install LNS
Server/Turbo Edition SP4 from the i.LON SmartServer 2.0 DVD. See Installing Echelon LNS
Server/Turbo Edition SP4 in Chapter 2 of the i.LON SmartServer 2.0 User’s Guide for more
information on how to do this.
2. Add an LNS Server to the LAN following these steps:
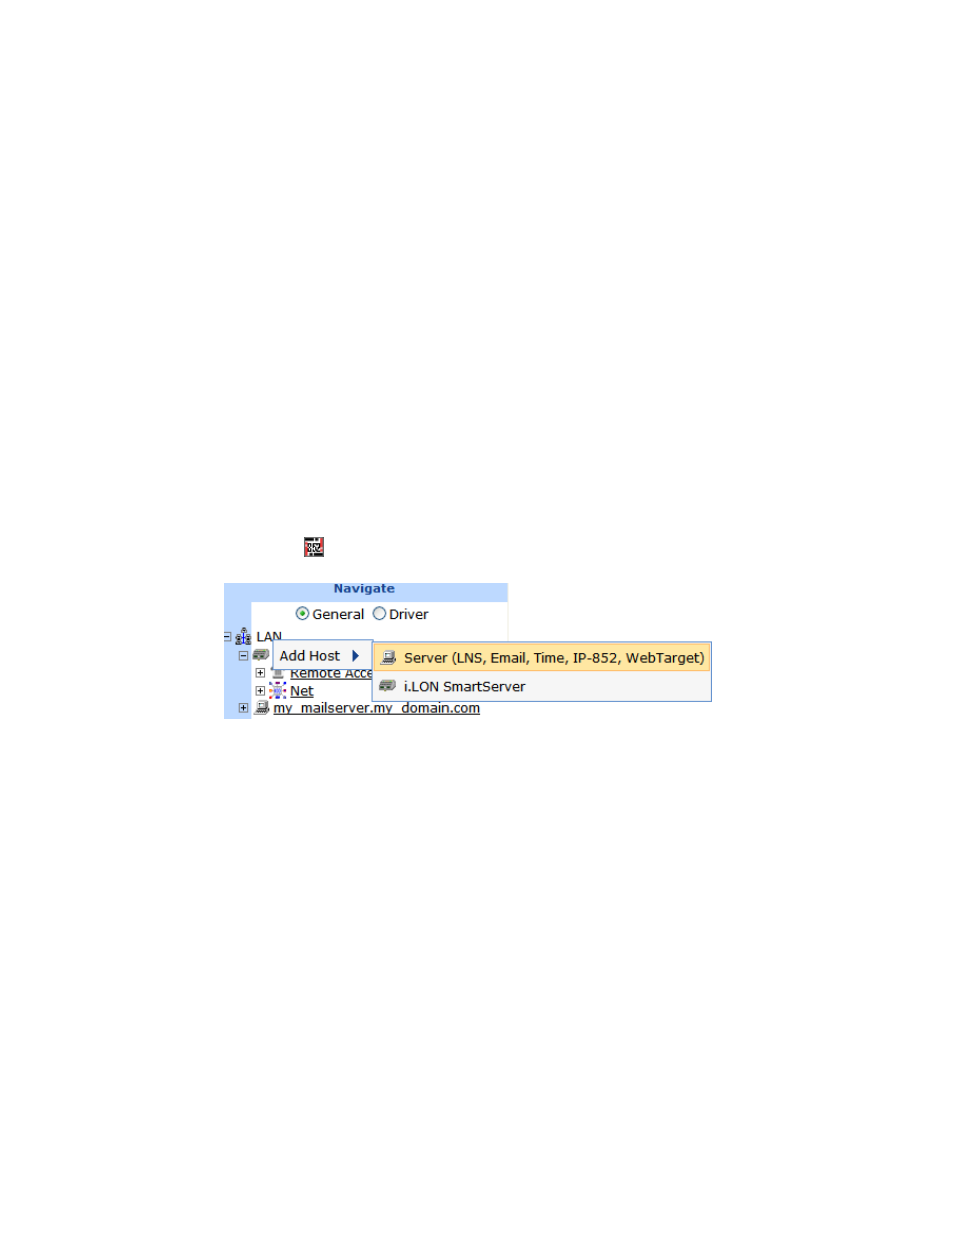
a. Right-click the LAN icon or a dial-out connection icon, point to Add Host, and then click
Server (LNS, E-mail, Time, IP 852 Config, WebTarget) on the shortcut menu.
Note: If IP-852 routing is licensed and enabled on the SmartServer and the IP-852
Configuration Server is installed on the LNS Server computer, click the IP-852 Configuration
Server icon (
), click LNS Proxy, and then skip to step d in order to configure the
properties of the LNS Server.
b. The Setup – Host Web page opens, and a server icon is added one level below the LAN icon
at the bottom of the navigation pane or one level below the dial-out connection icon.
c. Enter the IP address or hostname of the LNS Server and then click LNS Proxy. The server
icon on the tree becomes an LNS Server icon and the Setup – LNS Server Web page opens.