J9 j14, Iqube, Updater, use the – Rice Lake iQUBE2 Digital Diagnostic Junction Box User Manual
Page 65: Is connected to. 3. if necessary, use the, Firmware file (.hex extension). 5. click the, Virtui
Appendix
61
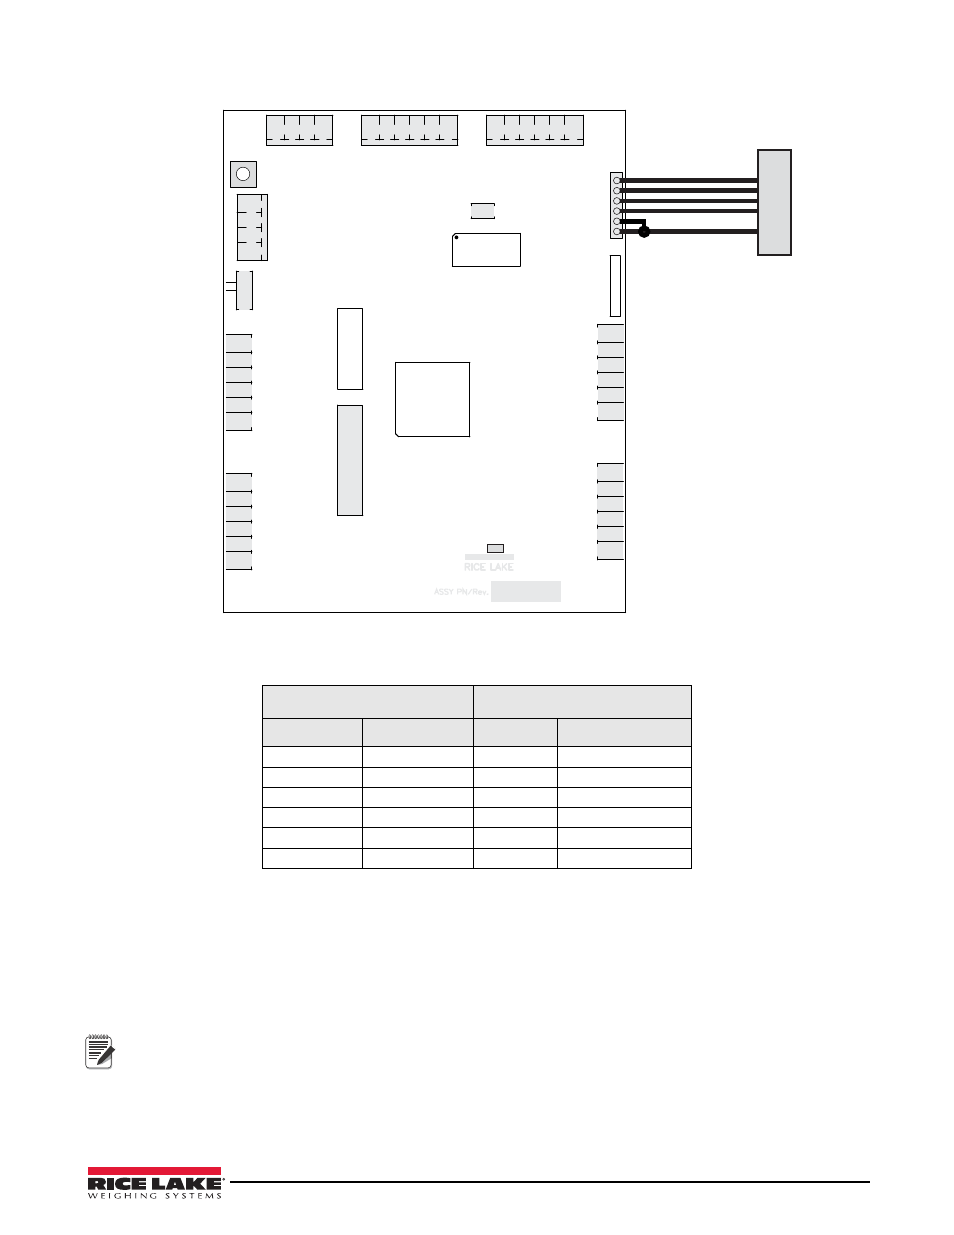
1. Connect the programming cable to the J14 connector as shown in Figure 8-4 and Table 8-5 on page 61.
Figure 8-4. Host Connection to
iQUBE
2
CPU Board
2. In the iQUBE
2
Updater, use the
COM Port
pull-down menu to select which communications port on your PC
that the iQUBE
2
is connected to.
3. If necessary, use the
Baud Rate
pull-down menu to specify a different baud rate.
4. Click the ellipses (...) to browse to and select the iQUBE
2
firmware file (.hex extension).
5. Click the
Program
button. Programming may take up to 1 minute to complete.
A confirmation dialog box appear when the firmware update is complete.
6. Remove the programming cable from the J14 connector.
If you stopped
Virtui
2
Services prior to the firmware update, they need to be restarted. Use the instructions
found earlier in this chapter to access Services, then right-click on the two
Virtui
2
services and select START.
iQUBE
2
J14 Connections
DB-9 Female Connector
Pin
Signal
Pin
Signal
1
GND
5
GND
2
GND1
NC
—
3
TxD
2
RxD
4
RxD
3
TxD
5
DTR
4
DTR
6
RTS
7
RTS
Table 8-5. Host Communications DB9 Connections
J6
POWER SUPPLY
CONNECTOR
S1
SW1
CONFIG SWITCH
S2
1
1
1
COMMUNICA
TIONS
POR
T 2
J9
J14
485 232
HDPLX FDPLX
1 2
GND +V GND +V
1
RTS
DTR
RxD
TxD
GND1
GND
CFG
OFF
HB1
DB9
FEMALE
7
4
3
2
5
RTS
DTR
TxD
RxD
SG
PC SERIAL PORT
PN 112262
Note