4 associating a scale, 2 virtui2 configuration, Associating a scale – Rice Lake iQUBE2 Digital Diagnostic Junction Box User Manual
Page 30: 2 virtui, Starting and logging in to the virtui, Configuration
26
iQUBE
2
Installation Manual
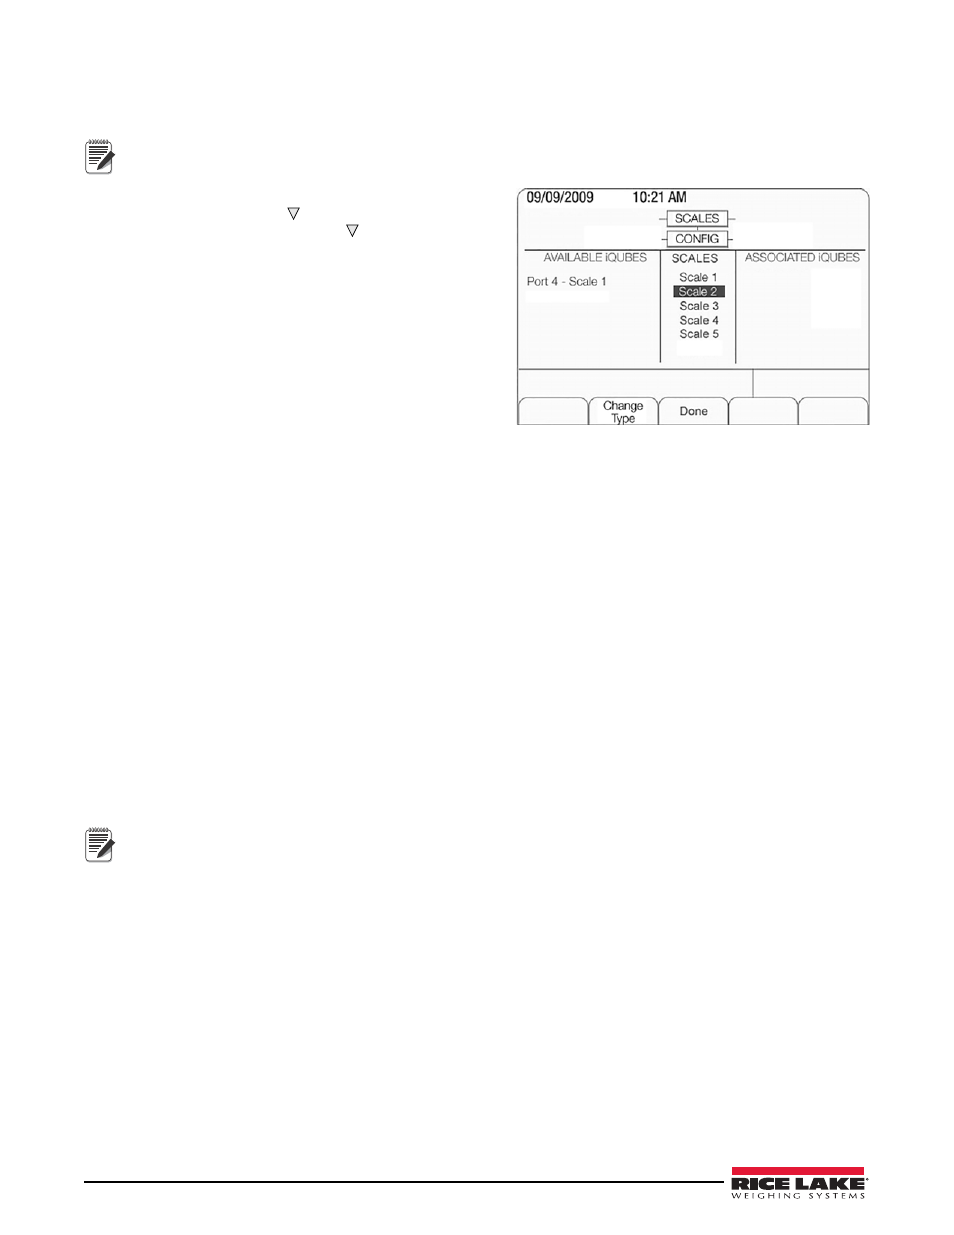
3.1.4 Associating a Scale
If the 920i
isn’t connected to the iQUBE
2
, refer to Section 2.5 on page 8.
Scale 5 is a total scale.
1. From the 920i
,
navigate to the
Scales
menu.
2. Press
ENTER
or
DOWN
( ) to show the
Config
parame-
ter, then press
ENTER
or
DOWN
( ) again to enter the
Scale Association screen.
3. The
Change Type
softkey may need to be pressed until
Available iQUBES and Associated iQUBES is dis-
played, as shown in Figure 3-7.
The Scale Association screen is divided into three
areas:
•
Scales
(middle section): Highlight the scale being con-
figured, then use the
left
arrow key to move to the
Available iQUBES section or the
right
arrow key to
move to the Associated iQUBES section.
•
Available iQUBES
(left section): Highlight the desired
port/scale combination and press the
Add
softkey to
associate the iQUBE
2
.
•
Associated iQUBES
(right section): Lists iQUBE
2
scale that has been assigned to the 920i scale. You can use
the
Remove
softkey to remove the iQUBE
2
from the 920i association. Only one iQUBE
2
scale can be asso-
ciated with a 920i scale. If the 920i scale is associated with another function, such as streaming or a set-
point, that association needs to be removed first.
4. Press
Done
when all required iQUBE
2
scales have been assigned to 920i scales.
3.2
Virtui
2
Configuration
iQUBE
2
configuration through Virtui
2
Configuration Utility is divided into five sections: Info, Device Configura-
tion,
Communications, Load Cells,
and
Load Cell Assignment. Use the icons in the left pane of Virtui
2
to navigate
between sections.
3.2.1 Starting and Logging in to the Virtui
2
Configuration Utility
1. From the Windows
Start
menu, select All Programs»Rice Lake Weighing Systems»Virtui2 Configuration.
Or, from Virtui
2
, select Virtui Configuration from the
Settings
menu.
2. From the
File
menu, select Login.
To access configuration options, you must be logged in as a user with administrator rights.
3. Enter the username and password, then click
OK
to log in.
The default user name is Administrator; the default password is blank. (User names and passwords can be
edited by selecting User Manager under the File menu.)
Note
Figure 3-7. Scale Association screen
Note