Installing the blower assemblies – Dynojet 250i: Pit Installation Guide User Manual
Page 46
In Ground Model 200iP/250iP Motorcycle Dynamometer Installation Guide
C H A P T E R 2
Blower and Monitor Support Installation
2-24
I
NSTALLING
THE
B
LOWER
A
SSEMBLIES
The high pressure blowers are an optional accessory. If you did not order high
pressure blowers, skip these steps.
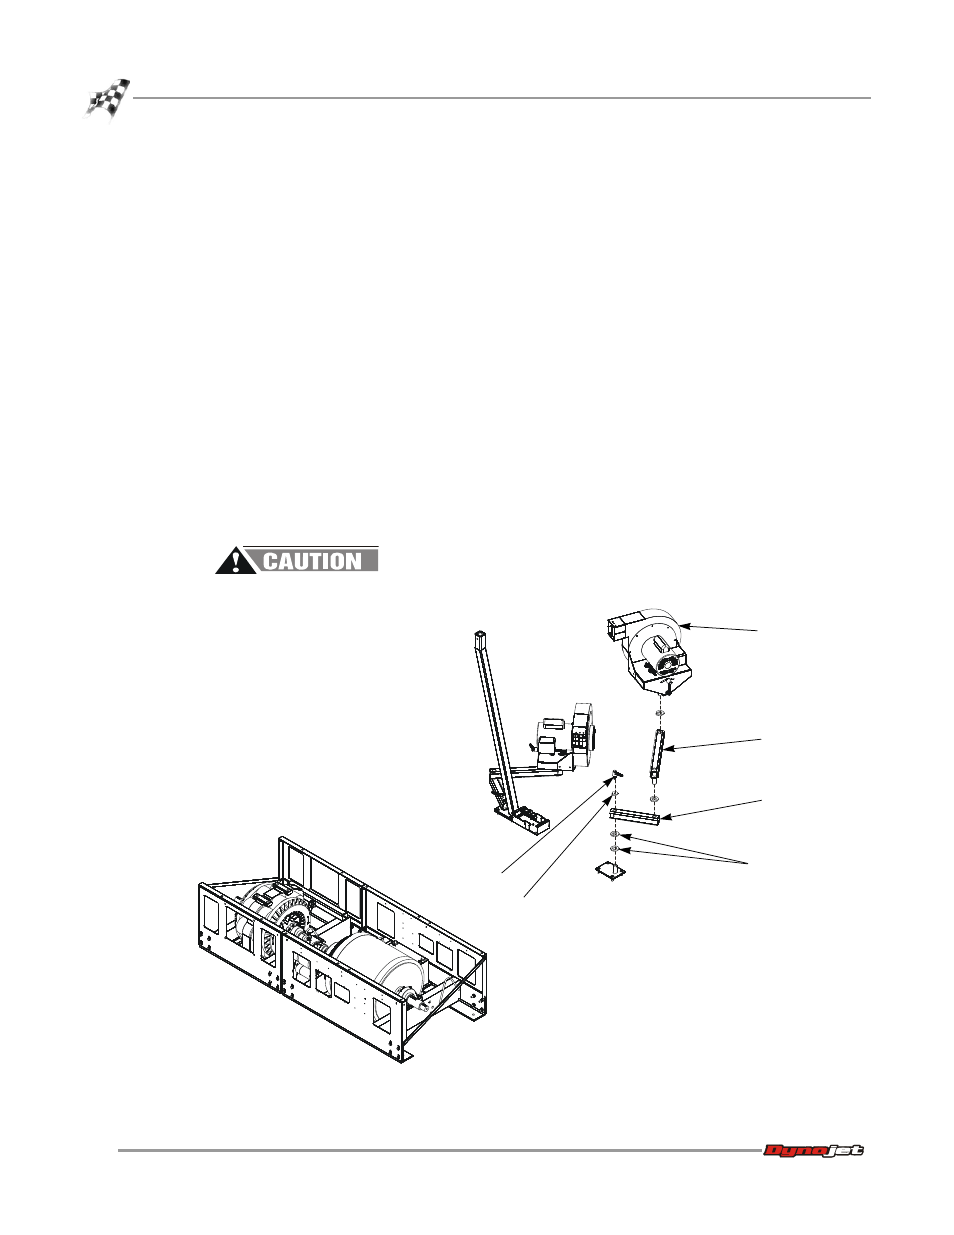
Use the following instructions to install both the left and right blower assemblies.
Note: Tire carriage not shown for clarity.
1
Insert a plastic cap in both ends of each arm.
2
Place two 1/4-inch thick poly washers around the pin on the blower mount.
Note: Use only one 1/4-inch thick poly washer around the pin on the left blower
mount.
3
Place the lower blower arm over the blower mount pin.
4
Place a 3/8-inch thick metal washer on top of the lower blower arm.
5
Secure the lower blower arm using the clamp lever.
6
Place a 1/8-inch thick poly washer around the pin on the upper blower arm.
7
Insert the pin on the upper arm into the lower arm.
8
Place a 1/8-inch thick poly washer around the pin on the blower assembly.
9
Insert the pin on the blower assembly into the upper arm.
The blowers can run at any time once the cord is plugged into a power source.
Figure 2-19: Install the Blower Assemblies
PD160
right blower
assembly
aluminum washer
1/4-inch thick
poly washer
lower blower
arm
clamp lever
upper blower
arm