Carriage plate and tire carriage, Installing the carriage plate – Dynojet 250i: Pit Installation Guide User Manual
Page 40
In Ground Model 200iP/250iP Motorcycle Dynamometer Installation Guide
C H A P T E R 2
Carriage Plate and Tire Carriage
2-18
. . . . . . . . . . . . . . . . . . . . . . . . . . . . . . . . . . .
CARRIAGE PLATE AND TIRE CARRIAGE
Use the following instructions to install the standard carriage or optional extended
carriage.
The tire carriage is fastened to the bottom of the crate next to the dyno. Refer to page
2-2 for instructions on removing the tire carriage from the crate.
You will need the following parts:
• 37513200
Anchor, Redhead, 3/8" (4)
• 37518200
Installation Tool, Redhead Anchor
• 71323006
Standard Carriage
71323007
Extended Carriage
• DM150-002-007
Washer, 5/16", Flat (4)
• DM150-019-012
Bolt, 3/8-16 x 1", Hex (4)
I
NSTALLING
THE
C
ARRIAGE
P
LATE
1
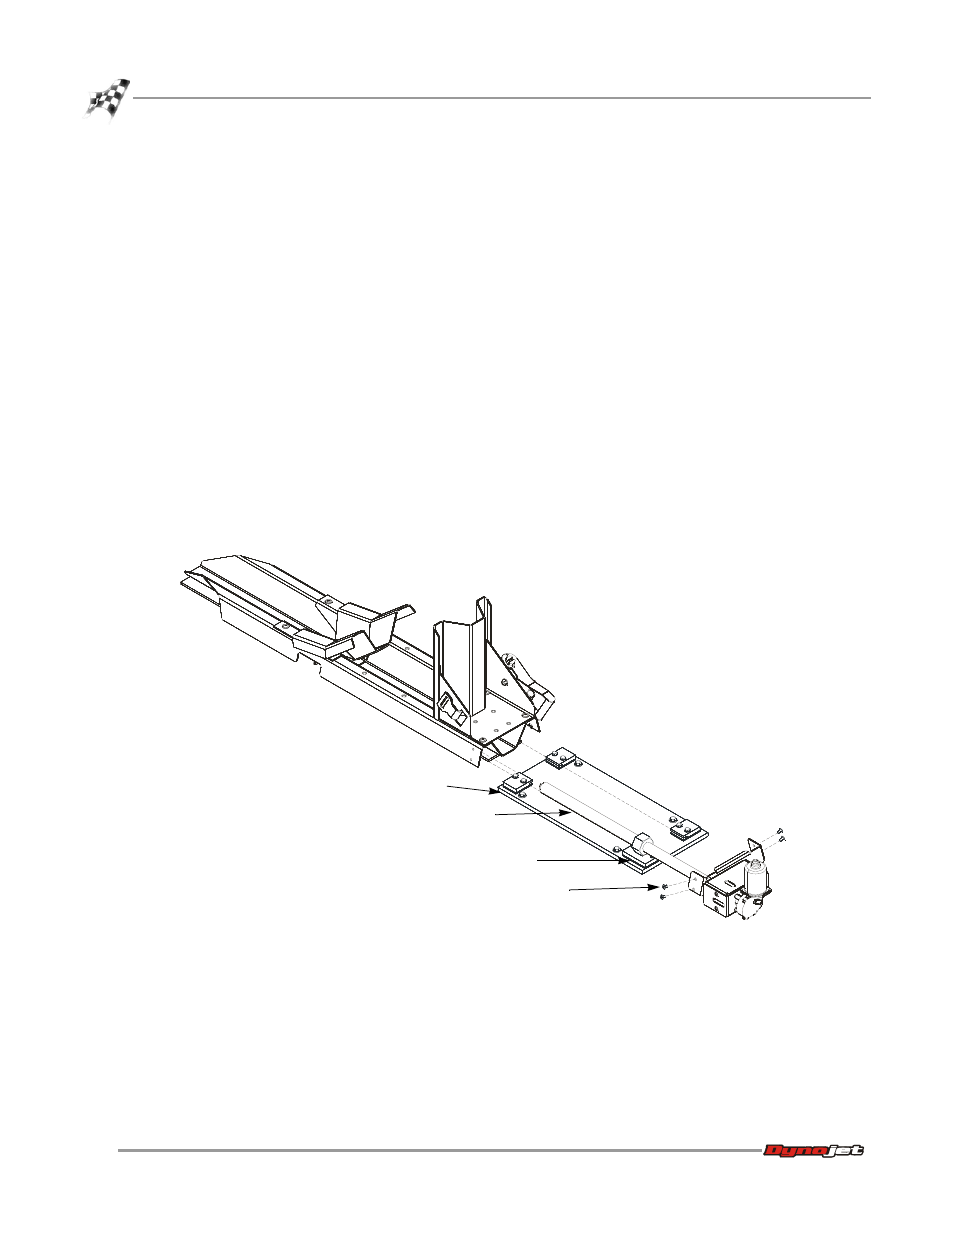
Remove the four bearing plate screws and slide the carriage from the carriage
plate.
Figure 2-13: Remove the Carriage From the Carriage Plate
TC062
carriage plate
carriage screw
nut block
bearing plate
screws