Figure 8 installing the signalhawk into a rack, Connecting the rack-mount via usb connection – Bird Technologies SH-36S-RM-Manual User Manual
Page 30
Bird Technologies
14
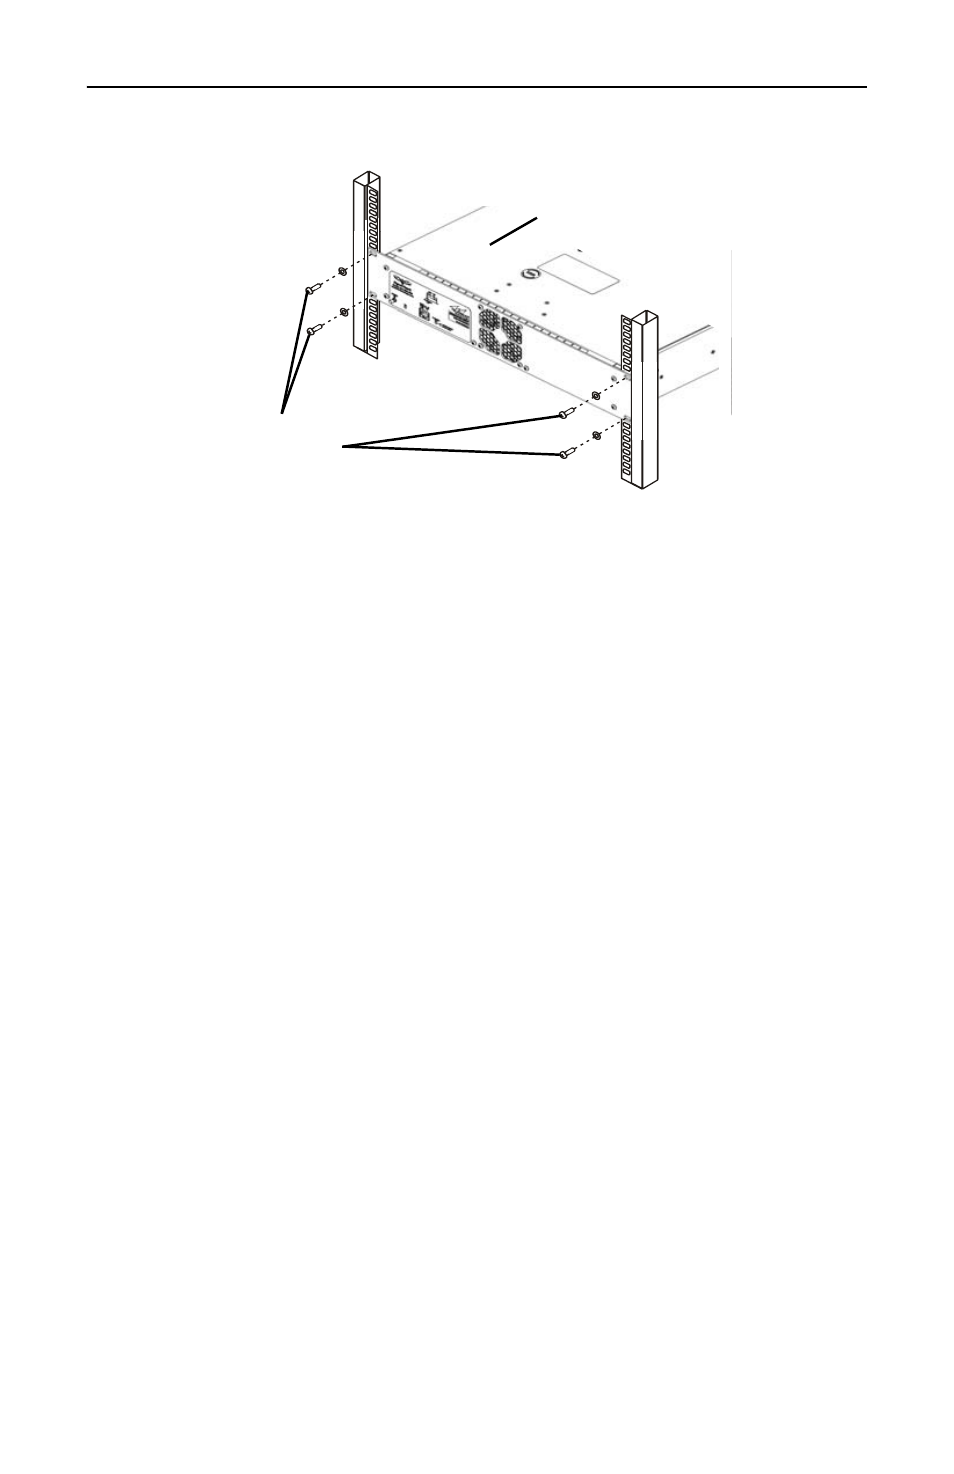
Figure 8 Installing the SignalHawk into a Rack
Connecting the Rack-Mount via USB Connection
1. Insert installation CD into host PC.
2. Select Install Software when prompted.
Note:
Install the PC software before connecting the Rack
Mount SignalHawk for the first time.
Note:
Set-up will inspect the computer for any missing
operating system prerequisites. If all are present, skip to step 6.
3. Select “Next” and the install utility begins the Prerequisites
Installation process.
4. Review the End-User License Agreement, check “I accept the
terms of the License Agreement” and select “Install.”
Note:
The install utility will install the prerequisites. This
may take several minutes.
Note:
When completed, check with Microsoft
®
support cen-
ter for any security updates. Typically, if “Automatic Updates”
are configured on the host PC, these will be automatically
flagged and selected for download and installation.
Note:
The installation utility will launch after the OS pre-
requisites are installed.
5. Do one of the following:
z
Accept the default installation location.
z
Select a different folder.
6. Select “Next” and the installer will complete.
7. Select “Finish” to launch the SignalHawk program.
8. Connect Rack Mount SignalHawk to a PC using the supplied USB cable.
Note:
The “USB Host Power” LED will illuminate when host
port is active and has power. It is not an indication of proper USB
connectivity to the host. Refer to software installation instructions
for how to address the PC SignalHawk from the host.
Mounting
Screws and
Washers
Rack Mount
SignalHawk