Rockwell Automation MinPak Plus DC Drives Kits User Manual
Page 21
20
Step 5 Ċ When the voltage across F1 and F2 is at the
proper level, put the POWER ON/OFF circuit breaker in
the OFF position and close the Chassis Cover.
4.3.3 Drive Motor Check Ċ It is necessary to determine
if the drive motor is rotating in the direction required by
the application. (Note that the motor is not connected to
the load at this time if all steps to this point have been folĆ
lowed.)
Step 1 Ċ Apply the main aĆc line power by closing the
disconnect.
Step 2 Ċ On the Regenerative MinPak Plus controller,
place the SPEED potentiometer at a setting between 1
and 4.
Step 3 Ċ Place the FORWARD/REVERSE selector
switch in the FORWARD position.
Step 4 Ċ Place the RUN/JOG selector in the JOG posiĆ
tion.
Step 5 Ċ If the Operator Station has an AUTO/MANUAL
selector switch, place it in the MANUAL position.
Step 6 Ċ Push and hold in the START/STOP rocker
switch to the START position. The drive should accelerĆ
ate to the speed set on the potentiometer. Release the
switch, and the drive will stop.
CAUTION: If the drive motor does not begin turning
at this time, press the STOP rocker switch immediĆ
ately. Put the POWER ON/OFF circuit breaker in the
OFF position. Open the main aĆc line disconnect.
Begin an organized troubleshooting procedure to
determine why the motor does not operate. Do not
leave power on.
Step 7 Ċ If the drive works properly in the JOG mode,
place the control in the RUN mode and repeat Steps 4
thru 6.
Step 8 Ċ Observe the direction of rotation of the shaft.
If it turns in the desired direction, proceed to Paragraph
4.3.4. If the motor is turning in the opposite direction,
continue with these Steps.
Step 9 Ċ On the Operator Station put the START/STOP
rocker switch in the STOP position. Put the POWER ON/
OFF circuit breaker in the OFF position. Open the main
aĆc line disconnect switch.
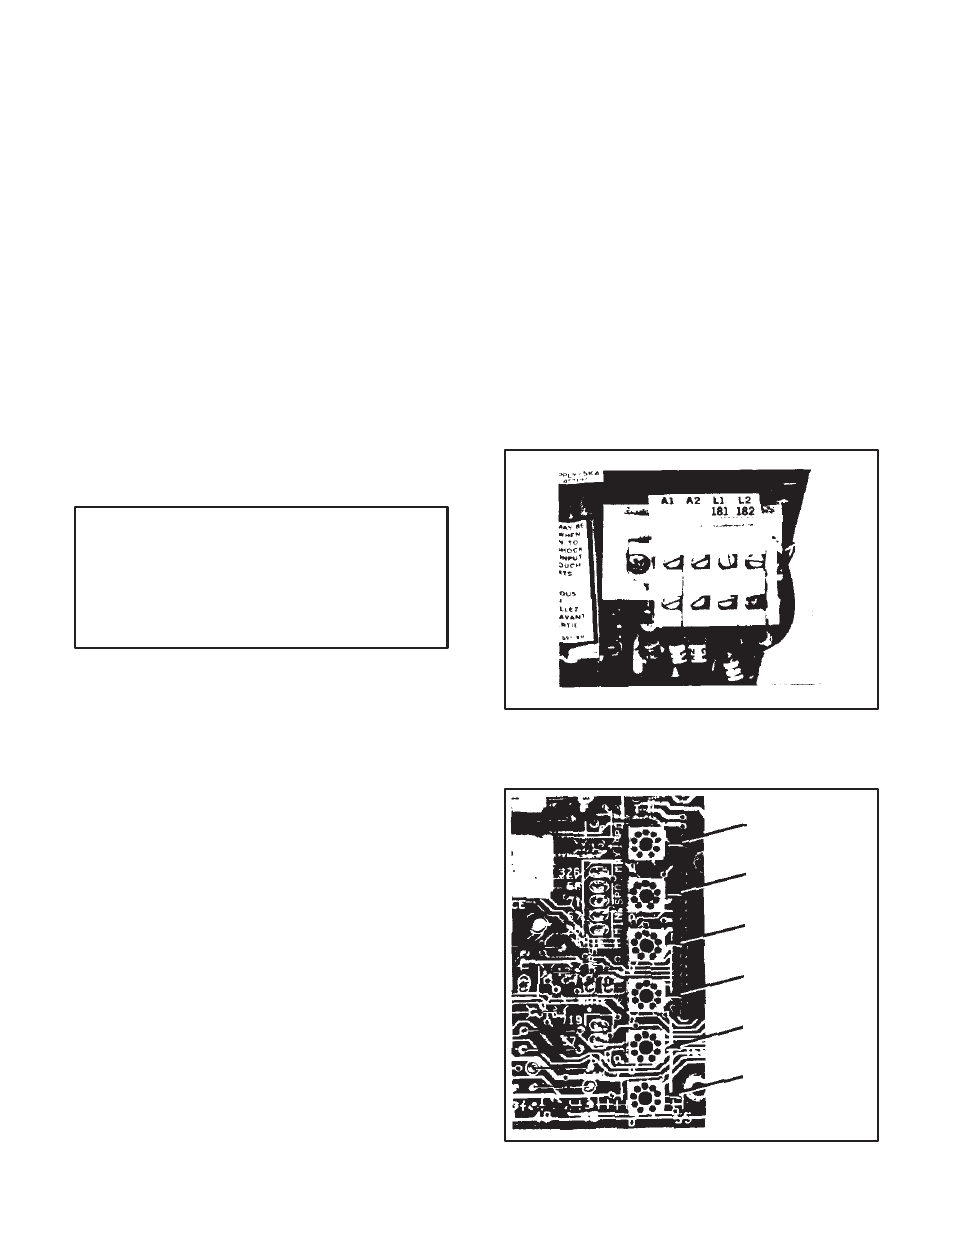
Step 10 Ċ Open the Cover and locate terminal barrier
1TB. (Refer to Figure 4.6.) Locate terminals A1 and A2,
which are the conductors connected to the armature. ReĆ
verse the position of these conductors.
Step 11 Ċ Return to Step 1 and. at Step 9, observe the
direction of shaft rotation to confirm proper turning and
motor performance.
Step 12 Ċ Do not turn any power off at this time. Go diĆ
rectly to Paragraph 4.3.4 and begin the setĆup adjustĆ
ments.
4.3.4 Regulator Module Pots Ċ The Regulator Module
has six adjustable potentiometers mounted on it. (Refer
to Figure 4.7.) They control the following functions:
D Maximum speed (full CCW: 50% speed)
D Minimum speed (full CCW: zero speed)
D Rate 1 (FORWARD acceleration, REVERSE decelĆ
eration)
D Rate 2 (REVERSE acceleration. FORWARD decelĆ
eration)
D Current limit #1 (+) (factory set at 150%)
D Current limit #2 (-) (factory set at 150%)
The pots are factory preset for the safest or most conserĆ
vative operation. At this time there should be no need to
make adjustments.
4.3.5 SpeedAdjustment Ċ The basic speed of the
drive is operatorĆcontrolled by the master speed potenĆ
tiometer.'' (This assumes that the AUTO/MANUAL is in
the MANUAL position.) The dial is located on the OperaĆ
tor Station and is marked SPEED.
Adjustments can be made with this control when the
drive is at rest or running.
When the drive is started, it automatically accelerates to
the speed selected on the SPEED dial. The numbers 1
thru 10 represent percentages of maximum speed.
Figure 4.6 - Terminals A1, A2 on 1TB
Max Speed
Min Speed
Rate 1
Rate 2
Current Limit 1
Current Limit 2
Figure 4.7 - Regulator Module Pots