Rockwell Automation 1557 MEDIUM VOLTAGE AC DRIVE User Manual
Page 155
OPERATOR INTERFACE TERMINAL PV-550 REV E
7-31
1557-UM050F-EN-P – June 2013
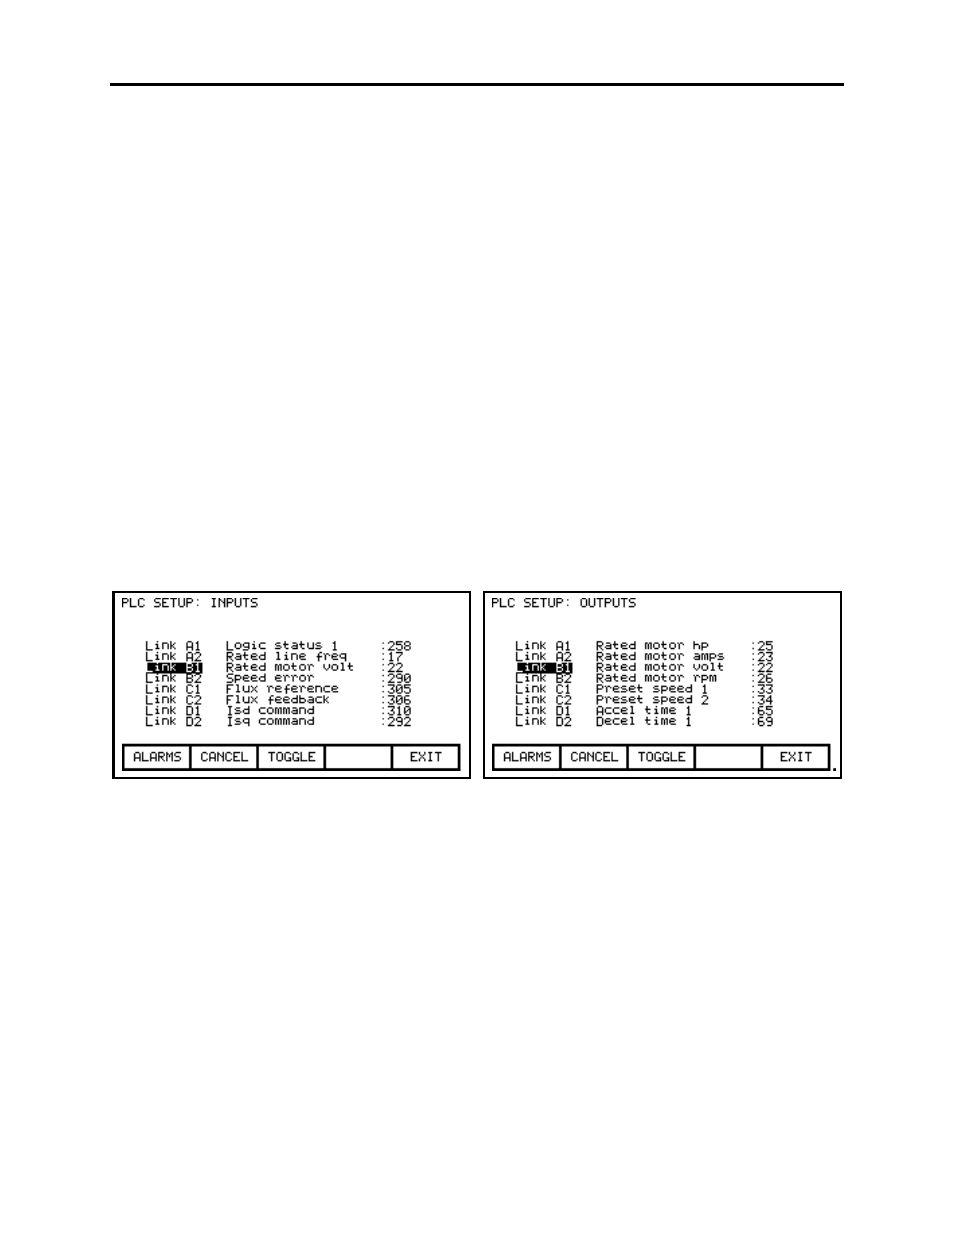
PLC
The drive can be optionally connected to a PLC via a RIO (Remote Input/Output) adapter. The
drive appears to the PLC as a rack of information. The tags which are associated with each of the
words within a rack can be defined. To setup the PLC link, press [F3] on the SETUP screen.
This will display a screen as shown in Figure 52 or 53. The PLC setup consists of eight words of
input and eight words of output. These are shown on separate screens. The type of PLC word
being viewed is defined to the right of the screen name, ie. PLC SETUP: INPUTS or PLC SETUP:
OUTPUTS. To switch to the other screen, press the [F8] key. Each press of the [F8] key will
toggle the screen to show the other set of words.
The layout of the PLC 'rack' is dependent on the DIP switch settings on the RIO adapter, (refer to
Publication 1203-5.1, "Bulletin 1203 Remote I/O Communications Module" for information on
the RIO adapter and its use). Tags are assigned to rack module locations in pairs. These pairs
are referred to as links and consist of two input and two output words. There are a total of four
links which can be assigned to the RIO adapter.
The screens show the current tags and their tag code which are associated with each of the links.
To change the tag attached to a link, use the [cursor up] and [cursor down] keys to highlight the
desired link and press the [enter] key. (If nothing happens then you have not gained the required
access to make changes. Exit to the SETUP screen and refer to the section entitled
"Enter/Modify a Password (Access)" to gain access).
This will begin the selection process of a tag as described in the section entitled "Select a
Parameter/Variable". When selecting a tag for the output words, only parameters will be allowed.
Both variables and parameters are allowed for the selection of input words. When you have
completed the selection process, the selected tag will be assigned to the link. To remove an
assignment to the highlighted link, press the [delete] (Backspace) key.
The changes made do not take affect until you press [F10] and exit the screen. Any time prior to
this you may cancel all of the changes made after coming to the screen by pressing the [F7] key.
Figure 52
– PLC Inputs Setup Screen
Figure 53
– PLC Outputs Setup Screen