SkyTrak 6036 Service Manual User Manual
Page 81
3-39
6036, 6042, 8042, 10042, 10054
Boom
3.7.9
Retract Chain Removal and
Replacement
(6036, 6042, 8042 & 10042)
1. Park the machine on level ground. Place the
transmission control lever in (N) NEUTRAL, engage
the parking brake switch, level the boom and shut
the engine OFF.
2. Place a Do Not Operate Tag on both the ignition key
switch and the steering wheel, stating that the
machine should not be operated.
3. Properly disconnect the battery.
4. Remove the boom rear cover.
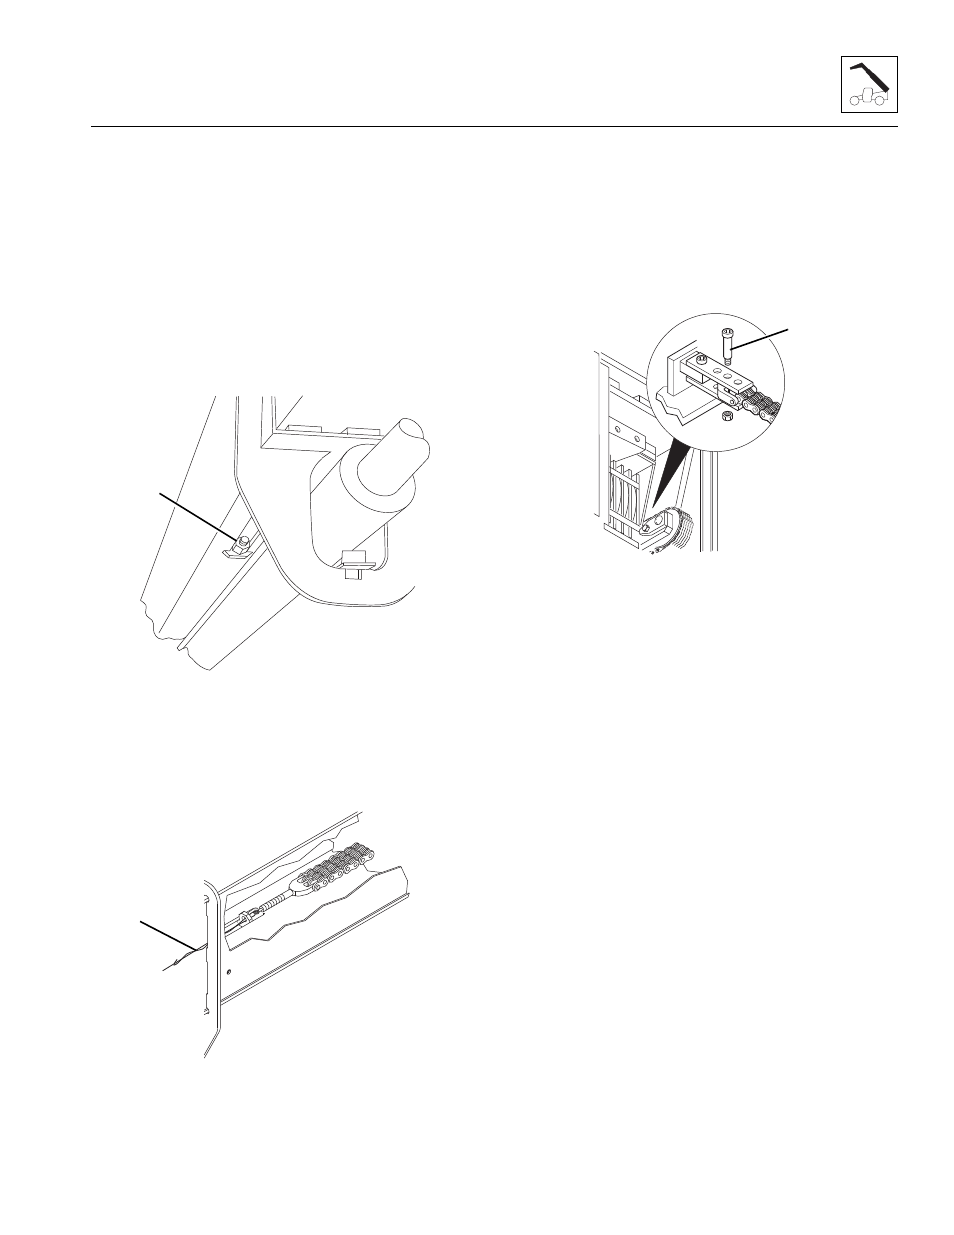
5. At the front underside of the boom, record the
amount of threads extending beyond the locknut
(13). This measurement will be the starting point for
adjustment of the boom retract chain.
6. At the front underside of the boom, loosen the
locknut far enough that it can be removed by hand.
7. Attach a wire or string (14) to the threaded clevis
with a threaded eye or a flat washer tack welded to a
capscrew. The outside diameter of the eye or flat
washer must be smaller than the diameter of the
threads on the clevis. The wire or string will be used
to pull the chain back through the boom during
reassembly.
8. Remove the locknut and flat washer holding the
retract chain threaded clevis to the mounting tab.
Note: Record the location of the shoulder bolt to ensure
correct installation.
9. At the rear of the boom, locate the two retract chain
anchor plates holding the retract chain to the third
boom section just in front of the retract chain sheave.
Remove the locknut and shoulder bolt (15) holding
the retract chain clevis to the anchor plates. The two
anchor plates can remain in place on the third boom
section.
10. From the rear of the boom, pull the retract chain out
of the rear of the boom.
11. Inspect wear and condition of the booms, chains,
clevis’, chain sheaves, Extend/Retract cylinder, chain
rods, clevis anchors and all mounting hardware.
Replace a worn or damaged chain. DO NOT attempt
to make any repairs to the chain.
Note: Chains and clevis’ are wear items and experience
the same stress. DO NOT attempt to repair a chain.
Replace a stretched or damaged chain with a new part.
Always replace both the chain and the clevis’.
12. Remove the string from the old chain and attach it to
the new clevis.
13. Coat the threads of the threaded clevis with multi-
purpose grease.
OA0513
13
MA9441
14
MH2551
15