Triton TritonNav User Manual
Page 27
2004.06.28
CHAPTER 1: Using DelphNav™ (Survey Control Panel)
21
Using Delph Nav
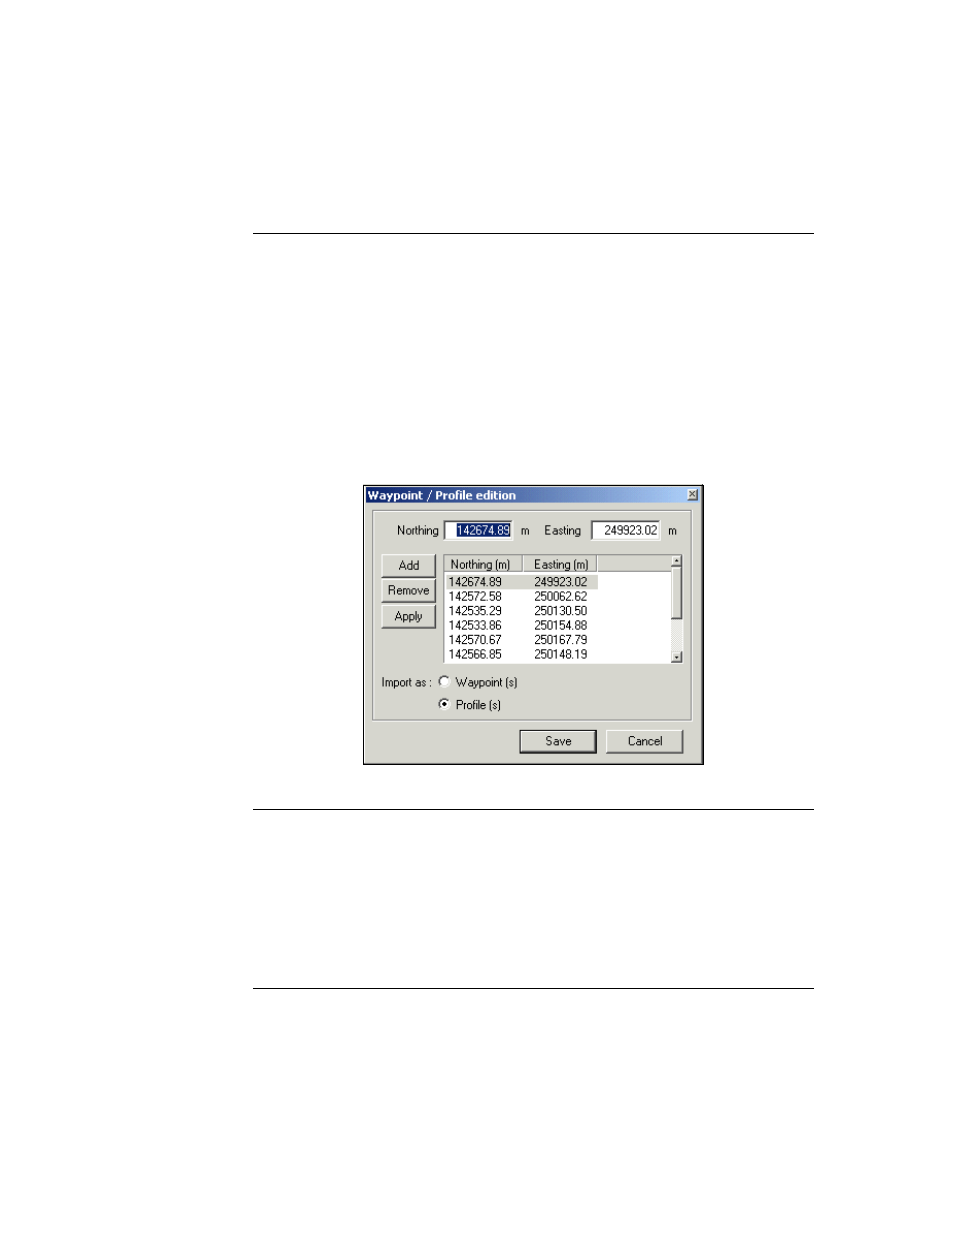
Making or Using a Survey Plan
2.
Type in a pair of coordinates in the Northing and Easting fields of this dialog box.
Click
Add
to add the pair of Northing and Easting values spreadsheet. To delete a way-
point, select the Northing/Easting couplet from the spreadsheet list and click on
Remove
.
3.
Continue to specify new Northings and Eastings and
Add
them to the list until you
have as many paired points as you want. If any coordinates need to be modified, high-
light the point of interest in the spreadsheet list; the corresponding Northing and East-
ing values will be shown in the edit fields at the top of the dialog box. Change the
coordinate values and then click the
Apply
button; the values associated with that
point will change in the spreadsheet list.
FIGURE 10.
Waypoint/Profile editing dialog box, with sample data
4.
When your list is complete, choose either the
Waypoint(s)
or
Profile(s)
import option.
5.
Click
Save
to close the Waypoint / Profile Editing dialog box and register the Points or
Profile in the Survey Control Panel window and in DelphNav.
If you chose
Waypoint(s)
in the Waypoint / Profile Editing dialog box, the system
marks your imagery with crosses at the paired points. These waypoints are shown in
the Points window of the Survey Control Panel (select the Points tab).