4 adding a filter cartridge – Techne PrimeQ User Manual
Page 33
33
• Excitation/emission wavelengths: As defined in the Add Cartridge settings box.
• Dye name: Each cartridge can be assigned up to four different dye names of the user’s
choice.
1.16.4
Adding a filter cartridge
• In the Access and Editing screen of the Filter Wizard, click the Add button next to the
appropriate filter. The
Add Cartridge screen will appear.
• Set the wavelengths and bandwidths for the excitation and emission filters.
This information can be found on the side of the filter cartridge.
These filter details become the filter ID such that the fluorophores are viewed or chosen by the dye
name. The input table can hold details for the four filter positions of the carousel.
• Click Next.
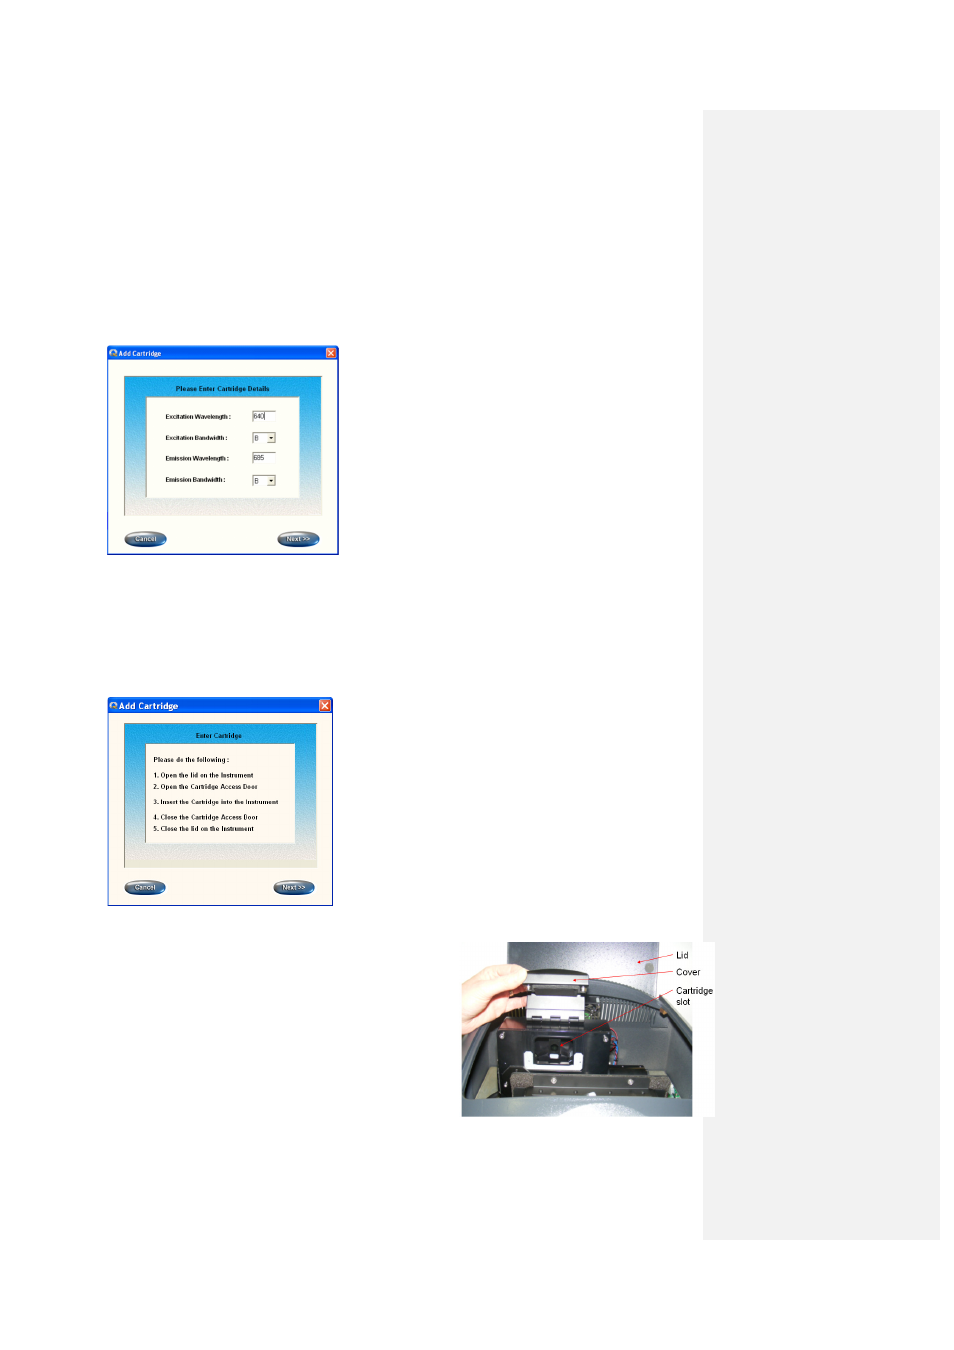
A screen appears prompting the user to perform a five-step procedure.
1. Lift the top lid of the PrimeQ.
2. Lift the cartridge/carousel cover.
3. Insert the cartridge and ensure that the magnets
engage to hold it in place; you will hear a “click” as
the magnets engage. It is important that the
cartridges are fitted correctly.
4. Close both lids.
5. Once the cartridges have been installed in the unit, it
is the user’s responsibility to assign filter descriptions
so that the application software knows what type of
filter is located in which position of the carousel.