Install the electrical box (if required), Install the screen – Extron Electronics PoleVault Digital Switcher Systems PVS 405D User Manual
Page 31
8. Install the Electrical Box (If required).
WARNING: Improper installation may result in
electrical shock or serious injury.
All electrical installation should be performed by
qualified personnel in accordance with local and
national building codes, fire and safety codes, and
local and national electrical codes.
If required, the following method is recommended for
integrating a 4S RACO
®
electrical box (not supplied) on
the PCM base plate (for example, a RACO 232, 2 1/8
inch deep, 4x4 inch electrical box and a RACO 778,
1/2 inch raised, 4x4 inch plaster ring or similar).
Install the RACO box on the PCM plate as follows:
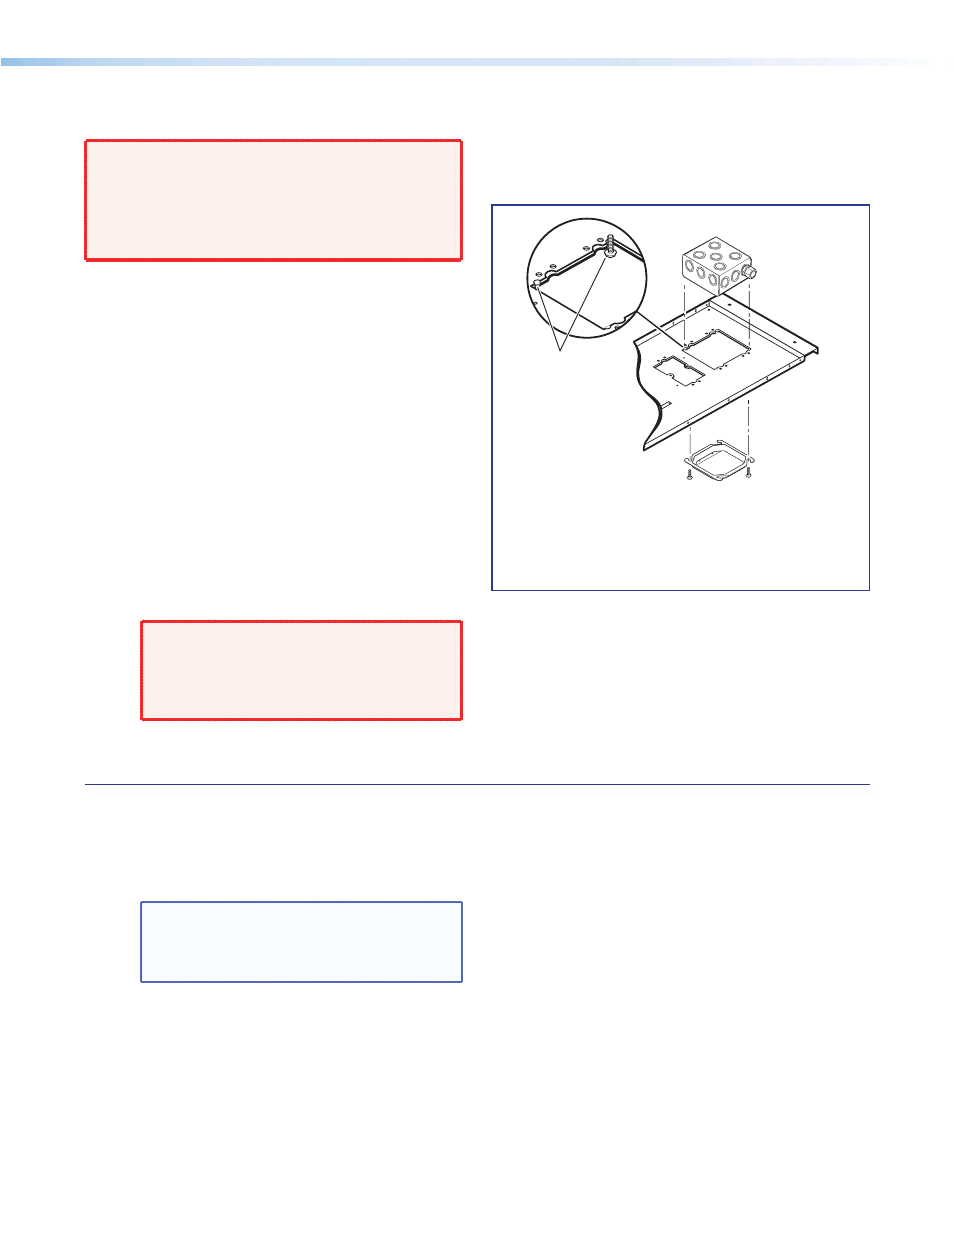
a. Attach the box to the plate, using the smallest
notches in opposite corners of the cut-out (see
figure at right). Do not tighten the screws fully at
this time.
b. On the opposite side of the PCM plate, slide
the plaster ring under the screws. The plaster
ring anchors the box in place with PCM plate
sandwiched between.
c. Fully tighten the screws.
WARNING: May result in electrical
shock or serious injury. For safety,
complete
all wiring of the electrical boxes
and accessories
after the plate is fully
installed and secured.
d. Mark and cut a hole in the ceiling tile for the
electrical box opening.
9. Install the Screen.
a. Following the guidelines given by the screen
manufacturer, continue to install the screen
mounting brackets and then hang the screen.
TIP: Use S-hooks to hang the screen
from the brackets. Bend the ends of the
S-hooks so the screen does not fall when
it is rolled up.
Use the smallest
notches when
attaching the
RACO box.
RACO box
RACO 778
Plaster Ring
é
Install the RACO box and plaster ring onto
the PCM 340.
PoleVault Digital Systems • Installation — Stage 1 (Screen and Projector)
25