Figure 35 voip wizard configuration, Table 15 voip wizard configuration – ZyXEL Communications P-2602HWLNI User Manual
Page 80
Chapter 4 VoIP Wizard
P-2602HWLNI User’s Guide
80
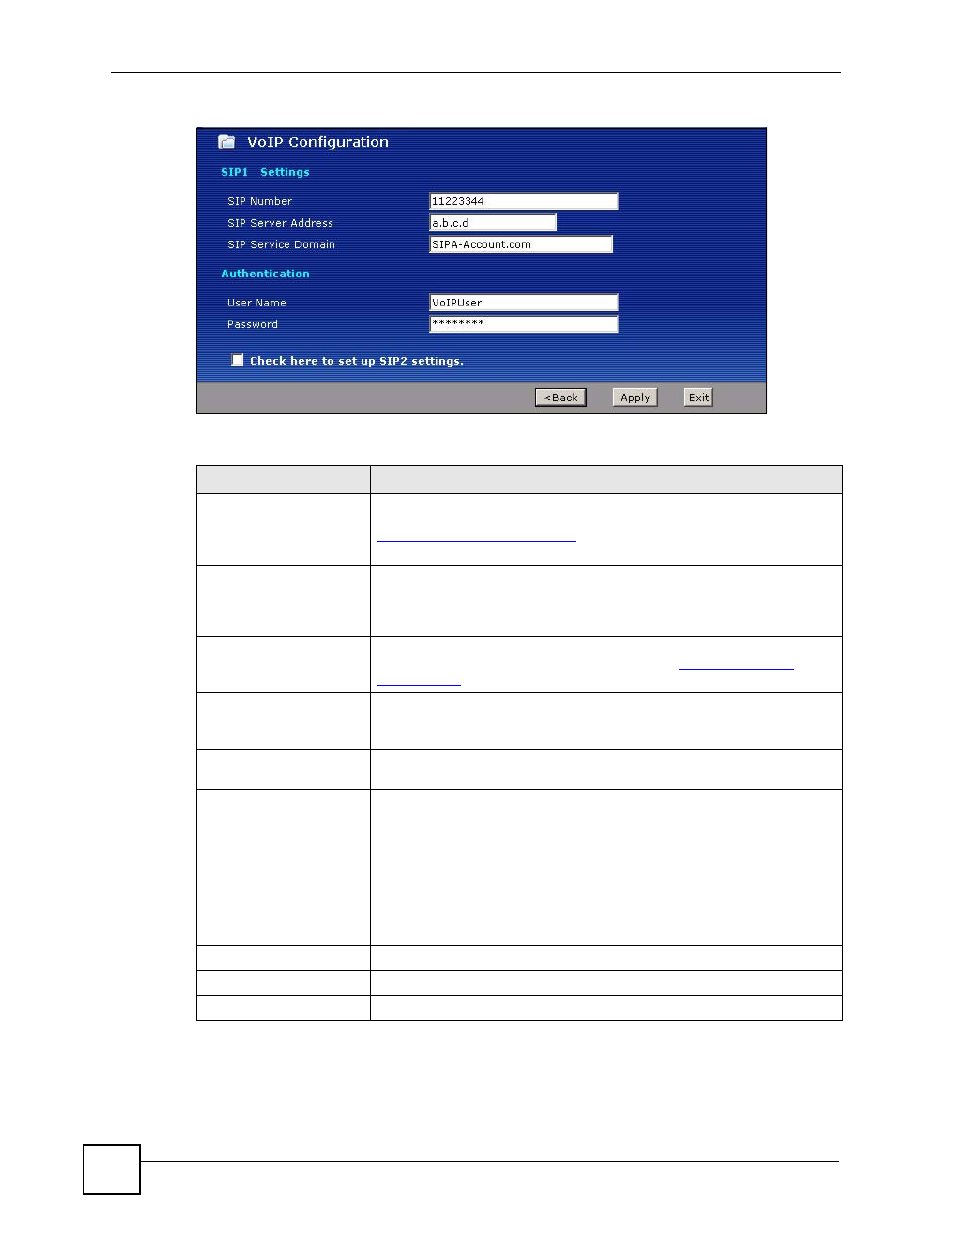
Figure 35 VoIP Wizard Configuration
The following table describes the labels in this screen.
5 When the SIP registration test screen displays, your ZyXEL Device attempts to register
your SIP account with your VoIP service provider. Wait until it finishes.
Table 15 VoIP Wizard Configuration
LABEL
DESCRIPTION
SIP Number
Enter your SIP number in this field. Use the number or text that comes
before the @ symbol in a SIP account. If your SIP account is
, your SIP number is “11223344”. You can
use up to 127 ASCII characters.
SIP Server Address
Type the IP address or domain name of the SIP server in this field in
dotted decimal notation (for example 192.168.3.1). It doesn’t matter
whether the SIP server is a proxy, redirect or register server. You can use
up to 95 ASCII characters.
SIP Service Domain
Enter the SIP service domain name in this field (the domain name that
comes after the @ symbol in a SIP account like
11223344@SIPA-
Account.com
). You can use up to 127 ASCII Extended set characters.
User Name
This is the username you use to login to your SIP account and to register
this SIP account with the SIP register server. Type the user name exactly
as it was given to you. You can use up to 95 ASCII characters.
Password
Type the password associated with the user name above. You can use up
to 95 ASCII Extended set characters.
Check here to set up
SIP2 settings.
This screen configures SIP account 1. Select the check box if you have
a second SIP account that you want to use. You will need to configure
the same fields for the second SIP account.
Note: If you configure more than one SIP account, you need
to configure Analog Phone settings to distinguish
between the two accounts when you make and
receive phone calls.
Back
Click Back to return to the previous screen.
Apply
Click Apply to complete the wizard setup and save your configuration.
Exit
Click Exit to close the wizard without saving your settings.