Device installation or removal procedure, Inch hard disk drive – NEC 140He User Manual
Page 263
9-5
DEVICE INSTALLATION OR REMOVAL PROCEDURE
Install or remove a component from the server as follows.
3.5-inch Hard Disk Drive
The 3.5-inch device bay on the front of the server contains five slots in which hard disk drives can be installed. The
device bay is not equipped with any hard disk drives (excluding when one or more built-in hard disk drives are ordered).
Purchase additional hard disk drives if required.
IMPORTANT:
Do not use any hard disk drives that are not authorised by us. Installing a third-party's
hard disk drive may cause a failure of the server as well as the hard disk drive.
The supported RAID level depends on the disk array controller to be used.
–
Onboard
RAID:
RAID0, RAID1, and RAID5 (See "Disk Array Configuration" in this chapter.)
– Optional disk array controller:
Refer to the manual that comes with the disk array controller. (If you purchased the
board by BTO (built-to-order), the manual is provided with the server.)
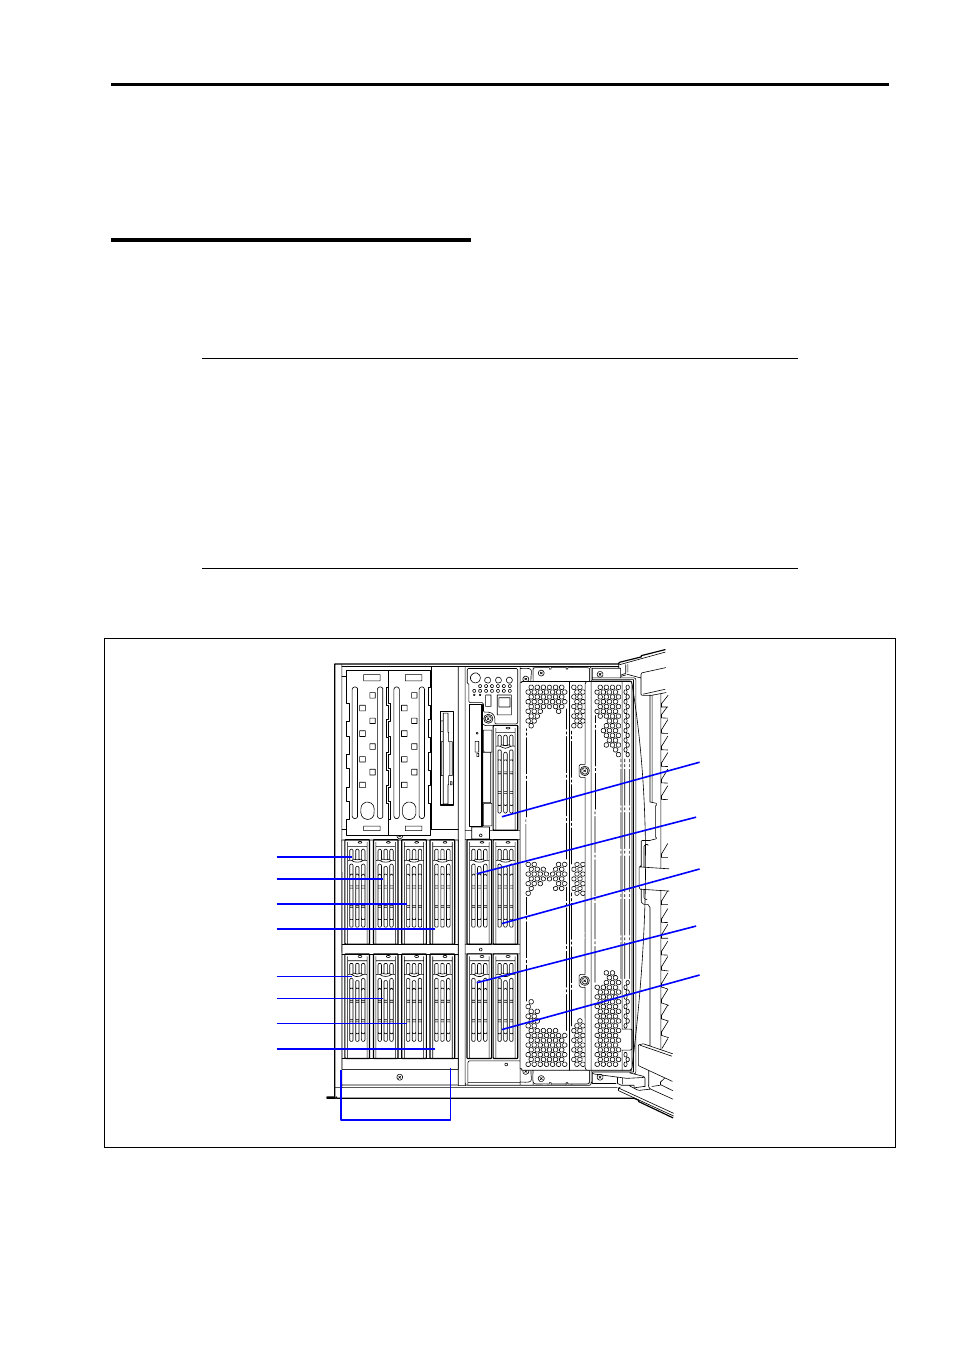
All five slots may contain a hard disk drive approximately 25.4 mm (1 inch) high. The SCSI IDs ID0 through ID4 are
always assigned to hard disk drives as shown below.
ID0
ID2
ID4
ID1
ID3
ID0
ID1
ID2
ID3
ID8
ID9
ID10
ID11
HDD cage (option)
The 3.5-inch disk bay cable is connected between the SCSI (Ch-A) connector and the hard disk drives cage on the I/O
board when the server is shipped.
To use the hard disk drives in a disk array configuration by using the on-board RAID controller, you do not need to