Shooting, Using a fl ash (flash photography) – Olympus OM-D E-M1 Mark III Mirrorless Camera User Manual
Page 84
84
EN
Shooting
2
• The following cannot be used:
interval-timer photography, multiple exposure, keystone compensation, bracketing,
fi
sheye correction, and HDR.
• Pictures taken with [e-Portrait] or an art
fi
lter selected for picture mode will be recorded in
[Natural] mode.
• Image quality may drop under
fl
ickering light sources such as
fl
uorescent or LED lamps.
• If the camera is unable to record a composite image due to blur or other factors, only the
fi
rst shot will be recorded. If [JPEG] is selected for image quality, the shot will be recorded
in JPEG format, while if [RAW+JPEG] is selected, the camera will record two copies, one
in RAW (.ORF) and the other in JPEG format.
Using a
fl
ash
(Flash photography)
When using an optional
fl
ash unit designed for use with the camera, you can choose
the
fl
ash mode using camera controls and take pictures with the
fl
ash. See the
documentation provided with the
fl
ash unit for information on
fl
ash features and their
use.
Attaching Compatible Flash Units
The methods used to attach and operate external
fl
ash units vary with the unit. See
the documentation provided with the unit for details. The instructions here apply to the
FL-LM3.
• Con
fi
rm that both the camera and
fl
ash unit are off. Attaching or removing a
fl
ash unit
while either the camera or
fl
ash unit is on could damage the equipment.
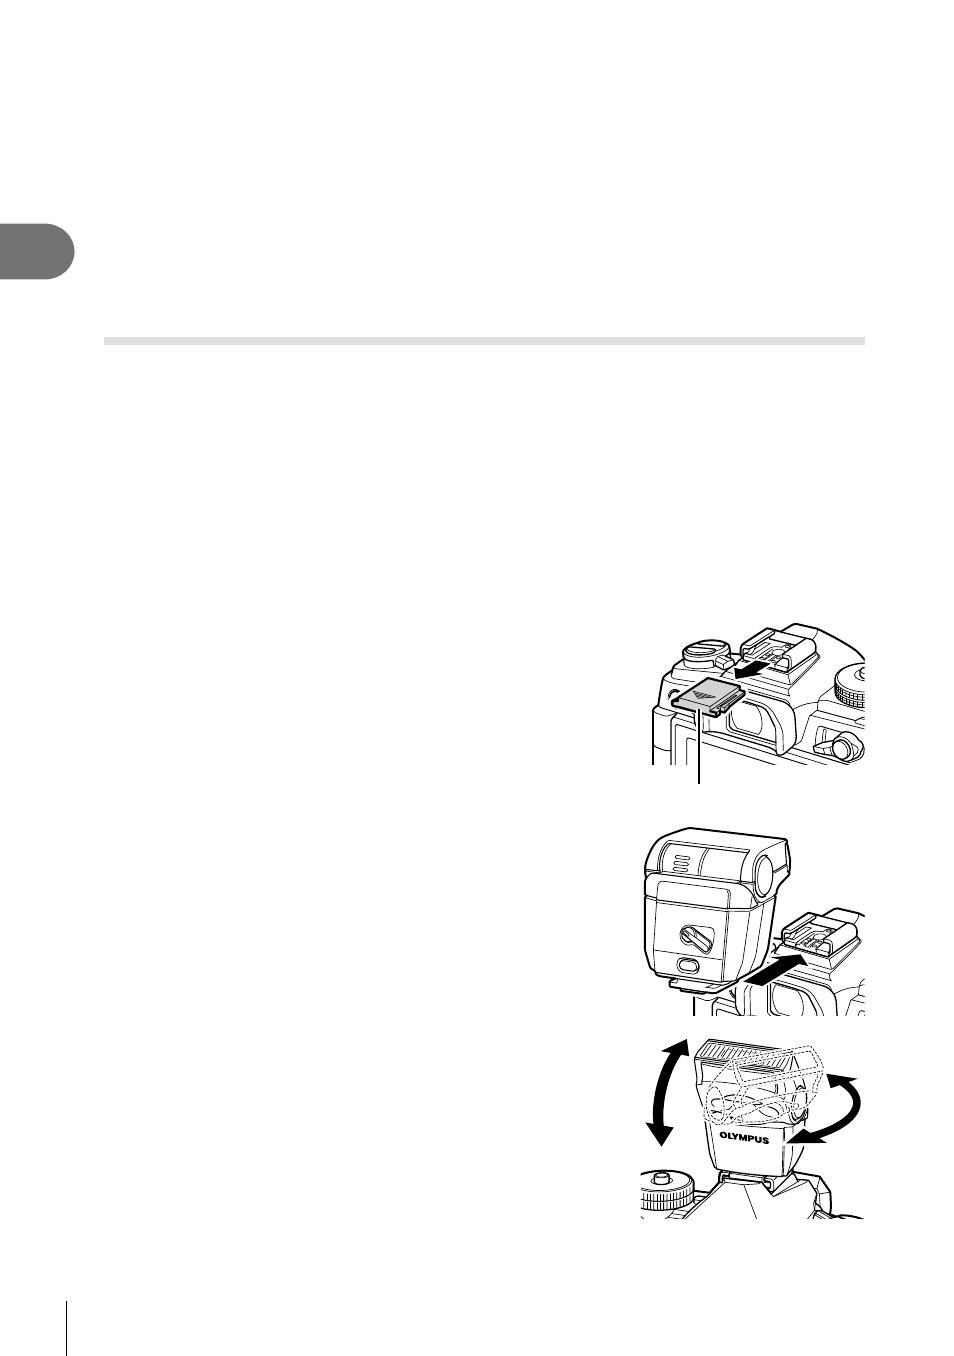
1
Remove the hot shoe cover and attach the
fl
ash.
• Slide the
fl
ash in until the foot clicks into place at the
back of the shoe.
Hot shoe cover
2
Position the
fl
ash head for bounce-
fl
ash
photography or direct lighting.
• The
fl
ash head can be rotated up and left or right.
• Note that
fl
ash output may be insuf
fi
cient for correct
exposure when bounce
fl
ash lighting is used.