Epson PhotoPC 650 User Manual
Page 111
Editing Images
7-11
A
B
You see the Special Effects editing window:
4
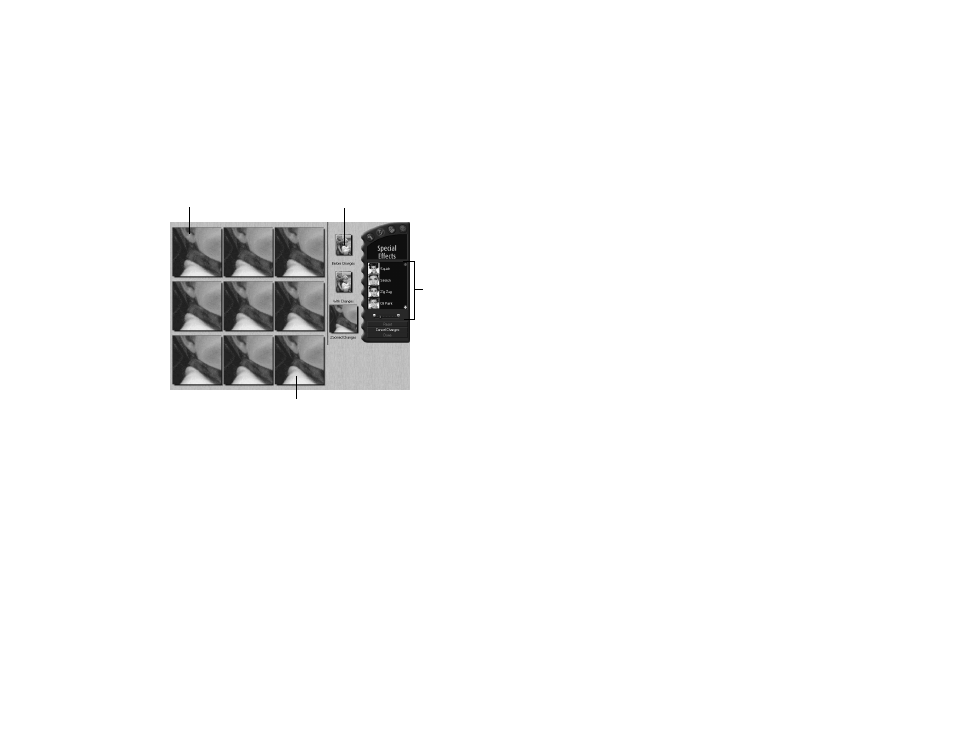
When you first open the Special Effects window, the
Before Changes and Zoomed Changes examples
represent the original image. The examples to the left
indicate varying levels of the Squish effect (the default
effect), with the least squished example in the upper left
and the most squished in the lower right.
If the portion of the picture shown in the example areas
is too small or you want to see a different example area,
click and drag the example area selector to choose a new
area. Drag the edges of the selector to enlarge the area;
drag the middle of the selector to reposition it.
5
To adjust the amount of variation shown in the
examples, slide the variation slider in the remote control
to the right or left (if available). To select a different
effect, click its button; use the arrows to view all the
effect buttons.
6
Click the example that has the type or level of effect you
want; that example is shown as the new With Changes
and Zoomed Changes example. The example images to
the left now display more extreme effects. Click an
example as many times as you wish to get the results you
want.
(To undo the change you made, click
Reset
on the
remote control.)
7
To apply another special effect, click the button for it on
the remote control and follow steps 5 and 6 again to
further correct the image.
example with weakest effect
example area selector
effect
buttons
and
variation
slider
example with strongest