Data destination configuration, Collect data – Measurement Computing Personal Daq rev.6.0 User Manual
Page 18
1-10 Unit Startup
878395
Personal Daq User’s Manual
The Configure Acquisition Window has the following default settings.
Pre-Trigger: No duration set, i.e., a duration of 0 scans
Trigger: Immediate
Post Trigger: Manual stop
Averaging: None
Acquisition Parameters:
Set for Maximum scan rate
Frequency: selected
Period: not-selected
Continuous Calibration: not-selected
Overrange Protection: selected
You can change the acquisition setup as desired. Explanations of setup options are discussed in Chapter 4.
Functions that can be obtained with Main Control Window toolbar buttons can also be obtained through
pull-down menus (discussed subsequently). See Chapter 4 for details.
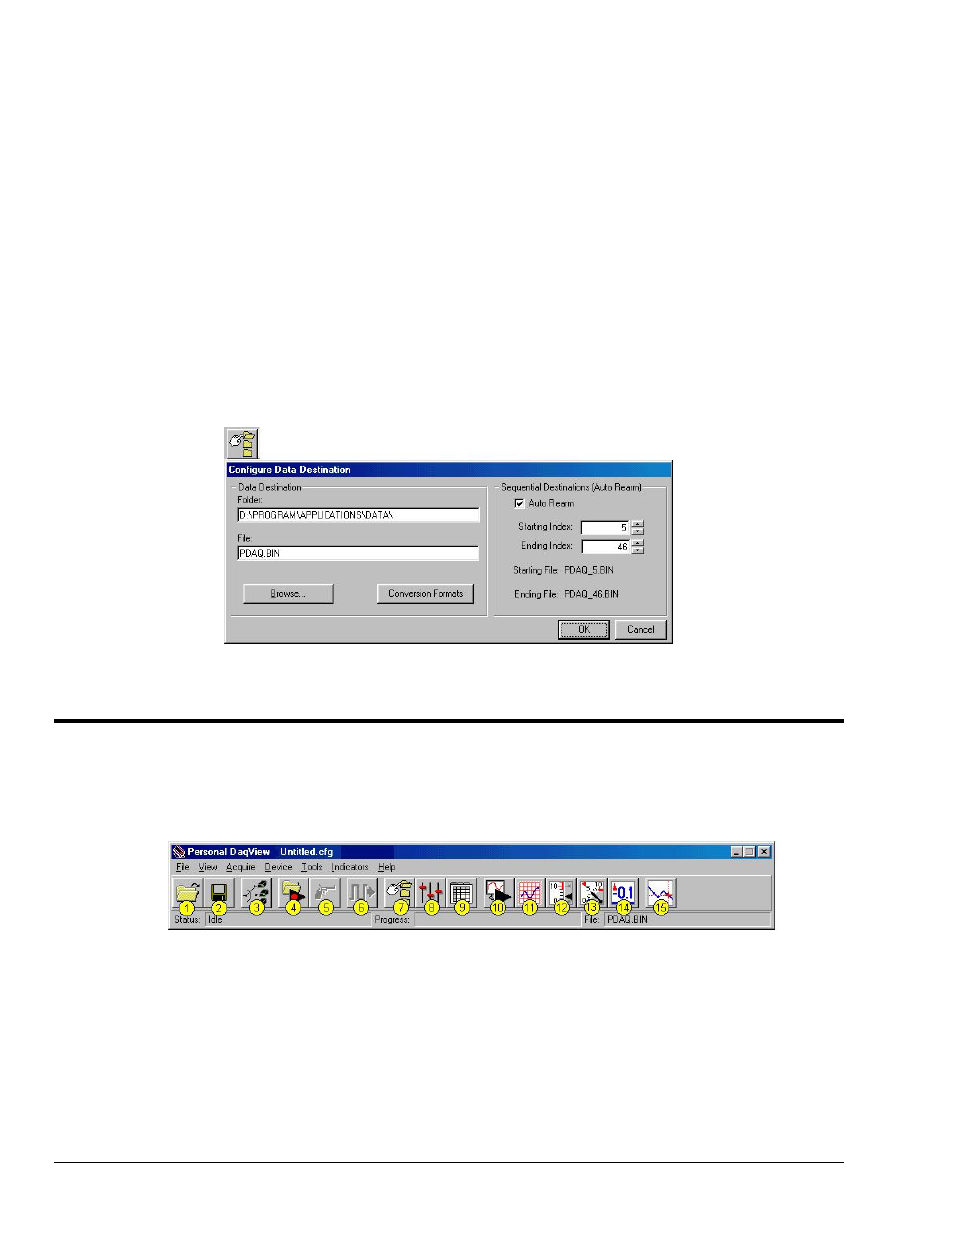
Data Destination Configuration
The Data Destination window can be accessed by using button (7). From the Data Destination window
you can assign a filename and folder location for the acquisition data. More detailed information is
provided in Chapter 4.
Data Destination Window
Collect Data
Click the Enable Readings Column button (16) [see page 1-8], or the Update All Indicators button (10)
[see following figure] to start the acquisition. The data acquisition begins and the readings column
becomes active. However, data is not recorded to disk. Clicking the Arm Trigger for Disk Recording
button (4) will send the data to disk.
Click one of the toolbar’s display icon buttons (11, 12, 13, or 14) to see your data in the form of a chart or
meter. Display options are as follows: (11) is scrolling charts, (12) is bar graph meters, (13) is analog
meters, and (14) is digital meters. Note that you can view all display types, or a combination of them, at
the same time.
Note 1: For scrolling charts, a Chart Setup Wizard is used to set up the desired chart display. Channels
not set up in the display can still be enabled and read on the channel configuration window.
Note 2: Chapter 4 is devoted entirely to the Personal DaqView program and its Chart Setup Wizard
feature.