Mount personal daq modules to din rail (option), 1) mount personal daq module to base (br-24), 2) attach feet (fe-8) to base (br-24) – Measurement Computing Personal Daq rev.6.0 User Manual
Page 11
Personal Daq User’s Manual
878395
Unit Startup 1-3
Mount Personal Daq Modules to DIN Rail (Option)
The optional PDQ10 DIN Rail Mounting Kit contains a base (BR-24), two feet (FE-8), and an installation
guide. The information found in the guide has been repeated here for user convenience.
1) Mount Personal Daq Module to Base (BR-24)
Note: If your Personal Daq system makes use of an expansion module you will
need a second DIN-rail kit for mounting the expansion module.
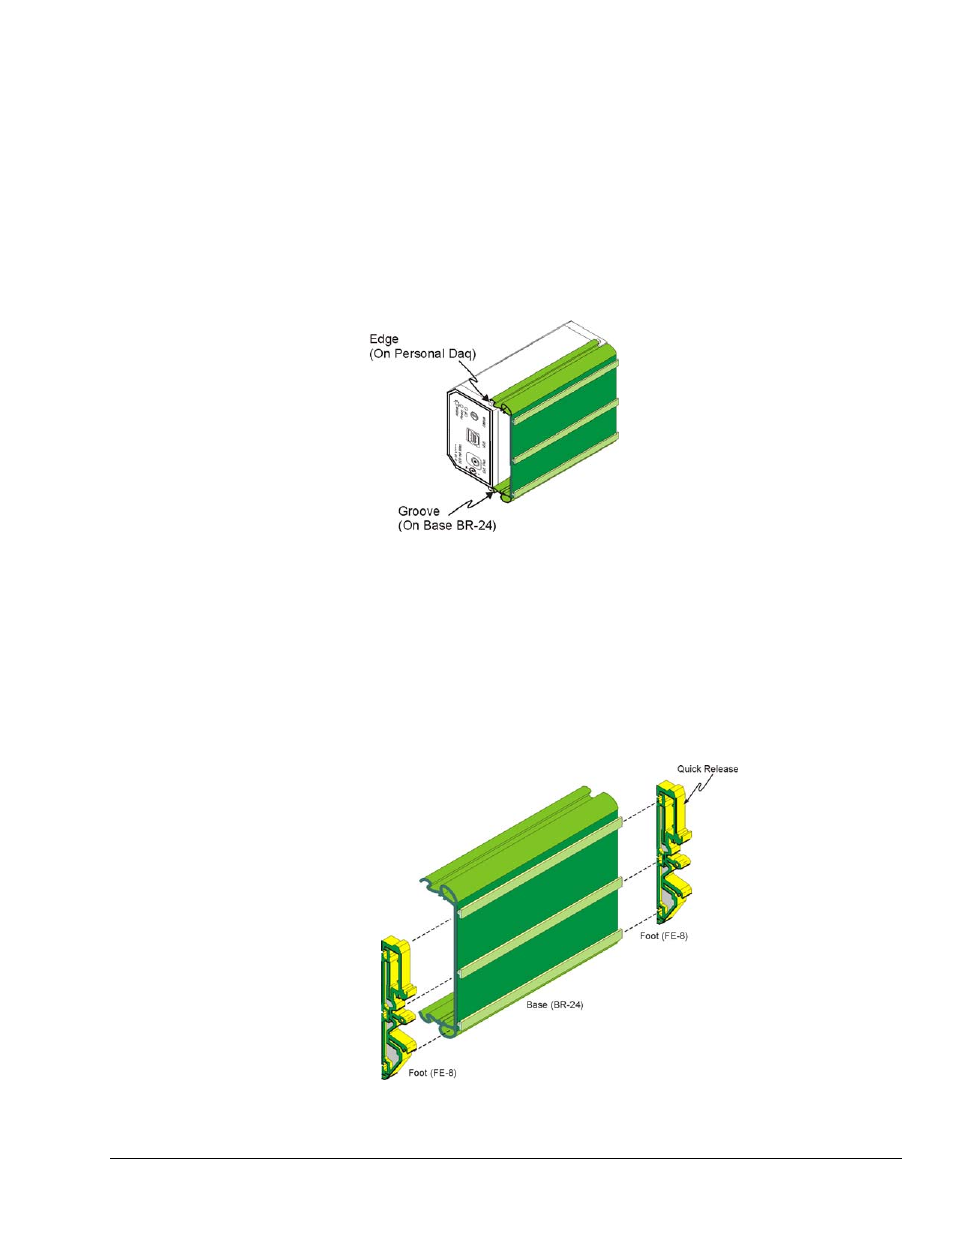
1. Remove terminal blocks from Personal Daq Module.
2. Snap Personal Daq’s mount edges into grooves of base (BR-24).
3. Re-install Personal Daq’s terminal blocks.
Inserting Personal Daq’s Mount Edges into Grooves of Base (BR-24)
2) Attach Feet (FE-8) to Base (BR-24)
1. Slide first foot (FE-8) onto base (BR-24). Note the orientation of the Quick Release (see following
figure).
2. Keeping the same Quick Release orientation, i.e., both “up” or both “down” as per your preference,
slide second foot onto base.
3. Position feet near edge of base. This will provide for best support of unit to DIN rail.
Attaching Feet (FE-8) to Base (BR-24)