Chapter 3 – creating presentations, Creating a full-screen presentation, Full screen – BrightSign BrightAuthor User Guide v.4.1.1 User Manual
Page 39
31
Chapter 3 – Creating Presentations
CHAPTER 3 – CREATING PRESENTATIONS
Creating a Full-Screen Presentation
In a full-screen presentation, your images and/or videos occupy the entire screen.
1. Create a new presentation project by navigating to
File > New Presentation.
Tip
: If you don’t see
New Presentation under File, make sure you have the Edit, Publish, or Manage tab selected in
the upper-left portion of the screen.
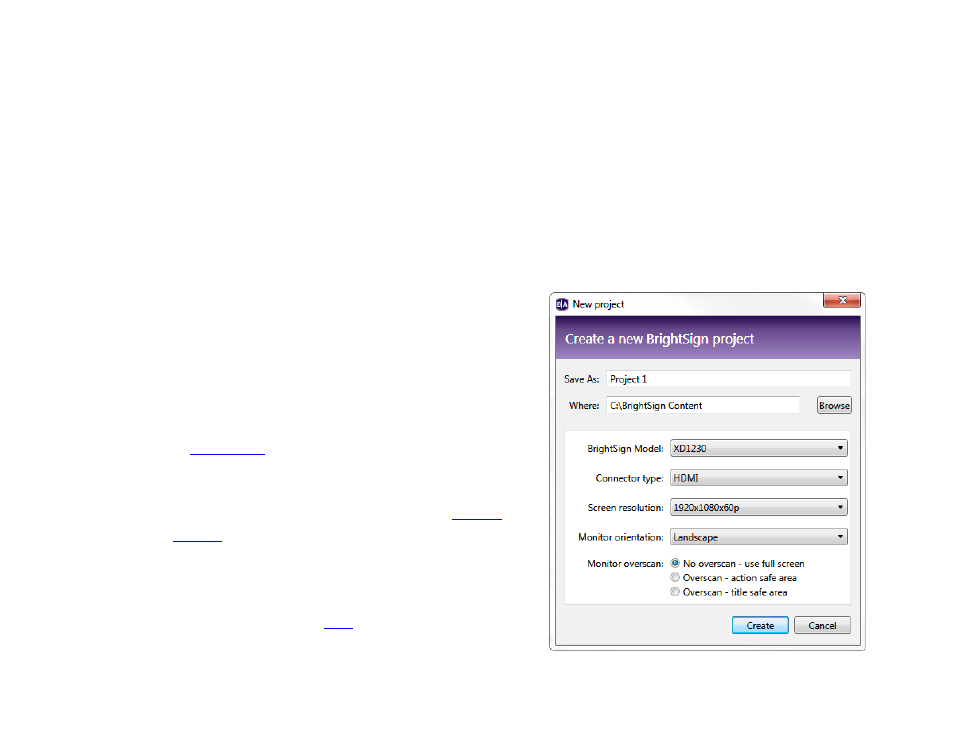
2. Specify the following in the
New Project window.
a.
Save as: Enter a name for the presentation.
b.
Where: Select the folder where you want to store the
presentation. Click
Browse to navigate to the desired
folder.
c.
BrightSign model: Select the model number of the
BrightSign player(s) to which you will publish this
presentation.
d.
Connector type: Select either HDMI, VGA,
or
e.
Screen resolution: Choose the resolution that best
matches the native resolution of your monitor. You can
view all available screen resolutions on t
Note: If you select HDMI or Component in the Screen
resolution menu, you will see several options that are only
compatible with component or composite (rather than VGA
or HDMI) signals. See this
of the BrightSign website.
for more information on
generating component/composite signals.