Home menu – TeeJet Matrix 840G User Manual User Manual
Page 40
www.teejet.com
64
●
98-05141 R2
65
●
No Guidance Mode
No Guidance Mode turns off Straight A-B ,
Curved A-B , Circle Pivot and Last Pass
guidance. Established points and guidelines can be
turned on by selecting the appropriate guidance.
To turn off all guidance:
1. Press the screen to activate the icons and select
the GUIDANCE MODE ICON .
2. Select NO GUIDANCE .
◄Status Bar will have no icon.
Figure 3-28: Guidance Off
Swath
acres
0.0
0
NOTE: No Guidance Mode does not delete
established guide lines or points from the
console.
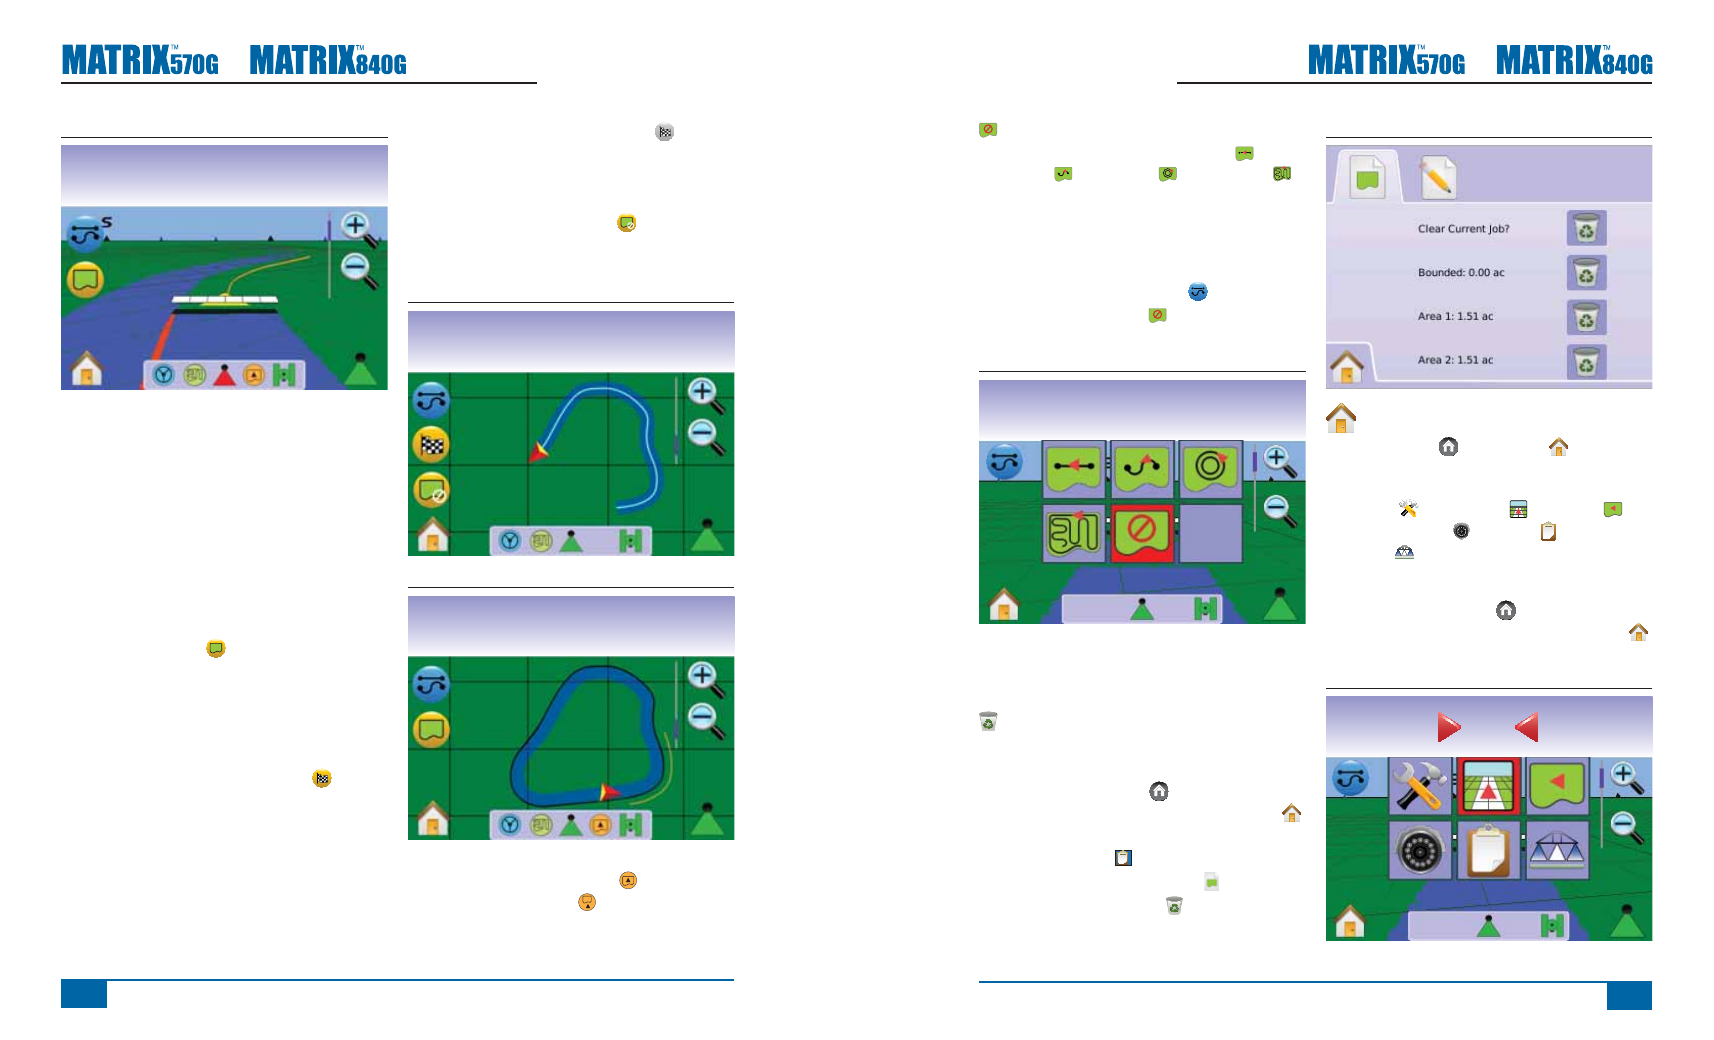
Clear Guidance Modes
To clear all guidance points, lines, boundaries and
totals:
1. Press HOME BUTTON or press the screen
to activate the icons and select HOME ICON
in bottom left corner of screen.
2. Press JOB VIEW .
3. Press JOB INFORMATION TAB .
4. Press TRASH CAN ICON to delete the
associated data.
Figure 3-29: Job Information
Home Menu
The Home Button or Home Icon gives you
access to the unit’s three functions: Setup, Guidance
and Monitoring. The six touch screen Menu Options
(Unit Setup , Vehicle View , Field View ,
RealView Guidance , Job View and Boom
Monitoring ) quickly access all aspects of the unit.
To view the Home Menu options:
1. Press HOME BUTTON or press the screen
to activate the icons and select HOME ICON
in bottom left corner of screen.
Figure 3-30: Home Menu
Swath
acres
0.0
0
0.0
Figure 3-25: Last Pass Guidance
mph
acres
6.2
3
Create Field Boundary
Field boundaries establish application area and
determine the no apply zone.
NOTE: A Field Boundary can be created in either
Last Pass Guidance while in Vehicle View or
during any guidance while in Field View.
To create a fi eld boundary:
1. Drive to a desired location at the perimeter of the
fi eld/area.
2. While the vehicle is in motion, press
BOUNDARY ICON .
3. Travel the perimeter of the fi eld/area.
4. Finish boundary:
►Travel to within a swath width of the starting
point. The boundary will close automatically (the
white guideline will turn black).
►Press BOUNDARY FINISH ICON . A
straight line will complete the boundary between
your current location and the starting point.
NOTE: If a swath was applied while creating a
boundary, the boundary line will be to the
exterior of the applied swath.
NOTE: The BOUNDARY FINISH ICON is not
available for selection (grayed out) until the
minimum distance is traveled (five-times the
swath width).
Use CANCEL BOUNDARY ICON to cancel
the new fi eld boundary process and revert to the
previous boundary (when established).
Figure 3-26: Boundary in Progress
mph
acres
6.2
3
Figure 3-27: Boundary Complete
mph
acres
6.2
3
NOTE: In correspondence to your current location,
the IN BOUNDARY ICON or OUT
BOUNDARY ICON is displayed on the
Status Bar once the boundary is established.