Lightbar, Home menu, System setup – TeeJet Matrix 840G User Manual User Manual
Page 17
www.teejet.com
20
●
98-05141 R2
21
●
Lightbar
Lightbar Setup is used to confi gure LED Spacing,
Display/Swath Mode and LED Brightness.
1. Press SYSTEM SETUP TAB
2. Press LIGHTBAR ICON .
3. Select from:
►LED Spacing – sets the distance
illustrated by the illuminated LEDs
►Display Mode – determine whether the
lightbar represents the swath or vehicle
►LED Brightness – adjust LED brightness
OR
Press PAGE RIGHT ARROW to cycle through
all settings.
NOTE: Options labels are current settings. While in
a setting screen, press icon to view available
factory settings and setting ranges.
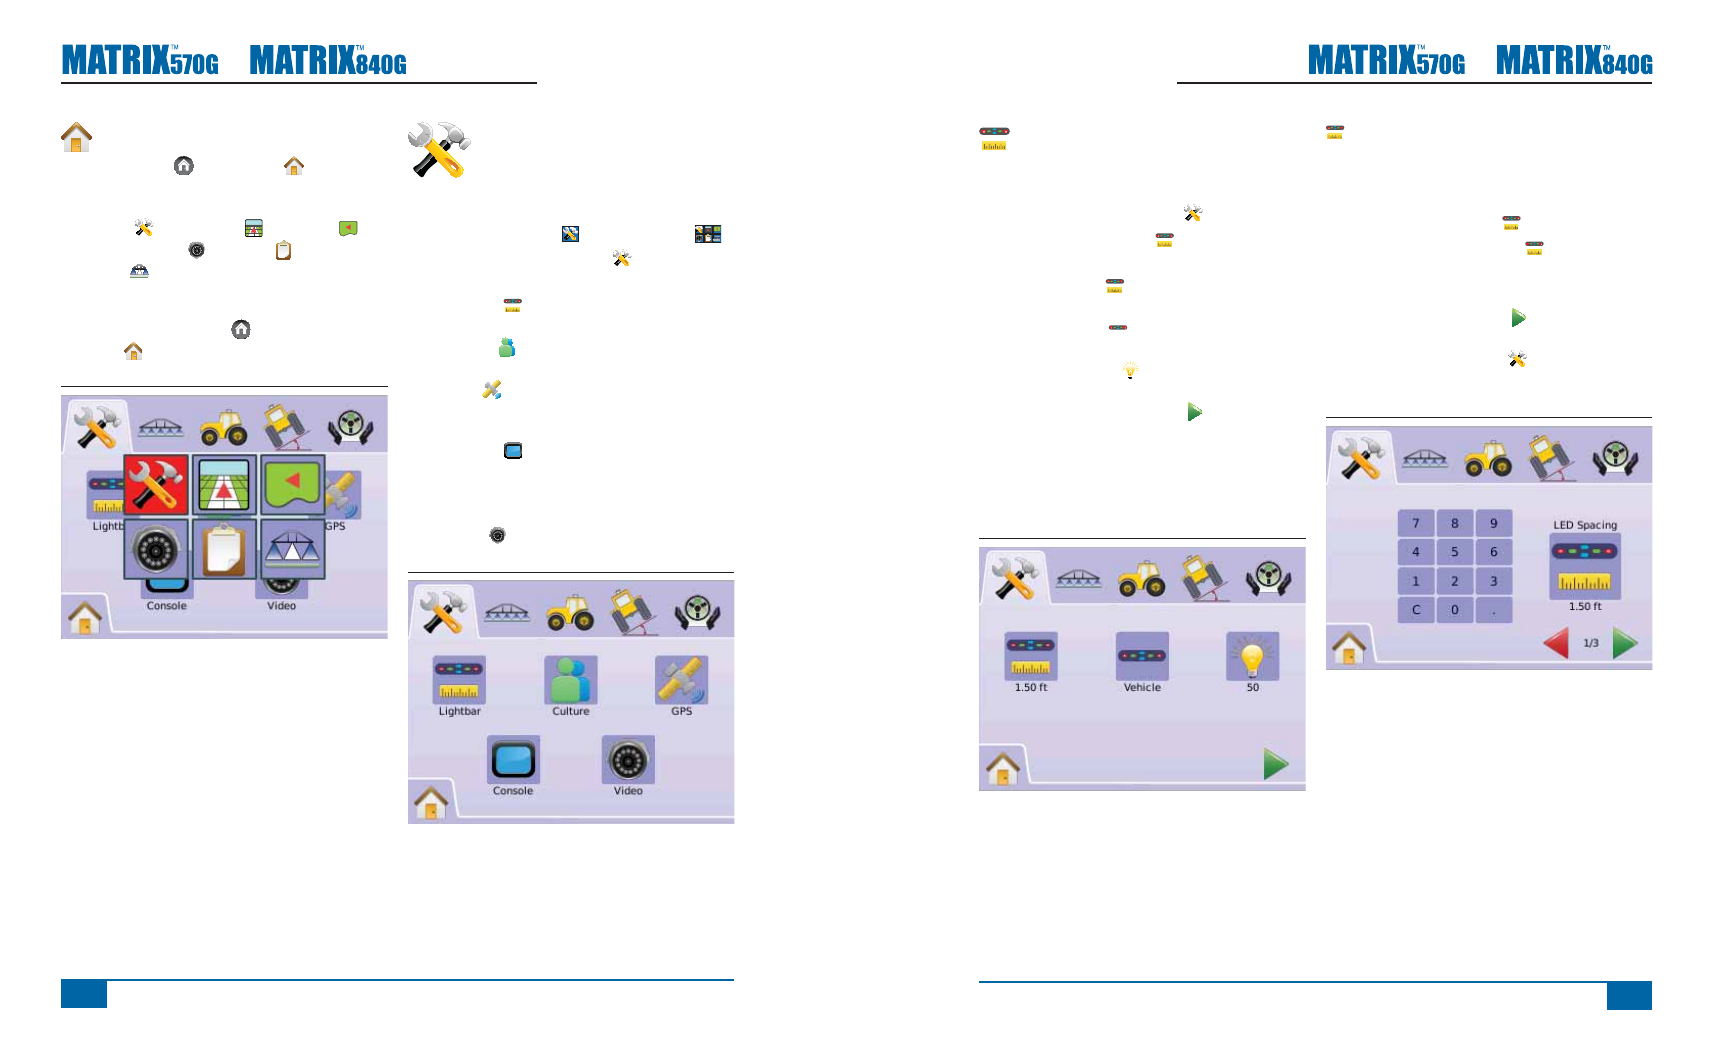
Figure 2-4: Lightbar Options
LED Spacing
LED Spacing sets the distance illustrated by the
illuminated LEDs. Range is 0.04 - 9.8 feet / 0.01 -
3.0 meters.
1. Press LIGHTBAR ICON .
2. Press LED SPACING ICON .
3. Use the entry screen to establish LED Spacing.
4. Press
►PAGE RIGHT ARROW to proceed to
Display Mode.
►SYSTEM SETUP TAB to return to main
System Setup screen.
Figure 2-5: LED Spacing
Home Menu
The Home Button or Home Icon gives you
access to the unit’s three functions: Setup, Guidance
and Monitoring. The six touch screen Menu Options
(Unit Setup , Vehicle View , Field View ,
RealView Guidance , Job View and Boom
Monitoring ) quickly access all aspects of the unit.
To view the Home Menu options:
1. Press HOME BUTTON or select HOME
ICON in bottom left corner of screen.
Figure 2-2: Home Menu - Unit Setup
SYSTEM SETUP
System Setup is used to confi gure
Lightbar, Culture, GPS, Console and
Video settings.
1. Select UNIT SETUP from Home Menu
.
2. Press SYSTEM SETUP TAB .
3. Select from:
►Lightbar – used to confi gure LED Spacing,
Display Mode and LED Brightness
►Culture – used to confi gure Units,
Language and Time Zone
►GPS – used to confi gure GPS Type and
the GPS Port, as well as view GPS Status
information
►Console – used to confi gure Volume, LCD
Brightness, Screen Calibrate and Screenshot
settings, as well as view About information and
Save system software information
►Video – used to set up individual cameras
Figure 2-3: System Setup