TeeJet Matrix 840G User Manual User Manual
Page 26
www.teejet.com
38
●
98-05141 R2
39
●
#
Number of Boom Sections
Number of Boom Sections establishes the number
of available boom sections, 1 to 15 depending upon
which SmartCable or Section Driver Module (SDM)
is detected.
1. Press NUMBER OF BOOMS ICON
#
.
2. Press UP/DOWN ARROW ICONS to
establish appropriate number of boom sections.
3. Press
►PAGE RIGHT ARROW to proceed to Boom
Section Width.
►BOOMPILOT/SINGLE BOOM SETUP TAB
to return to main Boom Section Setup screen.
NOTE: Press & hold UP/DOWN ARROW
ICONS to quickly adjust settings.
NOTE: A section of more than one boom will change
the total steps to complete the BoomPilot
setup respectively.
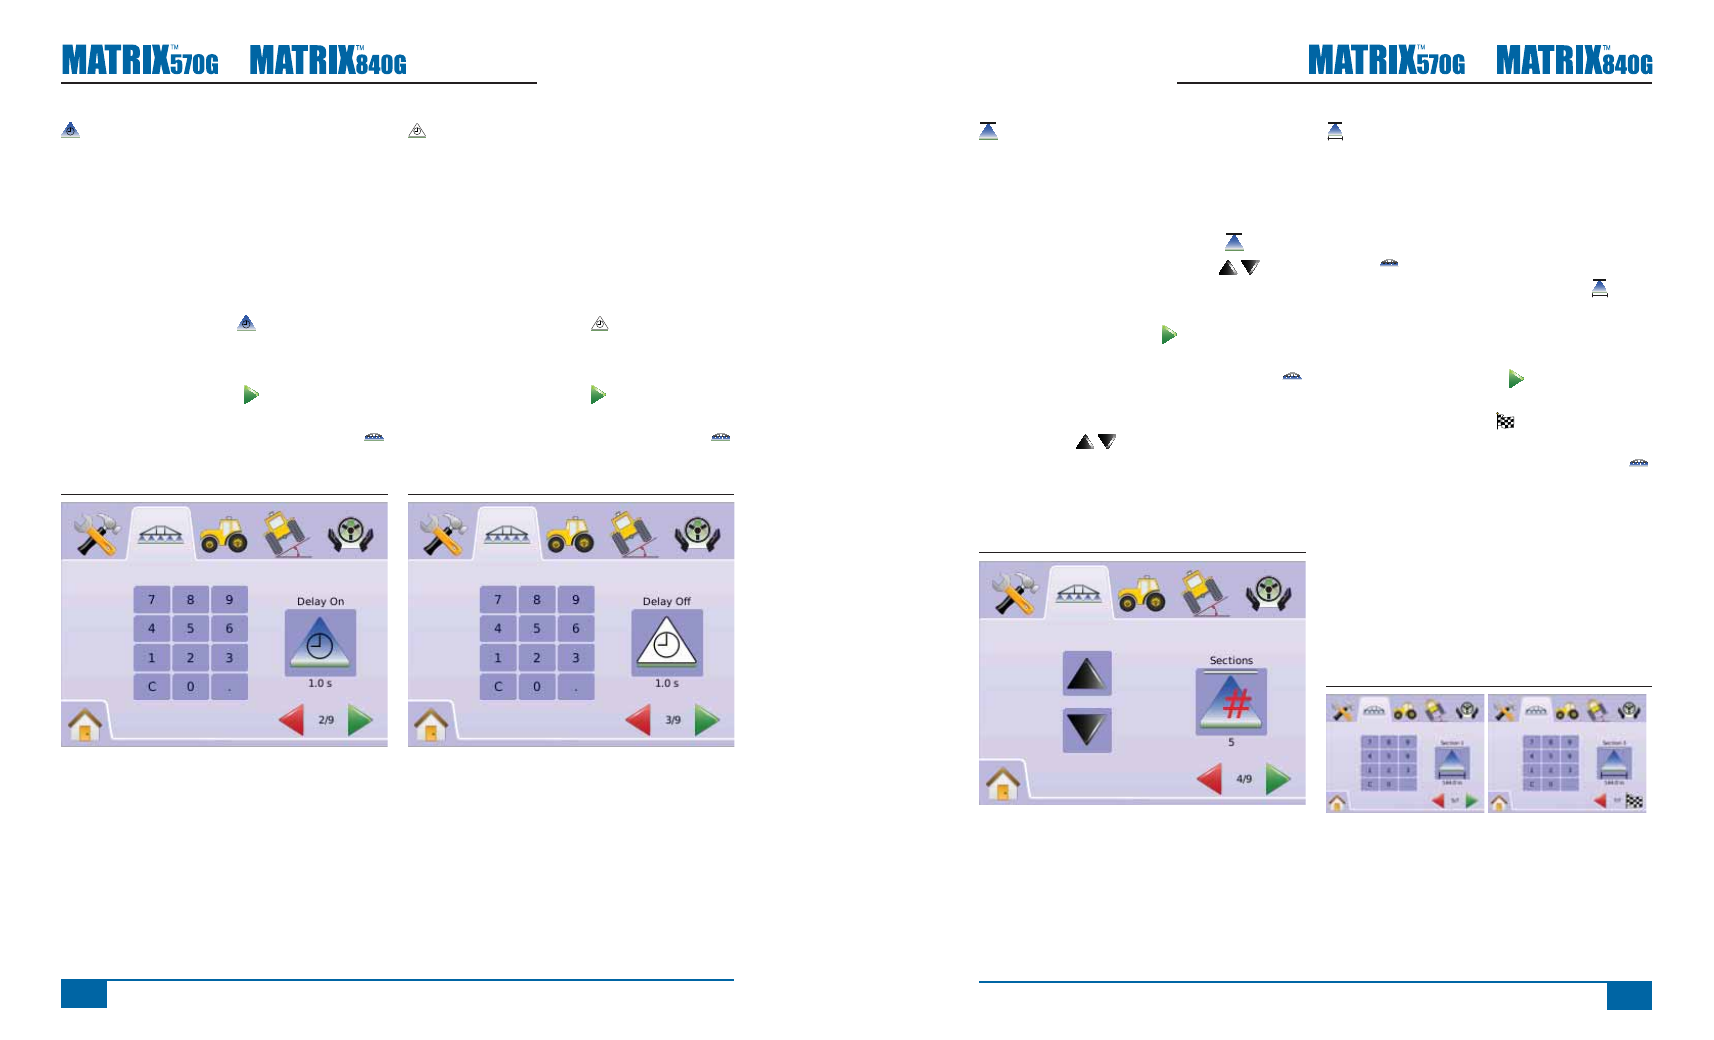
Figure 2-43: Number of Boom Sections
Boom Section Width
Boom Section Width establishes the width of each
boom section. Range is 0.0 - 1968.5 inches / 0.0 -
50.0 meters. When facing forward, boom sections
are ordered from left to right along the boom.
1. Press BOOMPILOT/SINGLE BOOM SETUP
TAB .
2. Press BOOM SECTION WIDTH ICON .
3. Use the entry screen to establish boom section
width.
4. Press
►PAGE RIGHT ARROW to proceed to the
remaining individual boom section widths.
►CHECKERED FLAG to complete Boom
Section Setup.
►BOOMPILOT/SINGLE BOOM SETUP TAB
to return to main Boom Section Setup screen.
NOTE: When entering Boom Section Width, the
total of all sections must be greater than 34
inches / 0.9 meters.
NOTE Individual boom sections can be set to
different widths.
NOTE: This setting is required for FieldPilot
Operation.
Figure 2-44: Boom Section Width
Delay On
Delay On functions as a “look ahead” for establishing
the timing for the boom section valves to switch on
exactly when entering an area that has not been
applied. If the boom turns on too soon when entering
a non-applied area, decrease the Delay On setting.
If the boom turns on too late when entering a non-
applied area, increase the Delay On setting. Range
is 0.0 - 10.0 seconds.
1. Press DELAY ON ICON .
2. Use the entry screen to establish delay time.
3. Press
►PAGE RIGHT ARROW to proceed to Delay
Off.
►BOOMPILOT/SINGLE BOOM SETUP TAB
to return to main Boom Section Setup screen.
Figure 2-41: Delay On
Delay Off
Delay Off functions as a “look ahead” for establishing
the timing for the boom section valves to switch
off exactly when entering an area that has been
applied. If the boom turns off too soon when entering
an applied area, decrease the Delay Off setting. If
the boom turns off too late when entering an applied
area, increase the Delay Off setting. Range is 0.0 -
10.0 seconds
1. Press DELAY OFF ICON .
2. Use the entry screen to establish delay time.
3. Press
►PAGE RIGHT ARROW to proceed to
Number of Boom Sections.
►BOOMPILOT/SINGLE BOOM SETUP TAB
to return to main Boom Section Setup screen.
Figure 2-42: Delay Off