Act setting, Act setting -4 – KEYENCE AutoID User Manual
Page 100
5-4
OT
HER SETT
5
5-2
Setting Macro Operations
Act Setting
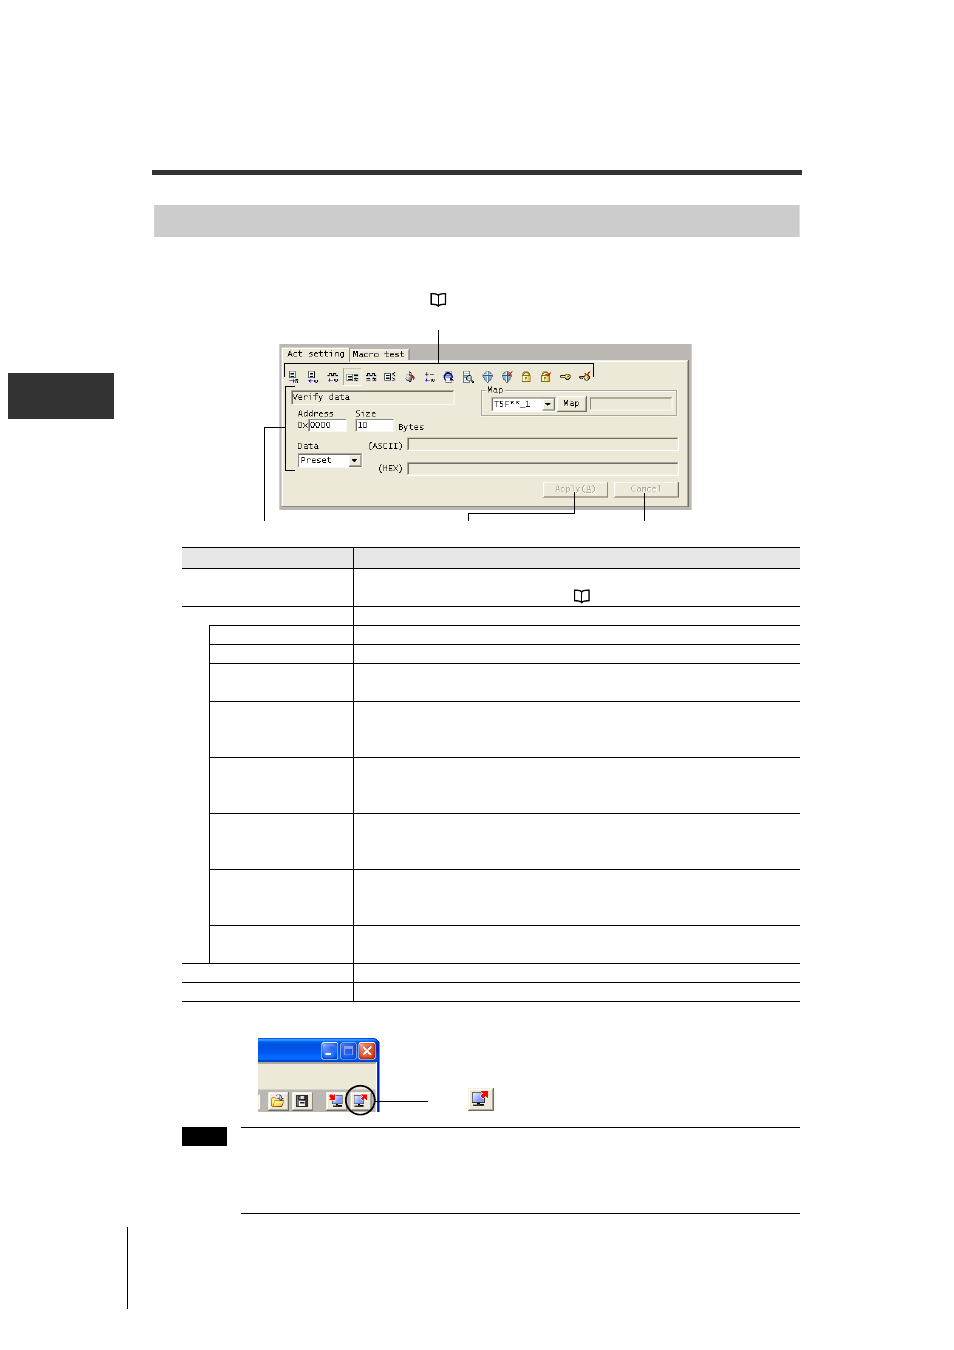
The following describes the [Act setting] tab for the macro registered to the head.
In this operation, set the commands to be used in the macro and their parameters.
For details on parameters, refer to the
"Operation Manual."
Register the macro you have set to the head.
• The macro currently registered to the head is overwritten.
• The macro settings file and the parameter settings file are created as separate
files. The parameter settings and the macro settings need to be sent separately.
Item
Description
(1) Command selection
Select from 16 operation commands.
For details on commands, refer to the
"RF-500 Series Operation Manual"
(2) Macro editing
Edit the content of a selected command.
Address
Set the head address of the data to be set as the command parameter.
Size
Set the size of the data to be set as the command parameter.
Data
Select the type of input data from the pulldown menu. Enter ASCII/HEX
(hexadecimal)/BIT (binary)/BLOCK as the data according to the type of operation.
Operator
Select the operator.
* This is displayed when setting the "Compare data" or "Write after operation"
command.
Process
Set the operation when there is a write-protected or write-locked area in the
specified range.
* This is displayed when setting the "Fill data" command.
Place
Set the place to write the checksum.
* This is displayed when setting the "Write checksum" or "Confirm checksum"
commands.
Tag type
Select the type of IC tag from the pulldown menu.
* This is displayed when setting the "Set write-protect", "Confirm write-
protect", "Set write-lock" or "Confirm write-lock" commands.
Map
The tag map is displayed in a separate window. You can select from tag maps
whose [Address] and [Size] specifications above are displayed.
(3) "Apply" button
Reflects the operation settings in the selected operation pattern.
(4) "Cancel" button
Discards the settings.
(1) Command selection
(2) Macro editing
(3) "Apply" button
(4) "Cancel" button
Click
(write setting).
Note