Cub cadet commercial z-wing – Cub Cadet Z-Wing User Manual
Page 69
Cub Cadet Commercial Z-Wing
65
27.36.Lift the axle and spacer tube out of the frame.
27.37.Behind the axle and tube is a second belleville
washer and flat washer, positioned in mirror
image to the ones in front of the axle. Behind
them is a self-locking retainer.
27.38.Hardware orientation: See Figure 27.38.
Figure 27.36
Flat washer
Belleville
washer
Spacer tube
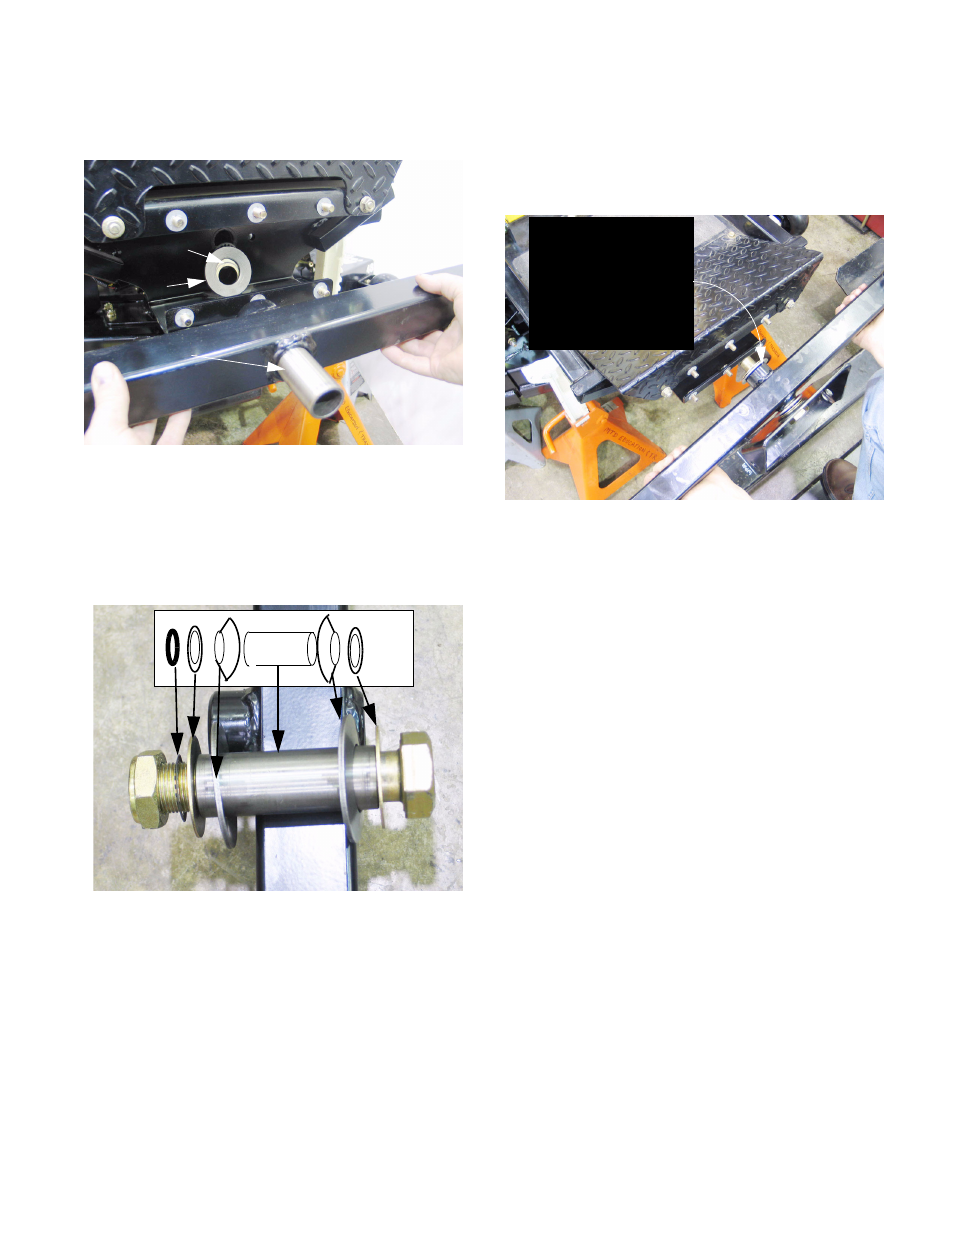
Figure 27.38
Rear
Front
27.39.For easiest installation, the axle bracket, axle,
pivot bolt, spacer tube, and washers can be
lubed and pre-assembled, with the self-locking
retainer holding all the parts in place.
See Figure 27.39.
27.40.Correct axle orientation:
•
The grease zerk on the pivot point faces down,
and the longer boss on the axle tube goes to the
rear.
•
The grease zerks for the caster yoke bearings
face rearward, and the tubes that the caster
yoke bearings fit in are of-set upwards from the
axle.
27.41.Install the nuts that secure the axle support
bracket. If the locking feature of the nuts has
worn, replace the nut or apply a small amount of
thread locking compound such as Loctite 242
(blue) to the threads and tighten them to a
torque of 35 ft-lbs (48 Nm).
27.42.Install the large locking nut that secures the pivot
bolt, and tighten it using a pair of 1 1/2”
wrenches. If the locking feature of the nut has
worn, replace the nut or apply a small amount of
thread locking compound such as Loctite 242
(blue) to the threads. Tighten the nut until all the
fore-aft play in the axle is taken-up, but not so
tight that friction inhibits the pivot action.
27.43.The remainder of the assembly process is to
reverse the steps of disassembly.
Figure 27.39
Washers
Pivot bolt
Axle bracket assembly
Axle
Pre-assembled,
ready for installation