Cub cadet commercial z-wing – Cub Cadet Z-Wing User Manual
Page 25
Cub Cadet Commercial Z-Wing
21
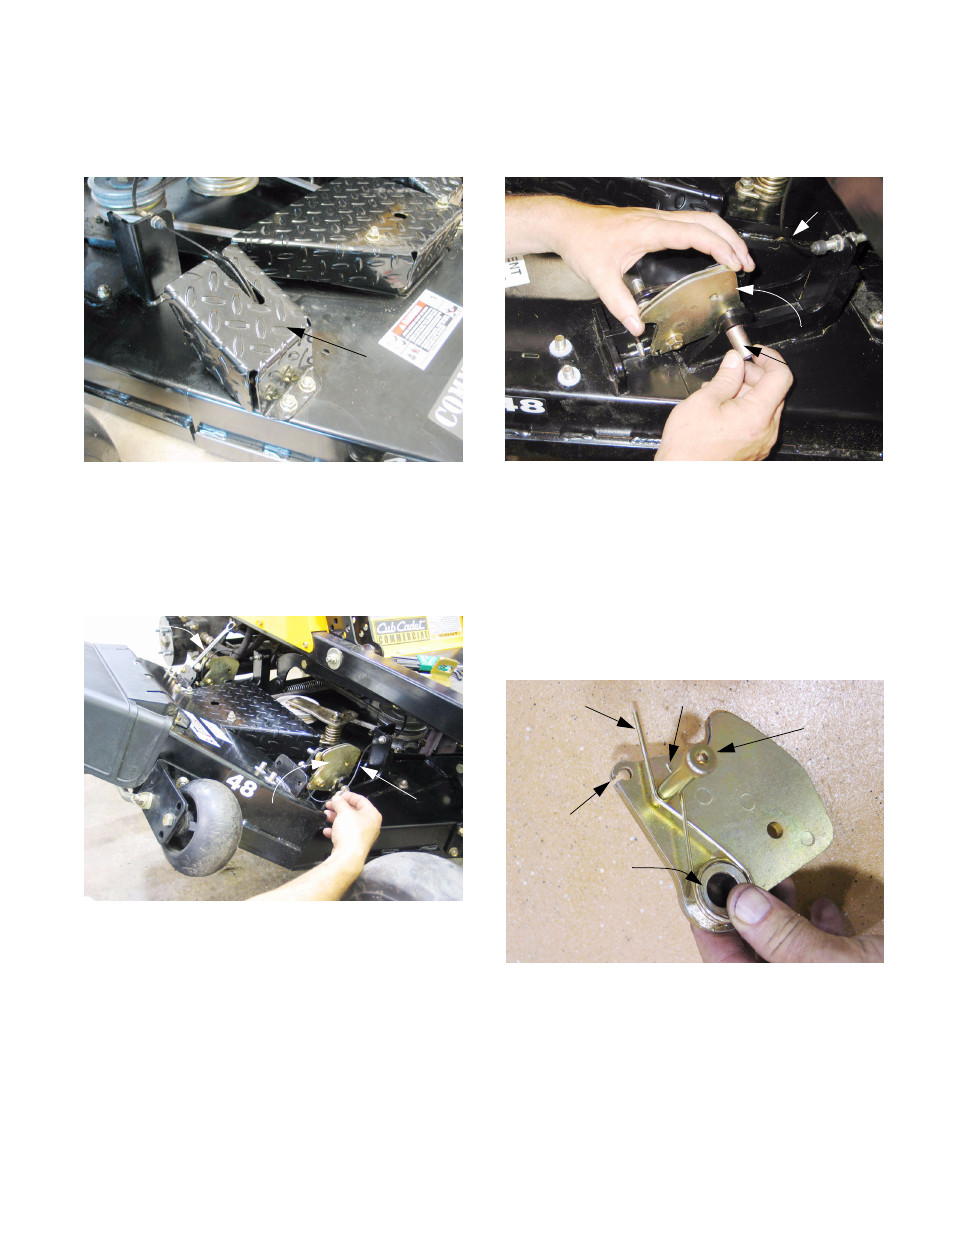
11.4. The lift mechanism can be reached by removing
the lift wing shield using a 9/16” wrench.
See Figure 11.4.
11.5. While the earlier cable brackets can simply be
unbolted with the cable attached, the torsion
spring on the revised cable brackets makes
them easier to remove if the cable is first discon-
nected. See Figure 11.5.
•
One hinge lock on the wing to be serviced can
be blocked open using an open-end wrench.
•
The hinge lock nearest the cable bracket to be
removed can be manually unlatched.
•
With both hinge locks released, the deck wing
can be lifted manually to slacken the cable.
•
Slack in the cable allows the cable-end barrel to
be slipped out of the key-hole opening in the
cable bracket.
Figure 11.4
Lift wing shield
Figure 11.5
Wrench
Cable
bracket
Cable
11.6. The cable bracket can then be removed using
two 9/16” wrenches. Unbolt it and remove the
bushing. See Figure 11.6.
11.7. The bolt and bushing that hold the bracket are
also the pivot point for the deck wing: If the deck
wing is to be completely removed, taking-off
both cable brackets will separate the deck wing
from the rest of the deck.
11.8. Orientation: on all four cable brackets, one side
of the bushing shoulder is thicker than the other.
See Figure 11.8.
•
The socket head cap screw always goes on the
side with the thicker shoulder.
•
The long arm of the torsion spring should be
nearer the cable bracket than the short arm.
•
The long arm of the torsion spring fits under the
socket head cap screw.
Figure 11.6
Cable
Cable bracket
Bushing
Figure 11.8
Long arm Short arm
Key hole
opening
Socket head
cap screw
Shoulder that
surrounds the
bushing